THE NORTH AMERICAN
BANDERS' STUDY GUIDE
A product of the
NORTH AMERICAN BANDING COUNCIL
PUBLICATIONS COMMITTEE
APRIL 2001
THE NORTH AMERICAN BANDERS' STUDY GUIDE
Copyright
©
2001 by
The North American Banding Council
P.O. Box 1346
Point Reyes Station, California 94956-1346 U.S.A.
http://nabanding.net/nabanding/
All rights reserved.
Reproduction for educational purposes permitted.
North American Banding Council Banders' Study Guide i
TABLE OF CONTENTS
Preface ........................................1
Acknowledgments ................................1
1. Introduction ..................................2
2. The Bander's Code of Ethics ......................2
3. A Brief History of Banding .......................3
4. Purposes and Justification for Banding Birds .........4
4.1. The Banding Offices ......................4
4.2. Purposes and Justification for Banding Birds ....4
4.3. Designing a Research Project ................5
4.4. Cooperative Programs .....................5
5. Permit Issuance ...............................5
5.1. Types of Banding Permits ..................6
5.2. Special Authorizations .....................6
5.3. How to Apply for a Permit ..................6
5.4. Permit Expiration and Renewal ..............6
5.5. Responsibilities of Permit Holders ............6
5.6. Permit Suspensions and Revocations ..........7
6. North American Banding and Recovery Data Base .....7
7. The North American Banding Council ..............7
7.1. What Is NABC Doing? ....................8
7.2. How Will Bander Certification Work? .........8
7.3. NABC Certification .......................8
8. Handling Birds ................................9
8.1. The Bander's Grip ........................9
8.2. The Reverse Grip ........................10
8.3. The Photographer's Grip ..................10
8.4. Free Holds .............................11
8.5. Opening a Bird's Bill .....................11
8.6. Carrying Devices ........................12
8.6.1. Bird bags .........................12
8.6.2. Carrying boxes .....................13
9. Capture Techniques and Extraction Methods ........13
9.1. Setting Up and Operating Mist Nets ..........14
9.1.1. Problems unique to the mist net ........15
9.1.2. Setting up and taking down mist nets ....15
9.1.3. Frequency of net checking .............17
9.2. Extracting Birds from Mist Nets ............18
9.2.1. Feet-first method ....................19
9.2.2. Body-grasp method ..................19
9.2.3. Tricky extraction situations ............20
10. Banding Birds ..............................21
10.1. The Essential Basics .....................21
10.2. Band Fit and Size .......................21
10.3. Types of Bands .........................23
10.4. The Band Numbering System ..............23
10.5. How to Order Bands .....................24
10.6. Banding Pliers and Other Equipment ........24
10.7. Banding a Bird .........................25
10.8. Releasing Birds ........................26
10.9. When and How to Remove a Band ..........26
10.10. Banding Nestlings .....................28
11. Processing Birds .............................28
11.1. Ageing and Sexing ......................28
11.2. Useful Measurements ....................30
11.2.1. Wing length .......................30
11.2.2. Wing formula ......................30
11.2.3. Tail length ........................31
11.2.4. Body weight .......................31
11.2.5. Fat and crop content .................31
11.2.6. Bill length, width, and depth ..........32
11.2.7. Tarsus and foot length ...............32
11.2.8. Crown patch .......................32
11.2.9. Rare birds ........................33
11.3. Parasites ..............................34
11.4. Deformities ...........................34
12. Record Keeping .............................34
12.1. Standard Codes ........................36
12.2. Banding Sheets ........................36
12.3. Recapture Data .........................37
12.4. Banding Schedules ......................37
12.5. Computer verification and edit programs
(MAPSPROG) ...........................39
12.6. Note For File (Canadian) .................39
12.7. Recovery Information ....................39
13. Preventing Bird Injuries and Fatalities ............39
13.1. Safety Considerations for the Use of Mist Nets . 40
13.1.1. Mist net selection and use ............40
13.1.2. Setting up a net array ...............41
13.1.3. Net maintenance and disposal .........41
13.2. Trap and Catching-box Design .............42
13.3. Bird Numbers and People on Hand ..........42
13.4. Injuries and Their Causes .................43
13.5. Causes of Death ........................44
13.6. Treatment of Injured Birds ................45
13.7. Disposition of Dead Birds, Record Keeping,
and Reporting ...........................62
14. Preventing Bander Injuries and Diseases ..........46
14.1. Physical Risks .........................46
14.2. Diseases and Disorders ...................47
15. Visitors and Public Relations ...................48
15.1. Problems .............................48
15.2. Some Solutions ........................48
15.3. Banding Demonstrations for the General Public 48
15.4. Group Visits ...........................49
Selected Bibliography ............................50
Appendix A. Associations and Bird Observatories ......56
Appendix B. Sources of Banding Equipment ..........57
Appendix C. A Well-designed Research Project ........58
Appendix D. Molt Cards .........................60
Appendix E. The Bander's Report Card ..............62
Appendix F. Some Examples of Cooperative Banding
Projects ...................................63
Appendix G. Banding Offices Information ............62
Appendix H. Policy for Release and Use of Banding and
Encounter Data .............................65
North American Banding Council Banders' Study Guide 1
PREFACE
The purpose of this Banders' Study Guide is to provide for
all banders in North America the basic information to safely and
productively conduct bird banding.
This publication is an integral part of several other publica-
tions, including a Trainer's Guide, and taxon-specific manuals
for landbirds, hummingbirds, shorebirds, raptors, waterfowl,
seabirds, and perhaps other groups. While some of the material
in this Study Guide may apply more to certain taxa, the material
was included if it applied to two or more of the taxa mentioned
above. For instance, mist netting is used to capture most taxa
(and thus is discussed in this study guide), but skull pneumatiza-
tion is used primarily for landbirds (and therefore is discussed
only in the landbird manual). Some judgments have been made;
for instance, traps for catching landbirds are mentioned in that
manual, although similar traps are certainly used for shorebirds
and waterfowl. The Committee felt, however, that the special
adaptations required for capture of these quite different taxa
merited separate treatment in the taxon-specific manuals.
We trust that this Guide will be read by all banders and
trainers. While guidelines used by various individual trainers and
stations may differ slightly from the general guidelines set down
in the manuals and guides, we and the North American Banding
Council urge, at the least, that full consideration be given to the
guidelines presented here, and that trainees be fully exposed to
the full variety of opinions that are captured in these publications.
This is a truly cooperative venture, representing many hours
of work of many individuals and their institutions. As such, it
was necessarily an inclusive document covering, as much as
possible, all responsible views of banding in North America. As
can be imagined, this was at times an interesting effort. We trust
that the final product is worthy of the effort that all have put into
it, and of the birds that we study and cherish.
—The Publications Committee of the
North American Banding Council
C. John Ralph, Chair
ACKNOWLEDGMENTS
We thank everyone who provided suggestions for the
approach, organization, and content of this guide, in both the
initial Canadian version and in the North American Banding
Council revision.
Greatly involved in the initial version were Ellen Hayakawa,
Peter Blancher, David Hussell, and Lucie Métras of the Canadian
Wildlife Service. Ian Spence kindly allowed the use of training
materials that he has been developing in Britain. Thanks also
to Michael Bradstreet, David Brewer, Douglas Collister, Brenda
Dale, Mark Dugdale, John Pollock, Paul Prior, Rinchen Board-
man, and George Wallace for their helpful insights and com-
ments. Hilary Pittel, a professional bird rehabilitator, shared
many of her insights.
The original guide was prepared under contract from the
Canadian Wildlife Service to Long Point Bird Observatory and
was funded through the Environmental Citizenship Program of
the Department of the Environment.
This North American Banders' Study Guide has been created,
adapted, and considerably augmented for use throughout North
America by the North American Banding Council's Publications
Committee. This guide is very much the product of many years
of collective experience on the part of all the banders and students
at Long Point Bird Observatory, Point Reyes Bird Observatory,
The Institute for Bird Populations, and many other stations and
individuals. It is largely a compendium of material taken from
other sources. Some parts summarize important details presented
in North American Bird Banding: Volume I (Canadian Wildlife
Service and U.S. Fish and Wildlife Service 1991) and North
American Bird Banding Techniques: Volume II (Canadian
Wildlife Service and U.S. Fish and Wildlife Service 1977) (see
also http://www.pwrc.usgs.gov/bbl/manual/manual.htm). These
manuals, collectively, hereafter will be referred to simply as the
"Bird Banding Manual." This guide is not intended to supplant
the Bird Banding Manual; they still are required reading.
Technical sections of this guide profited enormously from
The Ringer's Manual (Spencer 1992), The Australian Bird
Bander's Manual (Lowe 1989), A Manual for Monitoring Bird
Migration (McCracken et al. 1993), Handbook of Field Methods
for Monitoring Landbirds (Ralph et al. 1993a), A Syllabus of
Training Methods and Resources for Monitoring Landbirds
(Ralph et al. 1993b), Identification Guide to North American
Passerines (Pyle et al. 1987), Identification Guide to North
American Birds (Part 1) (Pyle 1997a), the MAPS Manual
(Burton and DeSante 1998), the MAPS Intern Manual (Burton
et al. 1999), and the Mist Netter's Bird Safety Handbook (Smith
et al. 1999). These references (and others listed in the Bibliog-
raphy) should be read to gain further insight.
Kenneth M. Burton, Julie Cappleman, Brenda Dale, David
F. DeSante, Erica H. Dunn, Lisa Enright, June Ficker, Dan
Froehlich, Geoff Geupel, Mary Gustafson, John Hagan, Kathy
Klimkiewicz, Jon D. McCracken, Lucie Métras, Sara Morris,
Robert S. Mulvihill, T. Pearl, Paul Prior, David Shepherd, Otis
D. Swisher, Jennifer Weikel, and Bob Yanick contributed major
portions of this document. Final editing and quality control of
this study guide were done by Jerome Jackson, Glen Woolfenden,
and Jared Verner. We are all grateful for their conscientious and
effective help.
—Publications Committee
2 North American Banding Council Banders' Study Guide
1. INTRODUCTION
Bird banding is both a delicate art and a precise science. It
should come as no surprise that it requires not only sensitivity and
intelligence, but also training. This is in the interest of the birds'
safety and in the interest of gathering accurate and useful
information.
Nearly all beginning banders are nervous and a little
awkward. This is a good sign because it signals that you
understand that you are holding something very much alive and
precious. After a time, though, it is all too easy to become
complacent. A good bander is always on guard against compla-
cency and realizes that, above all, banding is a great privilege.
The North American Banders' Study Guide and The In-
structor's Guide to Training Passerine Bird Banders in North
America are designed to complement each other. All banders and
prospective banders should familiarize themselves with the infor-
mation presented in the Study Guide. The Instructor's Guide,
however, is generally available only to trainers.
The motivating factor in the production of these guides is the
safety and welfare of the birds involved. Indeed, this principle
takes precedence over all other considerations in any kind of
banding operation.
You may want to band birds only as a small part of a short-
term research project, perhaps focusing on a single species, or you
may plan to use banding as a major part of your future work. In
either case, responsibilities are the same and you need the same
basic skills. Some people will need only limited training. For
example, if you are banding only geese, it probably does not really
matter whether you can tell a robin from a Blue Jay. Your trainer
can recommend that a banding permit be limited to a certain
species or trap type, or issued for use on a specific project only.
Training must be by a qualified trainer. The North American
Banding Council (NABC) maintains a complete listing of NABC-
certified trainers in specific geographic regions. For information
on NABC, contact the Banding Offices or web site (http://naband-
ing.net/nabanding/).
The amount of training required depends on the nature of
your project, the type of permit you want to acquire, the speed at
which you learn, the accessibility of a good trainer, and the
availability of training opportunities. It is difficult to establish
quantitative guidelines regarding how much time is required or
how many birds need to be handled. If you think you need a
permit in a hurry, remember that basic training is still a
requirement, and you should plan for this. This is particularly
relevant to graduate students, who should allow sufficient time
for thorough training.
In a NABC-approved evaluation procedure, a trainer must
assess a student's knowledge and practical skills, following
completion of a step-wise training program. The trainer grades
students according to the specifics of the banding project that they
will do. Some students will have specific research projects (e.g.,
graduate students studying a single species), while others will
have much broader interests (e.g., personnel at bird observato-
ries). Your permit should reflect the specifics of your research,
and you must inform your trainer of any special needs you might
have.
Along with a training manual, trainers are supplied with a
"Bander's Report Card" to guide the assessment process. A copy
of this report card is provided as Appendix E in this manual, to
give an overall feel for the content and structure of a thorough
training program.
Much information is presented in this guide. Students must
read it over at least once before their training to orient themselves
and preview what will be learned. After a week or two of
training, it should be reviewed in its entirety.
What makes for a good student? A good student is never
afraid to ask questions or to insist on adequate training time.
First observe, then perform each task under supervision. Learn
each new step openly in front of your trainer, so that he or she
can see exactly what you are doing. Once you are permitted to
do certain things alone, have your trainer spot-check you to see
that you are not developing bad habits and to ensure that your age
and sex determinations and measurements are reliable. "Brush-
up" sessions with your trainer after a few weeks or months on
your own can be very helpful. Don't get arrogant or over-
confident; a good bander has a life-long attitude that there is
more to learn, and recognizes that everyone, even the most
experienced, can make a mistake now and then. Keep your
humility. At the same time, confident handling is important to
bird safety and that's what we want you to learn.
2. THE BANDER'S CODE OF ETHICS
Bird banding is used around the world as a major research
tool. When used properly and skillfully, it is both safe and
effective. The safety of banding depends on the use of proper
techniques and equipment and on the expertise, alertness, and
thoughtfulness of the bander.
The Bander's Code of Ethics applies to every aspect of
banding. The bander's essential responsibility is to the bird.
Other things matter a lot, but nothing matters so much as the
health and welfare of the birds you are studying. Every bander
must strive to minimize stress placed upon birds and be prepared
to accept advice or innovation that may help to achieve this goal.
Methods should be examined to ensure that the handling time
and types of data to be collected are not prejudicial to the bird's
welfare. Be prepared to streamline procedures of your banding
operation, either in response to adverse weather conditions or to
reduce a backlog of unprocessed birds. If necessary, birds should
be released unbanded, or the trapping devices should be
temporarily closed. Banders should not consider that some
mortality is inevitable or acceptable in banding. Every injury or
mortality should result in a reassessment of your operation.
Action is then needed to minimize the chance of repetition. The
most salient responsibilities of a bander are summarized in the
Bander's Code of Ethics; more details are found in Section 13.
Banders must ensure that their work is beyond reproach and
assist fellow banders in maintaining the same high standards.
Every bander has an obligation to upgrade standards by advising
the Banding Offices of any difficulties encountered and to report
innovations.
Banders have other responsibilities too. They must submit

North American Banding Council Banders' Study Guide 3
their banding data to the Banding Offices promptly, reply
promptly to requests for information, and maintain an accurate
inventory of their band stocks. Banders also have an educational
and scientific responsibility to make sure that banding operations
are explained carefully and are justified. Finally, banders
banding on private property have a duty to obtain permission
from landowners and to make sure their concerns are addressed.
3. A BRIEF HISTORY OF BANDING
The first recorded instance of bird marking dates back to
about 200 BC when marked birds were used as messengers by
the military and sportsmen. Until the inception of systematic,
scientific bird banding in Denmark in 1899, all attempts to mark
birds were individualistic, involving the use of nonstandard
markers such as colored string, paint, metal shields around the
neck or tarsus, and toe clipping.
Ernest Thompson Seton and John James Audubon are
acknowledged as the first "banders" in Canada and the U.S.,
respectively, even though they did not use bands. Audubon tied
silver wire around the legs of nestling Eastern Phoebes in
The Bander's Code of Ethics
1. Banders are primarily responsible for the safety and welfare of the birds they study so that stress
and risks of injury or death are minimized. Some basic rules:
- handle each bird carefully, gently, quietly, with respect, and in minimum time
- capture and process only as many birds as you can safely handle
- close traps or nets when predators are in the area
- do not band in inclement weather
- frequently assess the condition of traps and nets and repair them quickly
- properly train and supervise students
- check nets as frequently as conditions dictate
- check traps as often as recommended for each trap type
- properly close all traps and nets at the end of banding
- do not leave traps or nets set and untended
- use the correct band size and banding pliers for each bird
- treat any bird injuries humanely
2. Continually assess your own work to ensure that it is beyond reproach.
- reassess methods if an injury or mortality occurs
- ask for and accept constructive criticism from other banders
3. Offer honest and constructive assessment of the work of others to help maintain the highest
standards possible.
- publish innovations in banding, capture, and handling techniques
- educate prospective banders and trainers
- report any mishandling of birds to the bander
- if no improvement occurs, file a report with the Banding Office
4. Ensure that your data are accurate and complete.
5. Obtain prior permission to band on private property and on public lands where authorization is
required.
4 North American Banding Council Banders' Study Guide
Pennsylvania in 1803 and was lucky enough to have the first
returns in North America when he caught two of his nestlings
again the next spring. In Canada, Seton marked several Snow
Buntings with printer's ink in 1882 in Manitoba.
Key to the development of a continent-wide banding and
recovery program was the formation and acceptance of a single
concept; namely that, with the cooperation of North American
ornithologists, the capture, marking, and subsequent encounters
of individual birds would lead to invaluable data on species'
habits, migration routes, and population status. Leon Cole was
the first to publicly and formally introduce scientific bird banding
to North America at a Michigan Academy of Science meeting in
1901, but it was P.A. Taverner who initiated the centralized
distribution of standardized, aluminum bands. In 1904, Taverner
placed a note in the Auk, offering bands to ornithologists wishing
to cooperate in a banding project. James H. Fleming of Toronto,
Ontario, was the first to use these bands, in 1905.
In 1909, the American Bird Banding Association (ABBA)
was formed. As a central organization whose role was to oversee
the issue of standardized bands as well as the collection and
storage of the resulting banding data, the ABBA greatly
contributed to the efficiency of the banding program. In 1911,
the Linnaean Society of New York offered to administer the
banding program for the ABBA, helping to cover the rising
administrative costs of the program.
With the signing of the Migratory Bird Treaty Act in 1916
came increased cooperation between Canada and the U.S. and
the recognition that migratory birds were of international
concern. The development of the banding scheme continued
under the direction of the Bureau of Biological Survey of the U.S.
Department of Agriculture in 1920. In 1922, Canada's Dominion
Parks Branch became officially involved, and by 1923 the
Canadian government was responsible for the administration of
banding efforts in Canada. Bands were standardized throughout
North America and each country became responsible for its own
banding data. Now, the U.S. Geological Survey and Canadian
Wildlife Service are jointly responsible for administration of the
North American banding program.
4. PURPOSES AND JUSTIFICATION FOR
BANDING BIRDS
4.1. The Banding Offices
The work of the Bird Banding Offices in Canada and the U.S.
is closely coordinated. Each office acts as a center for the
administration of banding within its own country, reviewing
proposed banding projects, and issuing bands, auxiliary markers,
and banding permits to qualified banders. All banding and
recovery data are computerized and freely exchanged between
offices. Each country encourages the use of the database by
banders and researchers. In so doing, the offices promote the
publication of significant findings resulting from bird banding.
However, banding birds is not a conservation or research program
in itself. The Canadian Wildlife Service and United States
Geological Survey do not have a conservation program called
"bird banding," and neither government has researchers looking
at data collected from banding. Hence, banders are not making
a bona fide contribution to research if they are banding birds only
for the purpose of contributing to the North American database
on banding and recovery. While all banding data are potentially
valuable, the value of banding data increases enormously if it is
collected under a well-designed study or is part of a cooperative
program. We strongly encourage all banders to think hard about
the usefulness of the information being gathered. Banders are
obliged to ensure that their study design and the collection and
analysis of data are sound, and that their results are published.
The Banding Offices review all applications for permits. If an
application is turned down because it lacks scientific merit, this
decision should be respected.
4.2. Purposes and Justification for Banding Birds
As detailed in Buckley et al. (1998), the basic purposes and
justification for banding birds are its scientific merits: it provides
data vital for scientific research into bird populations and for the
conservation and management of those populations. While some
of these data can be provided in other ways, banding often
remains the most cost-effective approach. Banding, recovery,
recapture, and resighting data remain critical for the conservation
and management of birds. Their use in the setting of annual
species and bag limits for game birds provides an immediate and
widely appreciated example. At the level of basic scientific
knowledge, banding is also a valuable tool for obtaining
information about avian populations, movements, behavior, etc.,
regardless of any immediate conservation or management value.
Lastly, banding has legitimate and widespread educational values
over and above its scientific value.
It is not always appreciated, especially by governmental
bodies and the public, exactly how valuable good banding data
are, and the important uses to which they are routinely put.
Examples include:
(1) Providing knowledge about movements of birds—e.g.,
establishing migration routes, finding links between
breeding and wintering grounds, delineating separate
populations, tracking range expansions and colonizations,
measuring dispersal within populations, quantifying gene
exchange among populations;
(2) Estimating demographic parameters and determining
dynamics of bird populations—e.g., estimating annual
production of young birds or age-dependent annual survival
rates, building models of population dynamics for predicting
extinction probabilities, separating population sources and
sinks, comparing survival rates of experimental or rehabili-
tated birds to those of wild birds;
(3) Management of gamebirds—e.g., delimiting flyways;
estimating harvest pressure for input to the establishment
and modification of hunting regulations; measuring
differential vulnerability to harvest and other risks by
species, age, sex, and geographic location;
(4) Ecological research requiring individual recognition—e.g.,
estimating territory size and examining the importance of
migrant stopover areas through individual stopover time
and weight gains, as well as habitat selection, dominance
hierarchies, molting strategies, molt patterns, and the
parasite burdens of individuals;
North American Banding Council Banders' Study Guide 5
(5) Monitoring populations and individuals—e.g., monitoring
Endangered or Threatened species, identifying populations
declining from decreased reproductive output or from dim-
inished recruitment, establishing population trends, and
validating other techniques of population monitoring;
(6) Educating the public about science and birds—e.g., teach-
ing, in the hand, about birds, their movements, their plu-
mage differences, and how molt proceeds; reinforcing
stewardship responsibilities.
We emphasize that the maximum value of banding data is
realized only when: (a) accurate and standardized (or well-
documented) data are taken; (b) these data are stored centrally
and made readily available to analysts and researchers; and (c)
the data are used, and the results are published.
Over 1.2 million bands are issued annually in the North
American Bird Banding Program. With so many birds involved,
the program inevitably incurs casualties. Some birds are injured
or die as a result of predators, or of being trapped, handled, or
banded. In all careful banding programs, the numbers are small
relative to those banded, but every effort must be made to reduce
the number to as near zero as possible. These losses can be
minimized by increasingly effective training in the capture,
handling, and welfare of birds, and by certification of banders.
The North American Banding Council's Bander Certification
Program addresses these issues.
4.3. Designing a Research Project
Banders may conduct research in two ways. You can design
your own research project and analyze your own data in the
context of the project's design, or you can collaborate with others
who have already designed projects (many of which are usually
in need of skilled assistance).
If you wish to set up your own research project and analyze
your own data, you will need to understand basic statistics (e.g.,
the mean, probability theory). Among other things, statistics can
be used to determine average dates of arrival, significantly early
or late occurrences of a species, and the proportion of hatch-year
birds to adults in a given population. Zar (1984) and Sokal and
Rohlf (1994) are both good statistical textbooks, but they are not
written for the lay-person. The U.S. Fish and Wildlife Service
and the British Trust for Ornithology (BTO) have produced
excellent introductory guides to ornithological statistics (Fowler
and Cohen, undated; Nur et al. 1999); see Appendix B for the
BTO address.
Grubb (1986) is a good reference on designing simple realistic
studies. Good examples of well-designed projects can be found
in journals like North American Bird Bander, Journal of Field
Ornithology, and Ringing and Migration. An example of a well-
designed research study is outlined in Appendix C.
Project design proceeds through a series of logical steps:
(1) Ask a question. All well-designed projects focus on a well-
defined question. Depending on the question, this step
usually implies some familiarity with the work of others on
the subject. Recently published literature can be consulted
at a university library.
(2) Develop a hypothesis. A hypothesis combines the question
with your expectation of what the answer might be and why.
Much of the necessary theoretical background for forming
a hypothesis comes from studying the results of others.
(3) Propose and design a project. Most people need help at this
stage. To design a workable project, you need to determine
what kinds of, and how many, data need to be collected.
This is where statistics can help. Usually the statistical test
that will be used to analyze the data dictates, to some extent,
the types and sample sizes of data required for analysis. At
this stage, banders should have a clearly formulated
question, with a hypothesis, a plan for collecting the neces-
sary data, and a plan for the statistical analysis of the data.
An experienced researcher or statistician can confirm that
the proposed sample size and types of data are sufficient for
meaningful tests of the hypothesis. Banders who are exper-
ienced with the capture of the proposed species can confirm
that the target number and trapping method are easily
attainable over the duration of the study. Get others' opin-
ions on the possible limitations of your study; it will save a
lot of hardship later.
(4) Collect the data. This is often the most challenging step
because field conditions rarely match expectations. Good
planning and appropriate practical training will greatly
facilitate this step.
(5) Analyze the data. The use of a computer with data entry and
statistical analysis programs will make analysis much easier.
(6) Publish your results. Remember that "negative" results are
just as important as "positive" results because they allow you
and others to build upon them. A range of publication outlets
is available, from regional bird bulletins to international
research journals.
(7) Questions beget more questions!
4.4. Cooperative Programs
Many scientific studies could never be undertaken at an
adequate scale by individual banders; they are possible only as
collective endeavors. Hence, even if you do not have a specific
project yourself, you can still contribute meaningful information
to a larger, organized project. Contact the universities, Partners
in Flight, and bird observatories, or respond to bulletins in
journals or newsletters such as the one published by the Ornitho-
logical Societies of North America (OSNA) for information on
how you can help. The OSNA newsletter can be viewed online
at http://www.ornith.cornell.edu/OSNA/ornnewsl.htm. Coopera-
tive projects in North America are described in Appendix F.
5. PERMIT ISSUANCE
Because bird welfare is a primary concern, banding permits
are issued only to people who have received proper training and
whose projects are designed to contribute to the knowledge,
conservation, and management of North American bird popula-
tions. Permit authorizations can be very specific. For example,
your banding permit may restrict you to banding young Herring
Gulls captured by hand. A more general permit could authorize
you to run a general bird monitoring station, with special
authorizations for the use of mist nets and for banding a wide
variety of species. Before applying for a permit, banders should
be confident of their qualifications and know which authoriza-
6 North American Banding Council Banders' Study Guide
tions are needed to complete their project. Consideration should
be given to the species under study, the capture method, and type
of data needed.
5.1. Types of Banding Permits
Two types of federal banding permits are available: the
Master Permit and the Subpermit. The differences between the
two relate to the experience and qualifications of the bander and
the responsibilities to be assumed. Because it costs money to
process banding and recovery data, it is more efficient if banding
teams or organizations designate one responsible person to report
all banding data. Although this section will deal with federal
banding permits, banders should be aware that some states and
provinces have separate permit requirements. Banders need to
contact their state or provincial wildlife agency for information
on state or provincial permits. A listing of all state Department
of Natural Resources offices can be located on the internet at
http://www.up-north/dnr_news/dnrstates.html. It is the bander's
responsibility to obtain all required permits before banding.
Master Permits are issued to "responsible individuals"
banding on their own or designated from a team of banders who
are working together on a project. Master Banders are responsi-
ble for coordinating the activities of all Subpermittees within the
project, ordering and distributing bands from the Banding Office,
recommending new Subpermittees, reporting encounters, and
preparing banding "schedules" (see Section 12.4).
Organizational Master Permit projects (e.g., at universities
and bird observatories) are overseen by a designated individual
who is granted Subpermit "A" within the organization's Master
Permit. In this case, the organization's address is used on all
correspondence with the Banding Offices so that data can be filed
in a consistent manner, despite possible personnel changes within
the organization.
Subpermits are issued to banders guided and supervised by
a Master Bander. Data from all Subpermittee banding are filed
in the Banding Offices under the Master Permit's number.
Note that banders and students do not require a permit if they
are under the direct, on-site supervision of a Permit holder.
Banders working unsupervised for any period of time, however,
do require a subpermit.
Contact the appropriate Banding Office (Appendix G) for
permitting standards, requirements, and application materials and
procedures.
5.2. Special Authorizations
Banders must request special authorization to:
(1) band waterfowl
(2) band hummingbirds
(3) band endangered species (and provincially protected species)
(4) use mist nets
(5) use cannon nets
(6) use chemicals (i.e., tranquilizers) to capture migratory birds
(7) use auxiliary markers (e.g., color bands, radio transmitters)
(8) take blood or feather samples
In Canada, banders also must request special authorization
to band raptors, or to band in a federal or provincial park, a bird
sanctuary, or in a wildlife area.
A banding permit allows banders to salvage dead birds
encountered during their studies. Specimens are useful for
further study and they should be salvaged whenever possible (e.g.,
sent to museums, universities). However, a special permit is
required to collect birds, to hold or transport live birds, and to
possess specimens, including eggs and nests. Without this
special permit, you can be charged with an offense. Permits to
cover these activities can be requested from your regional U.S.
Fish and Wildlife Service Migratory Bird Office; see http://-
www.pwrc.usgs.gov/bbl/manual/mboffice.htm for contact infor-
mation.
5.3. How to Apply for a Permit
Qualified persons wishing to handle, band, or mark birds in
North America should ask for an application form from the
appropriate Banding Office (see Appendix G). Master Banders
should supply the names and addresses of all prospective
Subpermittees when they ask for Subpermittees' application
forms. When a request for a permit is received by the Banding
Offices, an acknowledgment letter is sent with an application
form and a request for any necessary additional information. The
Banding Offices review applications for permits and issue when
appropriate.
5.4. Permit Expiration and Renewal
In general, banding permits are valid for 2 calendar years.
In the U. S., Master Banders are contacted at renewal time if
banding activity has been limited. In Canada, a renewal ques-
tionnaire is sent to Master Banders each December and upon
submission of banding data.
In the U.S., auxiliary authorizations are reviewed and
renewed every 2 years. In Canada, banding permits are issued
for 1 or 2 years depending on the projects. When a project
includes the use of auxiliary markers other than colored bands,
an annual Animal Care Committee review and approval is
required. All other banding permits are issued for 2 years, but
Master Permittees must submit a Year-end-report at the end of
each year to inform the Banding Office if changes are required
to their current banding permit.
5.5. Responsibilities of Permit Holders
Master Permit holders are responsible for their Subpermittees'
qualifications and conduct. Master Banders order all bands,
maintain a band inventory, submit all records to the Banding
Offices in a timely manner, maintain updated copies of all
banding schedules, report recoveries, maintain quality control,
and generally handle all paper work associated with the permit.
Subpermit holders are under the direction of the Master Bander,
who decides upon individual responsibilities. At the very least,
Subpermittees must provide the Master Bander with copies of all
banding schedules and band inventories and keep the Master
Bander advised on any problems that might arise. Subpermittees
also must let the Master Permit holder know their band require-
ments in plenty of time to allow band orders to be placed and
filled.
All Master Permit holders are responsible for the bands issued
to them until the data resulting from their use are reported, the
bands are returned to the Banding Offices, or they are transferred
to another Bander. All transfers must be authorized by the
North American Banding Council Banders' Study Guide 7
Banding Offices. In case of fire, theft or loss of bands, a copy of
all band numbers received should be kept in a couple of different
places. Band inventories should be done at the end of each
banding season.
Banders should always double check that the bands they have
received correspond to the bands issued to them, as listed on the
Banding Offices' Issue Slip. This means checking the numbers
on the bands themselves, not just the numbers printed on the band
envelopes or boxes. In the case of a discrepancy, or if any band
numbers are illegible, missing, duplicated, or out of order, notify
the respective Banding Office immediately.
5.6. Permit Suspensions and Revocations
Permits may be suspended or revoked if the bander's
qualifications or conduct are questioned, investigated, and
subsequently found to be in breech of those deemed acceptable
by the Banding Offices. This includes exceeding authorizations
specified on banding permits, neglecting to submit banding
schedules, or the mistreatment of birds.
6. NORTH AMERICAN BANDING AND
RECOVERY DATA BASE
Banding and encounter data are gathered and stored for the
purpose of facilitating research in North America. Researchers
are encouraged to request data for analysis. Generally, this
information is provided free of charge for those with legitimate
research purposes.
Banding and encounter data are contained in their own files
and in the Banding Retrieval File and the Encounter Retrieval
File, respectively. Data are taken directly from the retrieval files,
presented in the formats shown in the Banding Manual, and
supplied to you on diskette or as an electronic attachment. The
Banding Offices will not usually summarize or tabulate data for
you. However, occasionally the information may have already
been tabulated by other researchers and can be made available
upon request. The Banding Offices have developed their own
programs for data manipulation. You may be able to make use
of these programs for data summation.
To release banding or encounter data, the Banding Offices
require that the need for use of the data is justified. The Offices
also need to know whether data are required from the Banding
Retrieval File, Encounter Retrieval File, or both, the type of
encounter data required, species, age and sex required, area and
time period involved, and the various status and additional
information codes desired (consult the Bird Banding Manual
[Canadian Wildlife Service and U.S. Fish and Wildlife Service
1977, 1991] for more detail).
Much time and effort goes into data collection and storage,
both on the part of those who contribute data and those who
administer the banding program in North America. Researchers
are therefore asked to use data with care and consideration.
Researchers using banding data must obtain permission from
the banders involved before their data can be used for
publication, specifically, if a bander's past 5 years of banding
or encounter data contribute 5% or more of the total records
being used for publication, and/or if individual banding or
reencounter records will be cited in the paper. This permission
is seldom difficult to obtain, but it is necessary to protect banders'
own research interests. Banders have the prior right to the
analysis and publication of data resulting from their own banding
efforts. To guard against the improper use of data, a Policy of
Release is included with each data request. A copy of the "Policy
for Release and Use of Banding and Encounter Data," updated
September 24, 1998, is presented in Appendix H.
Data on endangered, threatened, or sensitive species may be
legitimately withheld by the Banding Offices. Other data also
may be withheld if they are required by government for manage-
ment or administrative purposes.
7. THE NORTH AMERICAN BANDING
COUNCIL
The mission of the North American Banding Council
(NABC) is to promote sound and ethical bird banding principles
and techniques in North America. Skill levels of banders will
be increased by the preparation and dissemination of standardized
training and study materials and the establishment of standards
of competence and ethics for banders and trainers.
The immediate objectives are:
(1) to develop a certification and evaluation program by setting
standards for experience, knowledge, and skills that must
be attained at each level (Assistant, Bander, and Trainer);
(2) to produce and update training materials such as manuals
and perhaps videos;
(3) to identify and certify an initial pool of trainers; and
(4) to encourage cooperative efforts in the use of banding in the
study and conservation of North American birds.
The NABC consists of 18 to 20 voting members, including
one representative appointed by each of the following organiza-
tions: American Ornithologists' Union, Association of Field
Ornithologists, Cooper Ornithological Society, Colonial
Waterbird Society, Eastern Bird Banding Association, Inland
Bird Banding Association, Ontario Bird Banding Association,
Pacific Seabird Group, Raptor Research Foundation, Society of
Canadian Ornithologists, Western Bird Banding Association,
Western Hemisphere Shorebird Reserve Network, and Wilson
Ornithological Society; and two representatives appointed by the
International Association of Fish and Wildlife Agencies (one
from Canada and one from the United States). Other groups have
been invited to become affiliated. The NABC also designates
from four to six additional members. The directors of the
Canadian and U. S. Bird Banding Offices are non-voting
members of the NABC. The NABC was incorporated as a non-
profit California corporation in 1998. While it is expected that
the NABC expenses will be covered by a small fee from appli-
cants for banding certification, donations are being solicited
during this start-up phase.
8 North American Banding Council Banders' Study Guide
7.1. What Is NABC Doing?
The NABC has developed a bander training and certification
program to set standards of knowledge, experience, and skills at
two banding skill levels: Bander and Assistant.
The NABC has prepared training manuals to serve as
reference materials for trainers and prospective new banders, and
to enhance the knowledge and skills of existing banders. The
current ones are: North American Banders' Study Guide,
Instructors' Guide to Training Passerine Bird Banders in North
America, Guide to the Banding of North American Raptors, The
North American Guide for Passerines and Near Passerines, and
North American Bander's Manual for Hummingbirds. Other
manuals are anticipated. Printed and electronic versions will be
produced in cooperation with the Banding Offices.
In addition, the NABC has designated a group of Trainers
who have extensive experience, peer recognition as expert
banders, good teaching abilities, and high ethical standards. The
NABC also maintains procedures, policies, and bylaws; issues
certifications; updates training and testing materials; and
maintains a directory of certified assistants, permittees, and
trainers.
7.2. How Will Bander Certification Work?
Certification of banders will require passing a written test and
field evaluation of banding skills. Prospective banders may
contact NABC or the Bird Banding Offices for information.
Existing banders also may wish to be certified. NABC certified
trainers will certify banders at all levels. Some trainers may be
involved in teaching formal courses. NABC will issue and
register the formal certifications. Modest fees will be charged to
cover administrative costs.
The Banding Offices will not require NABC certification of
new or existing banders but will recommend certification and
refer prospective banders to NABC. They will recognize certi-
fication as evidence of qualifications for a federal banding permit.
However, a proposal justifying banding will continue to be
required (i.e., NABC certification alone will not entitle one to a
federal bird banding permit).
7.3. NABC Certification
NABC has developed a certification program to recognize
standards of knowledge, experience, and skills. The sole purpose
of evaluating a bander trainee is to determine if he or she can
complete safely, efficiently, and accurately all tasks required of
the bander permit for which he or she is applying. The evalua-
tion will be thorough, including all aspects of bird capture,
handling, identification, ageing, sexing, banding, measuring, data
recording, and report filing. While the information in this manual
is considered basic to all applicants for certification and will be
tested in a written examination, evaluation of applicants' field
skills will emphasize techniques and procedures relevant to the
particular group or groups of birds for which the trainee is
seeking a permit. Separate evaluations of field skills will be
available for passerines, shorebirds, raptors, waterfowl, hum-
mingbirds, and seabirds.
Evaluations are based on both a written test and hands-on
demonstration of banding skills. NABC recognizes that both
portions of the evaluation are important and, indeed, complemen-
tary. Central to the certification process is the evaluation of a
trainee's ability to: use nets and traps properly, efficiently, and
responsibly; remove birds from them; and handle, measure, and
examine birds. A trainee without a basic understanding of bird
anatomy and banding techniques, or one who lacks the dexterity
and temperament for handling birds, may endanger the birds.
The written evaluation includes two parts: questions covering
basic knowledge of birds and banding, and problem-oriented
short answer questions.
The NABC recognizes the need for and provides certification
at three levels:
Assistant.—At the Assistant level, a trainee has achieved a
level of competence in removing birds from nets, bird handling
skills, and banding birds under the direct supervision of a bander
who is a Bander or Trainer. This level of certification is provided
to recognize the important contributions of those who assist with
the handling of birds at banding stations, but who do not wish
to take on the major responsibilities associated with record
keeping, and to provide a pool of trained individuals to assist
banders.
Bander.—The Bander level recognizes that a trainee has
achieved a level of competence in removing birds from nets,
identifying, sexing and ageing them, handling and banding them,
taking appropriate measurements, and keeping appropriate
records. The Canadian and U.S. Banding Offices issue two levels
of permits, the Subpermit and Master (Individual or Station)
Permit. NABC recognizes that both Subpermittees and Mas-
ter/Station Banders need the same level of knowledge and skill
and therefore provides only this one level of certification for
both—the Bander level of certification.
Trainer.—The Trainer level recognizes Banders who (1) have
demonstrated considerable banding experience, (2) have the basic
knowledge and skills associated with the Bander level of
certification, and (3) have demonstrated teaching skills such that
he or she can teach and evaluate proficiency in the basic
knowledge and skills associated with all levels of certification.
An applicant at the Assistant level must be certified by a
Bander or a Trainer. Applicants at the Bander level must be
certified by a Trainer. Applicants at the Trainer level must be
certified by two Trainers. Each successful candidate for certifi-
cation will receive a certificate signed by the Chair of the NABC
and the Bander or Trainer(s) who conducted the evaluation.
Certification is subject to periodic review by the NABC. Issuance
of banding Subpermits and Master/Station Permits is the
responsibility of the Canadian and U.S. Banding Offices. The
Banding Offices do not require NABC certification of new
banders or current Permit holders, but they do recommend
certification and refer prospective banders to NABC. They
recognize certification as evidence of qualifications for a federal
banding permit. However, a proposal justifying banding con-
tinues to be required. The NABC anticipates that its Trainers
will be involved in short courses for bander trainees.
As a result of NABC certification, bird studies will benefit
from an increased number of competent banders, more skilled
banders, more reliable data, and more opportunities for collabora-
tive studies. Birds will benefit from a safer, more effective North
American Bird Banding Program.

North American Banding Council Banders' Study Guide 9
8. HANDLING BIRDS
The proper way to handle a bird is the safest way. To ensure
the bird's safety during handling, it is crucial to use appropriate
grips, as described below.
Many birds are capable of inflicting a little pain or discomfort
on the bander; some, such as raptors and herons, may even draw
blood with their talons or threaten eye injury with their long
necks and beaks. Others will defecate on you, and some will bite
or scratch, but it is all part of the banding process. In any case,
never take any of your frustrations out on the bird. Consider the
hand that holds the bird to be separate from your body; learn not
to flinch when a grosbeak or hawk clamps its jaws down tightly
on your finger or when a flicker defecates in your face while you
are checking its fat condition. Laughter is often the best medi-
cine.
Right-handed banders normally hold birds in their left hand,
leaving their right hand free to scribe, hold banding pliers, and
so on. Left-handed banders do the opposite. No matter which
hand is chosen, you should feel comfortable transferring birds
from one hand to the other, which is part of the banding routine.
Never overlap the wings across the back of the bird or bring
the wings forward below the line of the body; this can cause
wing-strain and result in tissue damage. Always be careful that
the bird's body is not held too firmly. Excessive pressure placed
on the neck or body could result in broken ribs, damaged air
sacs, or suffocation. Breeding females carrying eggs could suffer
internal injuries if the abdomen is pressed. You should always
check for any signs of panting or other stress (see Section 13).
A good handler quickly learns to balance a secure, firm hold with
a gentle, noninjurious touch.
If a bird struggles loose from your grip, it is much better just
to let it go rather than to grab for it. What you usually get is a
handful of tail feathers, and you risk injuring the bird by a sudden
grasp.
8.1. The Bander's Grip
The "Bander's Grip" (Fig. 1) is the best and safest way to hold
a small or medium-sized bird. Hold the bird with its neck near
the base of the gap between your forefinger and middle finger.
With these two fingers closed gently around the bird's neck, the
wings can be contained against the palm of your hand. The
remaining fingers and thumb are closed loosely around the bird's
body, forming a kind of "cage." This hold leaves the bird's legs
free for banding.
By pinching the tarsus at the metatarsal joint (heel), or
slightly foot-side of the joint if leg length allows, securely
between thumb and forefinger of the hand holding the bird, the
leg is secure enough that, should the bird struggle during
banding, the hold will prevent any injury to the leg. It is
important that the heel not flex while applying the band. You
can measure the wing chord or check for fat safely simply by
lifting your thumb away from the bird's body.
The key to the Bander's Grip is to hold the neck firmly
Figure 1. Aspects of the Bander's Grip showing how the tarsal (heel) joint can be held (from Lowe 1989).

10 North American Banding Council Banders' Study Guide
enough that the bird cannot pull its head back through your
fingers, but not so firmly as to risk harm or stress. Your hand
should cradle the body and restrain the bird from struggling so
that it is not injured or expending energy trying to escape. If the
bird struggles a great deal and you are finished applying the band,
except with shorebirds (see below), the legs can be folded and
placed between the bird's body and your ring finger as if the bird
were perched. This will minimize struggling and allows you to
proceed with other measurements.
Although this is the most basic of all banding grips, there are
some things you should know about holding certain species:
(1) Most birds are usually docile, but some (e.g., sparrows,
starlings, woodpeckers, blackbirds, grosbeaks, and jays)
often kick or bite. Some species (e.g., Song Sparrow) lie
calmly, then suddenly kick strongly in an attempt to free
themselves from your hand. Be prepared by keeping a firm
grip on the neck throughout. Kicking can be minimized
by positioning the leg not being banded between your ring
finger and the body of the bird as described above. Before
or following application of the band, some species in the
hand are calmed by allowing then to grasp your ring or
small finger, as though they were perched within your grip.
Bad biters can be handed a small twig or a cotton roll to
bite, or their heads can be covered temporarily by a light
piece of cloth. They can also be restricted by keeping the
fingers straight. Usually, it is best just to endure the pain
and to learn to keep your fingers away from beaks.
(2) Small birds such as wrens are especially adept at wriggling
out of the Bander's Grip. They use their feet to put pressure
on the fingers around their necks and quickly slip their
heads from your grasp. Again, your grip must be sure but
not stifling.
(3) Caution is required when handling hummingbirds. Al-
though they are tough birds for their size, they can go into
shock due to stress or lack of food. In addition to the
Bander's Grip, they can be held with the finger-tip hold,
which allows the greatest control of the bird while assuring
its safety: thumb on one side of the bird's body, second
(middle) finger on the other side of the body, and the
forefinger on top of the bird. By holding the first and
second fingers in a firm but relaxed grip, you will not
endanger the bird nor will you let it loose. Never hold a
hummingbird by its legs as this will cause injury.
(4) Use care when handling long-legged shorebirds, cranes, and
herons. Leave their legs free for banding and never fold
them up against their body (see Section 13.4). Restricting
the legs causes stress to the bird and may result in the
temporary loss of muscular control of the legs.
(5) When holding small raptors in the Bander's Grip, be very
certain that your grip is sure and that the talons are under
complete control. Raptors will grasp tightly their own feet
together and hold their legs in this position for some time.
Then they will lash out suddenly, sinking their talons into
the object nearest them.
(6) Some birds (e.g., woodpeckers, mimids, and icterids) are
apt to scream a lot. This does not mean they are in pain,
but it is certainly disturbing. Forget trying to calm scream-
ers. The best thing you can do is to cover their head with
a bird bag, process, and release them quickly.
8.2. The Reverse Grip
The "Reverse Grip" is a standard hold in some countries but
not widely used in North America. We recommend that you
master the standard Bander's Grip before trying the Reverse Grip.
In the Reverse Grip, the bird is held with the tail facing away
from you (Fig. 2). Your pinky and ring finger secure the neck
against your palm. Your thumb is placed gently but securely
across the lower abdomen, below the back and wing, or across
the rib cage. As in the Bander's Grip, the leg can be positioned
for banding by pinching the metatarsal joint between your thumb
and forefinger.
The Reverse Grip is not efficient if measurements are to be
taken because the bird must be rotated and held in the Bander's
Grip for most measurements. Processing is faster and incidents
of escape and injury when you stay with a single grip. The
Reverse Grip is useful, however, for banders with small hands
who must handle medium-sized birds (e.g., Common Grackles
and Mourning Doves) or when banding swallows and other birds
with extremely short tarsi. This grip puts the metatarsal joint
close to the thumb and forefinger. The Reverse Grip also can be
useful when you measure or study tail feathers.
8.3. The Photographer's Grip
Many passerines can be held safely by their legs for brief
periods, but you must grasp the legs as close to the body as
possible. Never hold hummingbirds, kingfishers, or goatsuckers
in this grip as their legs are too weak. Caution should be used
with holding large finches with this grip, since problems of wing
strain or fractured coracoids have been reported. Many banders
feel that this grip should never be used as a method of extracting
Figure 2. The Reverse Grip (revised from Svensson 1992).

North American Banding Council Banders' Study Guide 11
birds from nets.
The "Photographer's Grip" (Fig. 3) is used primarily to hold
birds while photographing them because it maximizes the amount
of plumage in view, briefly to transfer them from one bander to
another, or to examine certain features. For this hold, you
"scissor" grip the bird's legs, as near to the body as you can,
between the fore and middle fingers (or between the ring and
middle fingers if your hand is very small) and then pinch the
bird's tarsi between your thumb and fore- (or middle) finger.
Place index finger between the legs of large birds such as raptors.
In this hold, the bird is securely gripped above and below the heel
joint, which is bent into an "L" shape. The bird will be able to
flap its wings, but it should not be able to rock back and forth or
from side to side. Never hold a bird only by the lower part of its
legs; they will break! Place your free hand over the bird's back
to keep its wings from flapping until the photographer is ready
to shoot or the other bander is ready to take the bird in the
Bander's Grip.
Many birds, especially short-legged species, present
difficulties when the bander attempts to "scissor-grip" the upper
tarsus. In this case, you can pinch the bird's feet together between
the thumb and forefinger and pull the legs away from the body,
allowing you to use the middle and ring finger in a "scissor-grip"
higher up the leg. Once secure, the bander can release the feet
and reposition the thumb against the lower tarsus.
Birds should not be held in this grip for longer than
necessary because they will be using additional energy trying to
escape. Still, it is an essential grip to master because it can be
used while extracting birds from mist nets and to photograph
unusual captures for documentation.
8.4. Free Holds
Many waterfowl, raptors, herons, goatsuckers, and gulls are
simply too large to be easily held and banded by one person. In
addition, many large birds have dangerous talons and bills. In
these cases, handling is often done by one person while banding
is done by another.
Swans, geese, and larger ducks can be held on their backs in
your lap, between your inner thighs, between two hands, or under
your arm. The head and neck should always be under control and
point away from you so that the legs are free for banding. You
also will soon learn to point the cloaca away from you. Most
waterfowl are not aggressive, but geese may try to bite and they
have sharp claws. These are strong, slippery birds that will
escape easily if your hold is not secure. Some waterfowl banders
were taught to hold them by their wings, overlapped across the
birds' backs, but many banders believe that this may cause wing
strain. We do not recommend it.
Herons and gulls can be held on the lap or between two hands
as described above; to guard against their sharp bills, a cloth bag
can be placed over their heads. The person holding the bird must
keep the head and neck under control. Herons, loons, grebes, and
others will strike with their bill at your eyes.
Approach raptors in a trap or net from behind. Try to distract
them with one hand until their talons can be safely controlled.
Place them in a secure grip immediately after extraction, covering
the head so they can not bite.
Great care is needed to handle powerful birds of prey the size
of Cooper's Hawks and larger. For birds larger than a Red-tailed
Hawk, we advise having two banders on hand. If only one is
available, a large raptor may be held under your arm or on your
lap with a cloth bag over its head and your hand clenched firmly
around its legs.
8.5. Opening a Bird's Bill
Skill in opening a bird's bill reliably and safely is necessary
for situations such as extracting a tangled tongue or examining
mouth tissue (e.g., for injury or color indicating age or sex). A
bander should be prepared for any size and type of bird, which
will dictate the approach taken. With smaller birds, especially
those controlled using the Bander's Grip, the bill can be opened
with just one hand.
The bander's fingernails are used to pry open bills, so
maintaining some fingernail length is useful. Do not use foreign
objects for prying open the mandibles. A bird can often be
tricked into opening its bill by offering a finger or small stick or
twig to bite. Special care should be given to species with
sensitive Herbst corpuscles at the mandibles, such as ducks and
some shorebirds.
The mandibles should not be opened wider than needed to
accomplish the task. For smaller birds, one person can accomp-
lish this while controlling the bird. With the bird's body under
control in the Bander's Grip, the thumb and index or middle
fingernails of the bander's free hand are pried between the upper
and lower mandibles. As the mandibles are parted, place more
of the thumb and other finger(s) into the mouth and leave in place
as stops. The mouth can then be easily examined. Two people
may be needed to safely control larger birds (see Section 14.1),
which will free two hands for opening the bill. Use the nails of
Figure 3. The Photographer's Grip.
12 North American Banding Council Banders' Study Guide
both thumbs to pry apart the upper and lower mandibles. As the
mandibles are parted, place more fingers between them toward
the commissures (corners of the mouth) and leave in place as
stops. For larger or stronger birds and any whose bill is not easily
opened, hold the head by placing fingers behind the jaw and
gently extend the neck up and forward, then open the bill as
described above.
8.6. Carrying Devices
Banders often catch many birds at once. Because working
near the traps typically prevents other birds from getting caught,
banders of landbirds usually gather the birds up in bags or boxes
and carry them back to a central banding station. This procedure
also allows the birds to settle down and permits the bander to
carry many birds at once. Raptor banders use cans of several
sizes to hold raptors for banding and carrying (as do some
hummingbird banders). The tubes fit snugly over the hawk and
prevent struggling and possible injury. Tubes can be as simple
as two small cans taped together with holes punched in one end
from the inside out to prevent injury. Each species and sex may
require a different can size. Not all birds can be safely held in
carrying bags or boxes, but suitable carrying devices should be
available for whatever type of bird is being banded.
Once all of your carrying devices are filled, always release
any additional birds that have been captured (see double-bagging
below). Release them immediately at the trap or net site.
Remember, bird welfare always takes precedence. On those odd
occasions when you get caught without a carrying device, you can
naturally carry the bird in your hand, perhaps under your shirt
to minimize stress. Avoid carrying birds in shirt or pants
pockets.
8.6.1. Bird bags
Draw-string bird bags are ideally made of thin, soft cotton
(e.g., old sheets and pillow cases) and measure about 15 x 20 cm
or larger, depending on the size of the bird. The bags must be
large enough that you can reach in and extract the bird in the
Bander's Grip. If the whole body and tail of the bird can fit easily
in the closed bag, it is the proper size. It is a good idea to have
an assortment of sizes on hand. Draw-strings must be long
enough that they can be hung on a carrying device and hitched
shut to prevent the bird's escape. If a bag is too small for the bird,
feathers could break or bend, or the wings could be strained from
being held in an awkward position. The seams of the bags must
be finished with no loose threads (e.g., by French stitching).
Otherwise, the bags should be turned inside out to prevent birds'
claws from becoming entangled. Finally, bags of different colors
or prints help you to recall quickly which bird is in which bag,
but do not use very bright colors, which can frighten birds. Avoid
making bags with camouflage-colored material because, if
dropped, they may be difficult to find. Avoid dark-colored bags
when banding in warm temperatures.
Some banders find mesh (zippered) "lingerie" bags to be
superior to muslin because you can see what is in the bag. Birds
can see out of these bags, however, and could be more frightened
by movement during transport and activities at the banding
station. Hummingbirds can be banded and measured without
removing them from the bag. Mesh bags also are cooler and dry
quickly when washed.
When putting a bird into a bag, place your entire hand into
the bag, closing your other hand around the neck of the bag and
the lower arm and wrist of the hand that is holding the bird.
Then gently release the bird at the bottom of the bag and slide
your hand out of the bag, assuring that the bird stays in the
bottom of the bag. Pull the drawstring of the bag shut before
removing your hand from the neck of the bag. With the bird
safely at the bottom of the bag, grasp the neck of the bag and loop
it into a simple overhand knot to prevent its coming open. Take
care that the tail of larger birds is not tied into the closure.
If all cloth bags are in use, it is permissible to carry birds
temporarily in small, brown, paper bags, twisted at the top. They
are not "breathable," however, can't be hung up, and disintegrate
if they get wet, so they are not recommended for regular use. Do
not use plastic bags for this purpose because they prevent
circulation of air.
Never set bags holding birds on the ground (where they can
"hop" away or be stepped upon), in the shelf of a mist net (where
they could place excessive tension on parts of the net and injure
other birds), or hang them in a place where they can be forgotten.
Instead, hang bags on clothes pins (that can have trap or net
numbers on them) on your shirt, on the eye cups of your
binoculars if large enough, or fashion a wire hook to wear around
your neck, wear a necklace made from shower hooks, or simply
keep bags looped safely around your wrists. Special posts for
hanging bags can be installed at convenient spots near traps or
nets, but be sure not to forget bags there.
In some cases, a rush of birds expends the number of bags
available. Under these circumstances, place no more than two
birds of the same species in a single bag, provided space is
ample. One definite exception to this is that you always should
single-bag large or aggressive birds. Jays, grosbeaks, grackles,
chickadees, vireos, hummingbirds, woodpeckers, and raptors
should never be double-bagged, whereas warblers, kinglets, and
nonaggressive sparrows can be double-bagged. Adults may be
more aggressive than normal during the breeding season and
should also be kept separate. Always be sure that the bander is
informed of all bags containing more than one bird, so that they
can be processed first or rebagged separately as soon as possible.
Launder bird bags frequently, as they must be kept clean.
Dirty bags are unsanitary and unsightly. They may also harbor
diseases and parasites and reduce air circulation. Never use wet
bags; they might prevent air circulation or chill the bird inside.
Turn bags inside out and shake out debris. Loosely fill a net
washing bag with bird bags and wash on the gentle cycle in hot
water with a small amount of detergent and chlorine bleach.
Rinse thoroughly, then leave bags inside the washing bag for
drying. After drying, reverse the bags so that the raw edge of the
seams are on the outside.
If a diseased bird is caught, it is extremely important to put
that bag aside until it has been washed and disinfected. Also,
take the time to wash and disinfect your hands before handling
other birds. Moist towelettes in your field kit make good
antiseptic cleaners. Small bottles of antiseptic lotion also are

North American Banding Council Banders' Study Guide 13
available.
8.6.2. Carrying boxes
Small carrying boxes, usually with two to several compart-
ments, are sometimes used to store birds prior to banding (Fig.
4). While more than one bird can be stored in one compartment,
follow the same guidelines as for double-bagging (i.e., don't mix
aggressive species, process double-boxed birds first, and separate
to individual bags as soon as possible).
These boxes are typically equipped with a denim sleeve or
piece of thick rubber with a star-shaped access hole cut into it.
Boxes should be made partly of peg-board for air circulation. The
floor should be made of wire mesh large enough that excrement
does not build up but fine enough that feet can not poke through.
Larger, compartmentalized, holding boxes ("hotels") come
in handy back at the banding station when you want to transfer
birds to a more comfortable environment but have no empty bird
bags. Try to avoid placing more than one bird in a compartment.
Do not place birds with powerful bills like jays or woodpeckers
in the holding box, as they can tear the screen dividers and kill
smaller birds. Hotels also allow you to sort the birds by species
prior to processing and even function well as temporary shelters
for birds recovering from hypothermia or other stress.
9. CAPTURE TECHNIQUES AND
EXTRACTION METHODS
Various devices and techniques are used to capture birds.
Among the methods used, only mist nets, because they are used
so prevalently to capture a great variety of birds, are discussed
in detail in this guide. For information on other techniques,
consult the taxon-specific manuals of the NABC as well as the
resources listed under "Trapping, Netting, and Band Techniques"
in the "Selected Bibliography," particularly the Bird Banding
Manual (1991), McClure (1984), or Bub (1991).
Traps and nets perform differently and offer banders different
opportunities for catching birds. In choosing a capture device,
consider your target species and your objectives. For example,
if you want to assess natural body weights, do not use baited
traps. If you want to catch insectivores, use nets. If you want to
catch ground-nesting birds, consider nest traps. Does your study
require standardized effort? If so, do not use attractants, such as
baits or water drips, which are hard to use in a standardized
manner. Will your target species be caught more efficiently if
the trap is at ground level or higher up?
Most baited traps attract seed-eating birds only. Their success
depends on the availability of wild food, the types of birds in the
area, the time of year, and the type of bait being used. For many
birds, the food offered in a trap is worth the "price" of being
handled and individuals may become "trap-happy," returning
again and again to the same baited trap.
Mist nets and Helgoland traps generally provide better (but
by no means complete) indications of the total numbers and kinds
Figure 4. A carrying box (made of wire mesh and peg board) with three compartments (top and bottom views) and a rope carrying handle. Top
shows access hole made of rubber with star-shaped cut and weighted flaps that drop over holes. Bottom shows wire mesh construction.

14 North American Banding Council Banders' Study Guide
of birds in an area than do baited traps because they are less
selective. Netting, however, must be conducted with care and
requires close supervision and intensive training.
Nets and some traps can be ordered from reputable suppliers.
Most traps are home-made. Necessary materials for trap
construction are readily available from hardware stores. Traps
are generally made of 1.25-cm welded or plastic mesh or
hardware cloth. A detailed list of materials is given in the
Banding Manual.
All of the most common general-purpose traps are described
in the Banding Manual and Bub (1991) and McClure (1984).
Literally dozens of trap types exist, however, and numerous
special-purpose traps for specific species, nesting birds, night use,
etc. Because traps are usually taxon-specific, they will be
discussed in each separate group's manual, but since mist nets are
used for essentially all groups, and since even a hummingbird
bander may catch a raptor, details of mist net use will be included
in this Banders' Study Guide.
9.1. Setting Up and Operating Mist Nets
Mist nets capture a wider variety of species than most traps
but they require more training, dexterity, skill, and experience
to use safely. The extraction of birds entangled in mist nets often
requires extreme patience. Assistants should be evaluated for
their suitability of temperament.
The nets are large panels of either nylon, terylene (polyester),
or monofilament mesh. Horizontal shelf strings (trammels) of
thicker, stronger thread are woven through the mesh at the top
and bottom of the net and at equal distances in between. Each
shelf string ends in a loop designed to fit over a pole. The net is
strung between two poles, which hold it upright and taut. The
shelf strings form pockets of netting and tether the mesh at the
top to prevent the net from blowing down to one end during high
winds (Fig. 5). Birds fly into the net and usually drop into the
pockets and become entangled.
Terylene (polyester) nets are preferred by some banders
because of their strength, durability, and design even though they
are more expensive and harder to obtain than nylon nets.
Because they have more vertical meshes in the netting, good-
quality nets have deep pockets, allowing them to catch and retain
more birds than cheaper nets.
Mesh size is measured by stretching the net diagonally and
measuring the diagonal distance of a square. Different meshes
have different catching efficiencies for each species, so mesh size
must be chosen carefully to suit your study and should be reported
in any publications. In general, the size of the target birds
determines which is the most appropriate mesh size to use. A
24-mm (1-inch) mesh is used to catch hummingbirds; 30-mm
(1.25-inch) mesh is used to catch small to moderate-sized birds
(e.g., kinglets, wrens, warblers, sparrows, and thrushes); 36-mm
(1.5-inch) mesh is used for larger songbirds—flickers, jays, small
hawks, owls, and many shorebirds; and 60-100-mm (2.5-4-inch)
mesh is used for larger hawks. If a small bird gets caught in the
larger-mesh nets or in a monofilament net, it is apt to get badly
tangled; therefore it should be removed immediately and with
care. Some banders suggest that monofilament nets be used only
by persons who have mastered the special mist-netting techniques
needed (for more information, see Section 13.1.1).
Figure 5. A mist net ready for operation (from Lowe 1989).
North American Banding Council Banders' Study Guide 15
9.1.1. Problems unique to the mist net
(1) Nets catch on everything and then tear. To reduce snag-
ging, avoid clothing with buttons, zippers, and velcro. Do
not wear exposed jewelry, especially ornate rings or
earrings and wristwatches. Be careful that hats, eye glasses,
and binoculars do not become entangled in the mesh. The
button on top of most baseball caps is guaranteed to get
caught and should be removed. It is best to set the net so
that the bottom shelf is off the ground; otherwise, birds that
get caught in the bottom shelf get hopelessly entangled in
sticks and vegetation, drowned in puddles, dew-soaked, or
attacked by ants, and they can hurt themselves by flapping
on the ground. If nets are set over water, it is especially
necessary to have them off the water level. Be aware of
incoming tides, if relevant.
(2) Nets can catch animals other than birds. Bats are fre-
quently caught in the evening and before sunrise. Because
bats can inflict a painful bite and may carry rabies, they
should be handled carefully. Try dumping them out of the
pocket; however bats cannot fly from the ground, so they
will need to be offered a stick to grasp and placed in a tree
if you use this method. If this does not work, grab the bat
firmly by the back of the neck with one hand while the
other works to free the netting. Do not be intimidated by
their snarls and horrific grimaces. Release bats away from
the net site.
(3) Nets can catch humans too! Caution the public viewing
your banding operation and post signs if necessary. Beware
of people carrying umbrellas, walking sticks, fishing rods,
and other items that can tear nets. Holes in nets not only
reduce your catching efficiency, they also increase the
probability of severely tangled birds.
(4) Nets will catch large insects, especially beetles, dragonflies,
and bumblebees, which cannot always be removed alive or
unharmed because they get the mesh caught up in their
legs, mandibles or wings. The best way to remove a badly
entangled insect is to crush it first, quickly and humanely
between two rocks, sticks, clothespin, or fingers, or slice off
the head.
(5) Birds and other animals in nets attract predators, which can
injure birds and damage nets.
9.1.2. Setting up and taking down mist nets
Select a suitable site before setting up a mist net. Depending
on the group of birds you are catching, you will need to consider
likely movements of birds, vegetation structure and height,
accessibility, proximity to a processing site, slope, type of ground
surface, possible depth and type of water, wind, and public access.
In salt water locations, tidal stage is an essential aspect. If the
site is in vegetation, cleared space of 1 m should be created on
each side and at each end of a net to allow proper access. Setup
is easiest with two people.
Various types of poles are used to support mist nets. The
most common type – electrical conduit – is the cheapest. Conduit
is sold in 3-m (10-foot) lengths of various weights. The lightest
weight (0.5-inch, thin-wall EMT) is frequently used for mobile
stations that are set up and taken down often. Heavier conduit
may be set over rebar supports or inside pipes set into the ground.
Poles that come apart in sections also are used, making set up and
take down easier for one person.
Nets that are intended to catch larger birds, or are in an area
where these birds can be expected to fly into the nets, can have
rubber bands at one or both ends of the net. Rubber bands are
usually cut from inner tubes of auto tires in 7-10 mm (0.25-0.5
inch) widths. Bands are better cut with a paper cutter than with
scissors. These are then tied to the ends of the loops on the net
by slipping one end through the net loop and pulling the other
end of the rubber band through the first end. The rubber loop is
then placed over the pole and works to prevent large birds from
bouncing out of the net. Rubber loops can also minimize the
potential for injury to fast-flying birds that strike the net. Using
rubber bands on the trammel loops lends stretchability to a net,
allowing a bander to reach over a net to remove a bird on the
opposite side; or to lift up the bottom shelf of a net to duck under
the net to get to the opposite side.
General set-up procedures for single-piece net poles.— Many
variations exist. The following is a generalized description of
one way to set up, furl, and store a mist net. Methods vary with
different banders and may need modifications because of local
terrain.
(1) Carefully remove the net from its storage bag and find one
set of shelf-string loops. This process can be facilitated if
a shower curtain clip is used at each end of the net to
prevent commingling of loops from both ends. A white
loop usually identifies the top shelf string, which is usually
doubled and tethered with small knots spaced at regular
intervals. With one set of loops over the fingers of one
hand, carefully hold all of the mist net securely under one
arm.
(2) Separate the loops, one by one, and arrange them in
sequence so that no shelf strings are crossed. Remember,
the white loop (the tethered top-line) goes on top.
(3) Slip the loops over one net pole, keeping the white loop on
top and the other loops in sequence. If soil conditions
permit, stick the pole in the ground to a sufficient depth to
support the pole upright. Support the pole with two guy
lines.
(4) One person holds the first net pole while the other walks
toward the other end of the net lane, gradually letting the
net out. Never let the net touch the ground or vegetation;
it will entangle with sticks and leaves.
(5) Once at the other end, separate the loops one by one
sequentially, ascertaining that no twists or tangles exist in
the shelf strings. With the loops in order, place them onto
the second pole.
(6) Pull the net taut and sink the second pole securely into the
ground. A second person is useful here to place the pole
securely. Guy it properly and adjust the tension of the net
if necessary. The top shelf should be taut, not slack. Check
to make sure that the poles are vertical, not leaning inward
or sideways. Leaning poles provide uneven tension and
strain nets. New nets are apt to stretch after a few days, so
the poles will need to be repositioned periodically to keep
the net taut. Humidity also can cause nets to stretch and

16 North American Banding Council Banders' Study Guide
sag. Learn to tie proper knots (e.g., clove hitch and half
hitch) when guying the poles so that repositioning is simple
(Fig. 6). If using fairly thick guy rope, a slip knot can be
used and quickly adjusted.
(7) If the net is not twisted, it can be opened. Unless you are
tall, you will need to use a stick to raise and lower the top
shelf string. Lift the shelf string's loops away from the pole
(to avoid abrasion and wear) and move them up or down
the mist-net pole to adjust the net position. Do not push or
pull the shelf strings; they may break. As a general rule,
pockets should be about 10-15 cm (4-6 inches) deep; this
usually requires a spacing of about 45 cm (18 inches)
between loops. The other panels are opened accordingly;
no pockets should overlap and no tension should be placed
on the vertical panel supports of the net. If it is breezy, the
net should be set even more loosely or birds will bounce out.
Figure 5 shows a mist net properly set. When the net is
opened, the bottom pocket should not be low enough to sag
and touch the ground with a bird in the bottom pocket. Test
this by throwing bird bags into the bottom pocket.
(8) Untended nets should not be left unfurled or left open
overnight, especially in an area frequented by deer. Before
closing a net, remove any debris (twigs, leaves, insects).
If you wish to leave the net on the poles, lower all upper
shelf strings to where the guy ropes attach to the pole,
leaving the top panel about a foot above the rest. Raise all
the lower panels up to meet the other loops, still keeping
the top pocket open. Grasping the shelf strings near the
loops, twirl the entire net so that the lower panels are furled
into the pocket of the top panel. Then lower the top shelf
quickly to meet the others and give the whole net one or two
extra furls. If it is to be left in place for one or more nights,
many feel that it is best to tie the net shut with ribbon or
flagging tape at either end and at two or three places in
between. If half bows are used to tie the ribbon or flagging
tape, the knot can be undone quickly with one hand.
Without these ties, the loops and shelf strings can separate,
particularly if a guy line on a pole should loosen or fail,
which often happens. Even a small separation in the loops
can open the net at one end sufficiently to trap birds (or
bats) by accident. Moreover, ties guarantee that the nets
will never become unfurled by a gust of wind or jostling by
passing animals. This furling technique is fast and ensures
that no birds are caught by accident. It also results in a
furled net that is easy to reopen. The furled net can also be
"locked" by hitching the top loops down over the others on
the pole.
(9) To reopen a net, simply undo each tie. The ties can be
stored between one loop and the mist-net pole to keep them
from blowing away or getting misplaced. Carefully raise
the upper shelf string on both poles without placing any
tension on the vertical panel supports. This raising should
cause the lower panels of the net to roll out of the upper
pocket. Arrange all shelf strings as described above. The
net usually unravels itself. If it does not, it could be caught
on itself by a hole in the net, frost clinging to the mesh, a
stick or an insect entangled in the mesh, or a shelf string
or vertical panel support that has broken. When the net will
not spring apart on its own, and if all objects have been
removed from the mesh, use your fingertips to gently tease
Figure 6. Knots used to tie mist-net poles.
Bowline
Clove hitch
Round turn and two half hitches

North American Banding Council Banders' Study Guide 17
the tangle free.
(10) Taking down a net is simply the reversal of the steps taken
to put it up, though several techniques are used. It is a good
idea to inspect the net's condition, noting this information
on the net bag. Some operators close the net but do not furl
it, because they feel it will be hard to put back up again at
a later date. Secure the loops together (in sequence) on the
pole with a shower curtain clip, piece of ribbon, or flagging
tape, or by weaving the top loop several times through the
other loops. Walk toward the opposite pole, gathering the
net into a bag as you go. Make sure the net does not touch
the ground. Secure the shelf strings of the opposite end of
the net in the same manner. If the net is dry, it can be
safely stored inside a cloth bird bag or a plastic bag. If it
is wet or damp, it should be dried before storing to prevent
mildew and rot. Label each storage bag with mesh size, net
length, and condition.
Alternative set-up procedure.—The following method can
be used when it is necessary to set up and remove the nets for
each banding session. Choose one end of the lane as the fixed end
and the other as the moveable end (Fig. 7). This allows adjust-
ments to accommodate variations in net length. You can use 2-
cm (0.75-inch) PVC pipe cut into 30-cm (1-ft) sections—one for
each net, 60-cm (2-ft) sections of 6-mm (0.25-inch) rebar bent
at one end (three for each net), and three 26-m (8-ft) sections of
6-mm (0.25-inch) rope for each net. Install a PVC section at the
fixed end of the net lane (Fig. 8). This should be placed at the
end the least public traffic. The PVC should be installed at a
slight angle away from the direction the net is running (Fig. 8).
This will help maintain the pole in a vertical position against the
tension of the opened net. Install one guy line directly in line
with the net. Pound the rebar into the ground approximately 16
m (5 ft) away from the PVC at an angle facing away from the net
(Fig. 8). Tie a section of rope to the rebar and then make an
adjustable slip knot at the net-pole end of the rope. Measure the
length of the lane using an old net or a net-length section of rope.
Install two guy lines at approximately 120E angles with the net
to form a tripod with the pole at the center (Fig. 7).
With the above net set-up, using this method with Black-
shaw's (1993) improvements involving a grocery store plastic bag
with handles for net storage, with prepared guy lines, and
shackles on the poles, net setup should take no more than 2 min-
utes.
Locate and lay out the poles and guy lines at each end of
the net lane, starting at the fixed end. Insert the pole through the
net loops and then put the shackle on the pole. Set the pole into
the PVC and attach the guy line. Walk to the moveable end
feeding the net out of the bag as you go. When you reach the end
of the lane, place the net, and then the shackle, on the pole.
Usually two net loops are placed below the shackle. Attach the
two guy lines to the shackle, pull the net taut, and slide the
shackle up the pole to tighten the guy lines. Nets stretch out after
opening and will most likely need to be tightened on the next net
run.
Because two people set up a net only slightly faster than
one experienced person, some banders feel it is better for people
setting up nets to split up (rather than leap-frog), meeting in the
middle of the line of nets. Some banders feel that in a standard
netting situation, however, the leap-frog method works well
because the nets can be more easily opened and closed in
sequence (the same sequence in which they are checked).
9.1.3. Frequency of net checking
Do not use nets in the rain, snow, or sleet. At all other
times, consider heat, cold, wind, and sun when using nets. Your
personal comfort as well as that of the birds can be an indicator
that it is too hot, too cold, or too windy. If your hands are too
cold to effectively remove birds, or birds are puffing their
feathers, then it is too cold to be operating nets. If you are feeling
the effects of the heat, or birds are gaping or showing other signs
of stress, then it is too hot to be operating nets. If nets are
exposed to wind that unduly bounces birds held in the netting
(usually also causing wind chill that induces hypothermia), then
it is too windy. Wind speed itself may not be a factor if nets are
set in sheltered lanes where birds may be calmly held in a net not
exposed to the full force of the wind.
Nets should be assessed individually with response to
wind and temperature, as different placements result in different
degrees of exposure. Individual nets that are blowing too much
should be closed, as should nets that are too hot, while nets that
are shaded may be kept open. Part of your judgment should
depend on how the usual temperatures are in the area. In mid-
winter in the northern states or Canada, a still day can be below
Figure 7. Quick net set-up showing fixed vs. moveable ends of net.

18 North American Banding Council Banders' Study Guide
Figure 8. PVC pipe on fixed end of quick net set-up, showing angle.
freezing, but birds there are somewhat acclimated to these
temperatures. Anticipating and responding to deteriorating
weather helps avoid casualties. Birds in nets are far more
vulnerable to inclement weather than birds in traps, because they
are more exposed to the elements and because the netting
disarrays their feathers, interfering with thermoregulation. For
this reason, mist netters especially must be acutely aware of
current and imminent weather. Be prepared to close up before
rain starts.
Once set, nets MUST be checked frequently. Under good
conditions, this usually means every 20-30 minutes, more often
in weather that is hot, cold, damp, or windy. That is, if you
decide on a 30-minute interval, the net round should begin no
longer than 30 minutes after the start of the previous round. For
projects that require the use of nets in more extreme weather
conditions of heat, cold, or light drizzle, nets may need to be
monitored nearly continuously. If nets are shaded, weather is
moderate, and the capture rate is relatively low, some very
experienced banders can check their nets every 45 minutes or so.
9.2. Extracting Birds from Mist Nets
Most birds that fly into a mist net do not struggle immedi-
ately. After a few minutes, the bird will begin to grasp with its
feet and flutter its wings. The longer a bird is left in the net, the
harder it will be to get out. This is particularly true of a bird that
can fit part of its body or the bend of the wing through the mesh.
The longer a bird is left in a net, the greater the risk of death or
injury from entanglement, exposure, or predation. Always
minimize risks to netted birds.
Removing a bird from a mist net is mostly a matter of
common sense and logic. Net extraction must be learned under
the supervision of an experienced person. Much of what is
described here will make more sense after being observed.
Removing a bird is normally a one-person operation; two
people trying to work together are seldom successful. Trainees
should remember this and refrain from giving unsolicited "help"
by holding the bird or net. Different banders frequently have
slightly different ways of extracting birds. In all techniques, the
key to good extractions is a light touch. Part of learning how to
extract birds is learning their habits and getting familiar with
how different species react and become entangled. It takes a lot
of practice to master extraction techniques, but you will even-
tually develop a "feel" for the process. Extraction is generally
easiest if you simply reverse the process of entry. If trainees have
excessive difficulty in developing these skills within a reasonable
period of time, however, they should consider that their time
might be better spent using traps, concentrating on helping out
as bander or recorder, or in other ways. Not everyone has the
dexterity, eyesight, patience, and ability necessary to become
proficient at mist-net extractions.
Approach the net quietly. Approaching perpendicular to
the net reduces the chance of escape by poorly caught birds.
Assess the situation. If many birds are caught, call for assistance
if needed; a whistle or walkie-talkie is a good alternative. First,
look for any bird that is in distress. Is any bird double-pocketed,
caught by one leg only or by the tongue; are large and/or
aggressive species next to small ones or species susceptible to
stress; or is any bird hanging on the ground or in vegetation?
Calmly and efficiently remove these high-risk birds first.
As you work on an entangled bird, remember that the bird
North American Banding Council Banders' Study Guide 19
usually can be backed out easily only in the direction from which
it entered the net. You must first determine exactly how the bird
went into the net. Observe carefully from which side and between
what trammels the bird entered the net, to find the opening of the
pocket the bird made. Because the tail is the last to enter, look
at its position to get a clue about how the bird entered the net, and
remember, that it is virtually always hanging in a pocket on the
side opposite from where it entered. Do not just grab the bird,
tempting as it may be. Start on the side of the net from which
the bird entered; part the trammels and netting loosely and look
into the pocket caused by the weight of the bird. Back the bird
out the way it went in, step by step. A light touch is the most
important prerequisite for all methods. After determining where
the bird entered, several standard procedures are used for
removing it, but different species and different problems will
require improvisation.
Herein, we describe the various methods used to remove birds
from nets. No single method will suffice for all birds because
each flies into a net differently. Combinations of methods will
certainly be necessary at times. In all methods it is often
desirable to know where the strands of net are amongst the bird's
feathers, which can help you decide where to move your fingers
next. The best method is to pull gently at the exposed netting and
see where feathers move on the bird. This will tell you where net
strands are binding, leading to quicker removal. Blowing apart
the feathers to see where net strands are located is sometimes less
efficient, as it tells you only if net strands are present where you
blow. Gently tugging at the strands, causing feathers under
strands to move slightly, can usually reveal strands caught on
other body parts, for instance around the opposite wing. Some
banders still find it helpful, throughout the extraction process,
to blow occasionally on the bird's feathers to reveal strands of
netting. Try both techniques.
9.2.1. Feet-first method
This is the original and, perhaps, still the most widely used
method. It is usually how beginners are taught. It can, however,
be somewhat slower than the body-grasp method. An additional
disadvantage is that it requires holding the legs in a Photogra-
pher's Grip, which, if done carelessly, can cause injury or
breakage. It involves the following steps:
(1) Make sure you are working on the side of the net from
which the bird entered. Find a patch on the belly that is
free of mesh and securely grasp the bird by the legs in the
Photographer's Grip, letting the net support the rest of the
bird. Check that mesh is not hidden beneath belly feathers,
either tugging gently on strands or by blowing feathers
apart to determine locations of net strands. If strands are
caught on the bird's thigh, pull them down toward the foot.
If the strands are caught too tightly on the thigh, leave them
for now. If the netting is loose enough, lift the bird out of
its pocket toward you, so that it cannot become more
entangled if it struggles.
(2) Bird's legs are designed so that the toes lock in a closed
position when the bird perches. In many species, the toes
naturally relax and open when the legs are straightened.
With the bird in the Photographer's Grip, gently use the
fingers of your other hand to extend the legs and toes and
"roll" or massage the net off the feet and toes with your
fingers.
(3) Once the legs are free, continue holding the bird in the
Photographer's Grip and try to free the wings. As the bird
struck the net, it folded its wings. Hence, it is the bend in
the wing (the carpal joint) that often goes through the mesh,
at least part way. Sometimes the strands will ride down the
primaries of the wing. In such cases, and often with birds
having extended carpal joints (e.g., such as shorebirds and
terns), it can help to maneuver the primaries through the
strands, then work the strands back over the carpal joint.
The strands will inevitably be tight. Careful use of a
toothpick or blunt probe will help to lift away hard-to-reach
strands. Never force strands over the joint or up the feather
shafts. This can cause tissue or feather damage. If the net
is lying loosely on the wing, or if it is a small bird, the net
can simply be lifted over the carpal joint. Use your best
judgement and disentangle the easiest wing first.
(4) After freeing one wing, decide whether it will be easier next
to remove the net from the head or the other wing. If the
opposite wing is freed easily, then change your hold to the
Bander's Grip so that more of the bird's body is supported
when you start to work on the head. This will minimize the
bird's struggling and make extraction easier.
(5) Removing strands from around the head is usually easy, but
it takes some experience to develop the knack. This step
is likened to the removal of a turtle-neck sweater. The
hardest part is to locate the exact mesh opening(s) of strands
through which the bird has put its head. Once you have
found this, hold the bird in the Bander's Grip and use the
thumb of your other hand to press the bird's upper mandible
down towards the fingers of the hand holding the bird.
With your forefinger of your free hand, hook the net up and
over the bird's head (Fig. 9). If the bird is as large as a
thrush, watch that you do not injure the eyes and that no pin
feathers catch on the net.
9.2.2. Body-grasp method
This method has recently been used by some stations and
found to surpass other methods in ease of learning, reduced injury
to the birds, and speed of removal. It should apply to the great
majority of passerines in mist nets.
(1) Determine which side of the net the bird entered. Find the
opening of the pocket caused by the weight of the bird.
(2) You have three choices at this point. (a) If the bird's body
is accessible, without any netting in the way, and the net is
free of the back and head, just put the bird into the Bander's
Grip, with (if using your left hand) your palm against its
back, your index and middle fingers on either side of the
neck, the right wing held with your thumb, and the other
fingers curled around the body and the left wing (Fig. 10).
Then proceed to step #7 below. (b) If the net is tangled
around the head and wing, slip your fingers over the body
and under the wings. This usually involves your thumb
around the breast and your fingers over the bird's back,
around its sides and under the wings, and carefully around

20 North American Banding Council Banders' Study Guide
the curve of the body. Make sure no net is under your
fingers—between your fingers and the bird. (c) If the body
is too tangled for a body grasp, then another method must
be used.
(3) With the body now firmly secured, back the body out of the
net to expose at least the bend of one wing. Remove the net
from that wing. Flick net threads from the bends of the
wing, working from the underside. Generally your thumb
should be placed under the thread(s) on the underside of the
wing and your forefinger placed on the outer bend of the
wing as a fulcrum over which to flick the threads. Often
it is helpful at this stage to pull gently on the exposed
portions of the still-tangled threads to free them or to see
where they are caught.
(4) When one wing is free, slip your fingers around it, securing
it against the bird's body. Next, pull remaining loops from
around the neck, working from the back of the head forward
in the manner of removing a T-shirt.
(5) Remove the net from the other wing, as above.
(6) The bird now should have been gradually put into the
Bander's Grip.
(7) Pull the bird up and away from the net, and it will usually
free its own feet in an effort to fly. If the toes are caught,
untangle them by pulling strands gently. You will notice
that if the heel joint is straightened out, the bird's toes have
a tendency to relax, so the netting can be more easily
removed. If the bird is clutching the net firmly, extract the
feet by (a) first freeing the opposable toe or hallux (the
"thumb") by sliding the threads over it and lifting it away
from the other toes; (b) straightening out the other three
toes out with your fingers; and (c) sliding the netting over
the toes with repeated strokes. Wetting the toes helps in
difficult cases.
This method, when administered with a nimble hand and a
light touch, is gentle to the bird because the only firm contact is
on the sides of the neck and body. It is also a time saver because
feet usually untangle themselves. The method works best with
a recently caught bird that has had little time to entangle itself,
but is applicable to most birds.
9.2.3. Tricky extraction situations
The procedures outlined above have many variations. If you
run into any kind of difficulty, ALWAYS get help from a more
experienced bander. Sometimes you may reach a mental block
when working on a difficult bird for a long time, and even an
equal or inexperienced bander may be able to help. Do not let
your ego get in the way of a bird's safety.
If the bird has spun in the net, unwind the spin with your
fingers as much as possible as you begin the extraction and
continue unwinding as you work. Often this needs to be repeated
several times for badly spun birds.
If at first you cannot find the belly or tail free of netting, or
cannot decide from which side the bird entered the net, free the
feet and legs to give you a clue. Sometimes a small bird will
enter from one side, struggle, make it part way through the
strands, then flutter and re-enter from the opposite side. Freeing
the legs and feet may make it easier to see the bare belly patch.
Beware of strands concealed under body feathers of the belly and
be equally aware that if the strands are caught high up on the
bird's thigh, they may appear to be covering the belly. Use gentle
tugging at net strands to reveal complexities of entanglement.
If the bird is caught in one pocket and weights the net so that
it hangs down to overlap another pocket, it could become
"double-pocketed." That is, its head, legs and possibly wings
could be entangled in two pockets. Remove the strands from the
outer pocket first, then deal with the pocket into which the bird
actually flew.
If the bird has gone through the net at a hole in the mesh, be
patient. It may have flipped up and around another shelf string,
twisted, become double-pocketed or any number of other twists
Figure 9. Removing mesh from around a bird's head.
Figure 10. Removing a bird from a mist net using the Bander's Grip
(from Spencer 1992).
North American Banding Council Banders' Study Guide 21
and flutters. This can be the most dangerous extraction situation.
After extracting a bird from a hole in the net you will appreciate
the importance of frequent net repairs.
During most extractions, switch to the Bander's Grip as soon
as possible because the bird will begin to struggle and flap more
when it feels itself being freed. When extracting a raptor, grip
the legs securely, being careful to avoid the talons. Because the
toes are large and the raptor will grip at the strands, the feet may
be badly entangled and strands may need to be picked off one by
one.
Some birds have strongly arrowhead-shaped tongues. When
a bird gets caught by its tongue, the strands have slipped behind
the fork at the back of the tongue. Ensure that the bird is not
pulling with its feet at the strands caught around its tongue. If
so, it is often best to immobilize the feet and legs as soon as
possible and extract from those strands, leaving tongue until later.
This will release the tension on the tongue. Hold the bird in the
Bander's Grip and pry open the bill with your fingers (see Section
8.5). At this point, a toothpick is helpful to carefully pull the
threads backward, off the fork of the bird's tongue, and out of its
mouth. This can be a delicate situation and is often left as the
last step of extraction. With badly "tongued" birds, it can help
to gather all of the strands on one side of the mouth, the better
to see the strands actually caught around the tongue. Proceed
slowly and be gentle, all the while keeping the net tension-free.
It is sometimes helpful if one person holds the bird while another
frees the netting from its tongue.
All banders should carry a plastic toothpick, blunt metal
probe, pocket scissors, or nail clippers to help free those hard-to-
get-at threads. A Swiss Army Knife is useful because it contains
both scissors and a toothpick. Note, however, that a good bander
rarely needs to cut strands to extract a bird. Because holes can
pose a risk to other birds that are subsequently captured, cutting
the net is a last resort (e.g., when injury is occurring to the bird
that will only worsen with more handling and/or when the most
experienced bander on hand is unable to quickly free the bird).
Even then, it is used judiciously and sparingly. Students MUST
seek help from more experienced banders before cutting strands
to extract a bird. If you must cut a few strands, be certain that
no strands are left hidden on the bird. It is generally not helpful
if you have to cut more than a couple of strands—then you just
have netting that is not taut (and difficult to see) caught on the
bird.
Finally, if extraction takes a long time (more than a few
minutes) and the bird is showing signs of exhaustion, release it
as quickly as possible, taking only the minimum data, preferably
on the spot. Some banders prefer to release such birds immedi-
ately upon extraction, but then the bird has endured the ordeal
for nothing. Again, trainees MUST seek assistance from more
experienced banders whenever they are faced with severe
extraction difficulties.
10. BANDING BIRDS
10.1. The Essential Basics
Banders must master bird identification and bird "topogra-
phy" (Fig. 11). Unless you are certain that the species you are
banding has been correctly identified, the bird MUST be released
unbanded. Data for a misidentified bird are worse than useless;
they are misleading and may contribute to false conclusions based
on banding data. Good-quality photographs at some stations are
permitted for subsequent reference by more experienced banders.
Do not be embarrassed to admit that you are uncertain. You also
usually are not permitted to band sick, injured, or domesticated
birds, Rock Doves, nor any of the Gallinaceous ("chicken-like")
bird species like turkey, grouse, pheasant, and quail. These
species are not covered by the Migratory Bird Treaty Act and are
banded with state or provincial bands.
Banding is most useful when accurate age, sex, and various
measurements and plumage descriptions are recorded. After all,
by examining live birds, you can learn a great deal about molt
patterns, color variations of races, differential migration times
between sexes and ages, and so on. It is every bander's responsi-
bility to record as much information as is safely possible from
each bird banded.
Part of being able to correctly identify, age, and sex birds is
becoming familiar with terminology describing different parts
of a bird. You need to familiarize yourself completely with field
guides and with age and sex keys.
All banders of landbirds must own and use Pyle (1997a).
Especially the introductory material in this volume (pp. 1-40)
should be treated as an essential and integral part of this Banders'
Study Guide for the groups covered. Certification of applicants
at the Trainer and Bander levels will presuppose a thorough
knowledge of the material contained in these pages in Pyle.
10.2. Band Fit and Size
Every band size is designated by a number or a number-letter
combination, ranging from 0A to 9C. Like shoe size, this
number is for identification only; the actual size of the band is
measured by its inside diameter. Selection of band size is
naturally governed by the size of the bird's leg. Most species are
banded below the metatarsal joint, but some (kingfishers and
some shorebirds) are banded above.
Generally, a band is said to be a good fit if, when closed
properly, it can rotate and slide freely up and down the tarsus
without slipping over the metatarsal joint or down over the bird's
toes. Loosely fitted bands may slip and so constrict the toes that
the bird cannot grasp with its feet, catch the hind toe between the
leg and the band, or slip onto the metatarsal joint so the bird
cannot bend its leg. A band that is fitted too tightly can damage
a bird's leg. Keep in mind that tarsi are usually elliptical in cross
section and that the band should be fitted to the widest part of the
leg.
Based on the above criteria, the Banding Offices recommend
a certain band size(s) for each species and sometimes even for
sexes within a species. Because leg diameter varies considerably

22 North American Banding Council Banders' Study Guide
Figure 11. "Topography" of a bird, showing nomenclature for feather tracts and anatomical areas (from Pyle 1997a).

North American Banding Council Banders' Study Guide 23
Figure 12. Information as placed on a standard band, labeled for prefix, suffix,
return address, band size indicator, and variable series number (from CWS and
USFWS 1991).
among individuals of some species, however, (e.g., Common
Grackle) the legs of these variable species should always be
guaged (see Section 10.6) to select an appropriate band size.
Record this in your field notes and on the Banding Schedule,
noting why a band of the "wrong" size was used (e.g., "large leg,
hence this band size"). If you accumulate experience suggesting
that a different size band would better suit a particular species,
submit this information to the Banding Offices and publish your
findings. If the band is a poor fit, it should be removed (see
Section 10.9).
10.3. Types of Bands
All standard bands provided by the Banding Offices are made
of a light-weight aluminum alloy. Butt-end bands are designed
for general use on most species and are available in all sizes and
are routinely issued unless another type is specifically requested.
Lock-on bands have a special crimping flange to "lock" the
band onto the bird's leg. These are especially useful for raptors,
which may be capable of removing standard, butt-end bands.
They are available in sizes 4 through 9. Rivet bands, available
only in size 9, are used on eagles.
Hummingbird bands are shipped to the bander as a thin sheet
of aluminum with numbers printed on it. Banders must cut out
and trim the bands, smooth the edges, and shape the bands before
use. Instructions are provided by the Banding Offices. Hum-
mingbird bands are denoted sizes X, XA, and XB. A special
authorization is required to band hummingbirds; bands will not
be sent unless the banding permit has this authorization. See
manual for banding hummingbirds.
Depending on circumstances, you may require bands made
from harder metals, different alloys, or made to other specifica-
tions. Some banders have found that aluminum bands are not
suitable on birds that frequent saltwater habitats. Birds with
strong bills (e.g., raptors, grosbeaks, cardinals, and crossbills) can
remove a band, so bands made of stronger metals (e.g., stainless
steel) may be used for these species. Contact the Banding Offices
to obtain these specialty bands. Often you will be required to
cover the production cost of specialty bands. Uncommonly used
alloys and their properties are listed in the Banding Manual.
Markers, of whatever metal, other than the official, numbered leg
band must be authorized before use and are not normally supplied
by the Banding Offices.
Colored, plastic leg bands are available from commercial
suppliers (see Appendix B). Two (exceptionally, three) color
bands can be put on the same leg. In some cases, for example
small flycatchers and swallows, the tarsus is so short that only
one band (either plastic or metal) may be used per leg. Two
metal bands should NEVER be used on one leg, as the bands
wear against each other and become razor sharp. You must
record which colors are used, in which combinations, and on
which leg (right or left). A special authorization is required for
the use of color bands and other auxiliary markers. These
authorizations are issued on a species-by-species basis for close
observation of individuals.
10.4. The Band Numbering System
Every band has a unique eight- or nine-digit number stamped
on it (except hummingbird bands, which have a letter + 5 digits),
along with the return address of the Bird Banding Laboratory
(Fig. 12) or 1-800-327-BAND. On smaller band sizes (sizes 0-
1A), the address is impressed on the inside surface of the band.
Band numbers consist a three- or four-digit prefix and a five-digit
suffix. The prefix is a combination of a variable series number
and a band-size indicator; the last digit of the prefix indicates the
size of the band (as in the table in Figure 12). The suffix is the
identification number that, in combination with the prefix, is
different for every bird.
Standard bands are strung in consecutively numbered "series"

24 North American Banding Council Banders' Study Guide
Figure 13. The leg gauge.
or "strings" of 100 on wire, plastic tube, or string. For example,
a band string may contain bands with the numbers 1201-56501
to 1201-56600. The final digit of the prefix indicates that the
bands are of any one of the four size one bands (1, 1C, 1B, or
1A). The first band of every string carries the final two digits
"01" while the final band always ends with "00" of the subsequent
hundreds digit. For most effective record-keeping, all bands of
a series should be used consecutively.
10.5. How to Order Bands
Only Master Permit holders may order bands from the
Banding Offices. When ordering hummingbird or specialty
bands, banders must include a statement of need along with their
permit application or indicate previous authorization. You should
order as many bands as needed to last the duration of your band-
ing project, or 6 to 12 months, whichever is less. It is important
to inquire about any unusual band orders well in advance so that
your banding operation is not left short.
10.6. Banding Pliers and Other Equipment
Following is a basic checklist of the bander's equipment:
• banding pliers (different sizes)
• bands (different sizes)
• device for holding band strings (e.g., film canisters, wire clips)
• band removal tools (e.g., circlip pliers, end nippers, fingernail
scissors)
• wing rule
• thin ruler for tail measurement
• calipers
• balance and weighing containers
• leg gauge
• bird bags
• nail clippers
• crochet hook
• small scissors, pen knife
• magnifying glass or Optivisor
• light source
• black pens and soft pencils
• white out for pen use
• data sheets (e.g., banding sheets, journal sheets, retrap cards,
molt cards)
• binder or file box for data sheets and cards
• clipboards
• nets, poles, and/or traps
• identification and age/sex manuals
• toothpicks
• adhesive bandages
• hand cleaner or moist towelettes
• anti-viral wash
• antiseptic ointment
• container of water (for skulling)
• sugar
• thermometer
Suppliers of banding equipment are listed in Appendix B.
Use a leg gauge (Fig. 13) to determine the correct band size
for species with more than one recommended band size, on
species with variable leg thickness, or whenever you are in doubt.
The thickest part of the bird's tarsus is placed in the slot on the
leg gauge that corresponds to the anticipated band size. The
gauge is then moved up and down the bird's tarsus to assure sure
that a band of that size would fit properly. It is always a good
idea to try two or three slots to arrive at the best fit, which is
determined in properly bored gauges by finding the slot in which
both sides of the slot most closely fail to touch the widest parts
of the leg.
For 0A-1B, bands are small enough that it is more useful to
use the actual band and not a representation of the ideal or
standard band size. The actual band may be at the high end of
the specifications or the low end, but rarely will it be right at the
middle. Any shape other than round also changes how a band
fits. Holding a closed band behind the tarsus and check for space
on both sides of the leg.
Small bands (sizes 0-3) are usually opened and closed using
specially designed banding pliers (Fig. 14), which are available
in a selection of sizes according to band size. They are much
better than regular needle-nosed pliers or other kinds of closing
devices, because they greatly reduce the chance of overlapping
bands and harming a bird's leg. Avoid any closing device with
serrated jaws, as these can scar the band and obscure band
numbers.
Banding pliers usually have a split pin, which is used for
opening the band. The band is placed over the pin, with the seam
Figure 14. North American banding pliers, showing holes in the jaw
and the split pin opening a band.

North American Banding Council Banders' Study Guide 25
Figure 16. Closing a lock-on band using a pair of British banding
pliers (from Spencer 1992).
of the band oriented exactly toward the tip of the pliers and even
with the split in the post so that, when the pliers are opened, the
band opens evenly (Fig. 14). This evenness is important to assure
that the band also can be closed evenly.
A pair of banding pliers has holes in its jaws that fit one or
two standard band sizes. When the pliers are used to close a band
placed in the right-sized hole, the band will close properly
without overlapping or leaving a gap between the ends of the
band (Fig. 15). Never use an incorrect plier hole for the band
size; this risks overlapping the band and crushing the bird's leg.
To be on the safe side, make tracings of the pliers in use at your
station, labeling the hole sizes for the benefit of students.
Large bands and lock-on bands are opened with a pair of
needle-nosed pliers. On lock-on bands, the flange is bent
upwards to be perpendicular to the rest of the band. The band
can be closed using the correct-sized banding pliers or a pair of
needle-nosed pliers, but be careful not to overlap the band. Use
pliers to bend and lock the flange in place (Fig. 16). Larger butt-
end bands can be closed using needle-nosed pliers, but larger
banding pliers and the British banding pliers are even better.
Eagles require rivet bands, and a pop-rivet gun is needed for
application.
10.7. Banding a Bird
Before starting to band, banders must be completely familiar
with the data that need to be collected, and how those data are
to be recorded. If a person is available for recording data on the
data sheets, the bander can dictate the measurements and other
data taken from the banded bird. After correctly identifying the
bird, check both legs for previous banding. Check the list of
recommended band sizes. If more than one band size is
recommended or if it is a species known to have a variable leg
size (e.g., raptors, Mourning Dove, Common Grackle), use a leg
gauge to determine the appropriate band size. If in doubt, use the
larger, especially for ground-foraging species (e.g., towhees, some
sparrows). Use the next band from the string of the appropriate
size. Some banders like to read the band number before banding
the bird to ensure that no band has been missed or lost without
record of an explanation. Even though the band will be read after
it is put on the bird, reading size and band number before its
application precludes the need to remove it if the band chosen
is not correct.
While holding the bird in the Bander's Grip in one hand and
the pliers in the other, place the band over the opening pin on the
pliers. First-time banders usually have a little difficulty in
mastering the banding operation smoothly without finding a need
to set the pliers down. With practice and a little coordination,
however, it is easy to hold the bird, the band, and the pliers at the
same time.
Open the band evenly and just enough that the band will fit
over the bird's leg (Fig. 14). Place the band in the correct hole
of the pliers with the split in the band oriented toward the tip of
the pliers (Fig. 15). Firmly grip the bird's toes with thumb and
forefinger, immobilizing the leg and exposing the tarsus. This
method ensures that the toes cannot be caught in the pliers while
closing them. Some banders prefer to firmly hold the bird's
metatarsal joint (heel) between their thumb and forefinger (Fig.
1). The leg must be supported at the heel joint or you risk its
breaking or dislocation if the bird suddenly struggles. With the
band correctly in the pliers, gently slip it around the tarsus and
carefully close it, watching that you do not pinch the tarsus or
overlap the band. Kingfishers have short tarsi and will be injured
if banded below the tarsal joint. Shorebirds and rails are often
banded above the joint due to mud and erosion.
Open and withdraw the pliers, being careful that the band is
not jammed in the hole, and inspect the band to ensure that the
ends firmly abut and no sharp edges protrude. If a gap exists,
rotate the band 90E and pinch it again in the appropriate hole of
the pliers (Fig. 15). If the band is skewed (ends not directly
opposite each other), correct this by angling the pliers so that the
jaws contact the top and bottom surfaces of the band. The
technique for closing a lock-on band using a pair of British
banding pliers is shown in Figure 16. If you open the pliers and
a band sticks to one side of the pliers, the pliers should be
reclosed. If this happens often, careful application of a fine
emery abrasive can eliminate the problem.
Once the bird has been banded, set the pliers down gently and
quietly onto a cushioned surface so that they are not damaged and
Figure 15. Applying and closing a butt-end band, including the 90
o
rotation (from Spencer 1992).

26 North American Banding Council Banders' Study Guide
Figure 17. A release hatch is set in the wall of a banding lab, just
above the banding table, and just below a window.
the bird is not startled. Then read and record the band number.
Doing this after the band is applied ensures that the band number
is correct and legible and that the bird is not inadvertently
released unbanded.
Band and process the bird as quickly, quietly, and carefully
as possible so it can be released unharmed, having endured
minimal stress. As a general rule, no need exists to handle birds
for more than a couple of minutes. A skilled bander is able to
process a bird completely (including ageing, sexing, and
measuring) in about a minute. One bander, or at most two,
should be sufficient to handle all data collection. Passing birds
from bander to bander in a line with each recording or measuring
one piece of data is very stressful to the birds, and not recom-
mended practice. While it is important to pass birds from student
to trainer, it is not recommended as a routine way of collecting
data.
Your banding area should be a Quiet Zone when birds are
being handled. Trainees should resist their natural temptation
to comfort a bird by talking to it or patting it on the head. Birds
have no clue what you are talking about and are frightened by
strange sounds and quick motions. They doubtless would prefer
to be released sooner than to be held for "soothing." Keep in
mind that, to a bird, even the most well-intentioned bander is a
predator. Try to put yourself in their situation.
10.8. Releasing Birds
As a general rule, birds should be released unbanded if they
have been waiting to be banded for longer than an hour. The
time really depends on temperature, species' behavior, and other
conditions. For example, if it is very cold outside, birds should
be released as quickly as possible to allow them maximum time
to feed. Dependent juveniles should be banded as soon as
possible and must be released at their point of capture. Many
banders agree that it is good to band and release family groups
together and other birds captured together (i.e., flocking species).
Some banders feel that, during breeding season, female birds with
brood patches should be released immediately at the point of
capture after quick processing on the spot. At the least, when on
a net run, it is important to keep track of priority individuals
(such as brooding females) and species and to process them first.
For the release itself, waterfowl can be grasped by both hands
and thrown gently upwards, into the wind and towards water.
Most shorebirds should be taken near the water's edge and
released by lowering them to ground level. When your grip is
loosened, the bird should walk away by itself.
Raptors should be released while facing into the wind and
away from nearby obstacles (e.g., trees or buildings). The bird
may be gently but firmly thrown upwards and away from you (any
large bird with long wings and short legs may be released this
way). Owls at night should be placed in a safe, dark spot; when
their eyes readjust to the dark, they will fly away.
Passerines should never be thrown into the air or released
high above the ground, as they may be unable to fly properly as
a result of cold, stress, or wing-strain. When releasing a small
bird, it is often best to hold it in the Bander's Grip, crouch down
low so they will not fall, and simply open your hand palm
downwards onto your other hand. If the bird tips over, help it
to roll upright, as the ventral-up position paralyzes some birds.
A gentle nudge may aid departure. Some banders like to put
birds into a small, open box, perhaps with a heating pad on the
bottom; they will fly out when ready. Again, be careful not to
combine aggressive birds with other birds.
Stations that band many birds often use a release hatch built
into the banding-lab wall (Fig. 17). After banding and measur-
ing, the bird is gently dropped through the release hatch, where
it lands on a platform. The release hatch is open to the outside
but the entrance back to the banding lab is blocked. Birds usually
fly away immediately, but watch each bird after it has been
released to verify that it is healthy. You must be able to see or
hear each bird as it flies out of the release hatch, which is why
the hatch is normally located beneath a window. The flap door
to the inside also can be used to check for departure.
10.9. When and How to Remove a Band
Bands that are too loose, too tight, or worn down (sharp-
edged or hard to read) need to be removed. Getting a band safely
onto a bird's leg is simple. Getting one off, however, can be dif-
ficult, especially if it is tight against the tarsus.
A band is subject to constant wear and corrosion from the
moment it is placed on a bird's leg. Much of this wear is
produced by the simple action of the band moving up and down
the bird's leg and occurs on the inner surface. Eventually, if the
bird lives long enough, the band will fall off. Corrosion and wear
to the outer, numbered side of a band depends a great deal on the
bird's habits. Corrosion occurs most often to bands of birds
inhabiting saline or alkaline waters and to bands that come into
frequent contact with feces. In time, the band number becomes
illegible and to read it the band must be returned to the Banding
Office to be etched. Bands are etched by placing a very strong

North American Banding Council Banders' Study Guide 27
acid with a metal catalyst on the band under controlled condi-
tions. It is best to report the band replacement on the schedule
and attach the band to the schedule for etching by the Banding
Office. You will be notified of the original banding information
for that bird and of all additional reports of that number, whether
your band is the original or the replacement band. Bands
adjacent to other bands (such as color bands) experience wear
along the edges where they come into contact.
If a band rotates freely and slides up and down without pinch-
ing the tarsus or causing foreseeable injury, it should be left on,
even if it is the "wrong" size. On occasion, it may be better to
slightly "oval" a band that is marginally too small rather than risk
band removal, especially if you are on your own. Band removal
is an extremely delicate process and can itself result in a broken
leg or foot.
Circlip pliers (Fig. 18) frequently are used for band removal
because they have fine, angled tips, enabling their insertion
between a band and a bird's tarsus. When the handles of these
pliers are closed, the tips open, thus opening the band. When
removing a band with circlip pliers, all leverage must be applied
to the band and none to the leg. As during banding, the tarsal
joint must be supported throughout the whole process. The band
and tarsal joint can be held by the thumb and finger, ensuring
that the band cannot move during opening. Insert the tips of the
pliers so that they are on either side of the seam of the band.
Gradually apply pressure to the circlip pliers, opening the band
a little at a time and readjusting the plier tip in the opening band
until it is open far enough to be taken off the leg.
If the band is too tight against the leg to use circlip pliers,
loop two strands of thin, strong wire, such as that on which bands
are strung, on either side of the seam of the band, being careful
not to puncture the leg. Wrap each end of the wire around
improvised handles, which must be unbreakable (not a pencil)
(Fig. 18) or twist the ends around the tips of needle-nosed pliers
opened around the band. Provided the twists are very tight,
opening the pliers further should force the band open. One
person holds the bird, preventing it from struggling, and supports
the leg. The other person pulls the "handles" apart evenly and
simultaneously. Once the band is sufficiently loosened, circlip
pliers can be inserted to complete the task. Wrapping one wire
end around a stationary anchor, such as a nail in a block of wood
(Fig. 18), can be especially useful if you are alone. You often can
pry very tight bands open a little by carefully twisting the tip of
a pen knife blade into the seam.
Some banders favor the use of "end-nippers" in band removal.
An end-nipper's jaws are parted to a distance that will include
the band's length. The jaws' edges at one side of the nipper are
brought to each end of the butt-end's joint. Assure perfect
alignment to the butt-end joint and safe distance from the tarsus.
The end-nippers are then squeezed slowly and the butt-ends of
the band will part to about 1-2 mm. This will be sufficient for
removal of smaller bands. A repeat of the above may be
necessary. Larger bands will be opened enough for further
parting with pliers or fingernails. This method avoids much of
Figure 18. Band removal using (A) circlip pliers, (B) wire and circlip pliers (adapted from Lowe 1989), and (C)
a wire, stick, and nail (adapted from Spencer 1992).
28 North American Banding Council Banders' Study Guide
the difficulties of supporting the pressures applied in other
removal methods.
Some banders favor the use of cuticle scissors or other fine-
pointed scissors for removing the bands from small passerines.
Cuticle scissors are useful in that the tips are recurved. Insert the
tips into the band with the curve pointing up at the band and not
down at the bird. Carefully open the band, readjusting the
scissors as necessary until the band can be slid off over the tarsus.
After the band is removed, determine whether to destroy or
reuse it, depending on its condition.
10.10. Banding Nestlings
Banding nestlings is important to many research projects, as
it provides useful recovery information on age and place of origin.
It can lead, however, to nest failure or premature fledging if done
improperly. If possible, avoid banding nestlings in the morning
or during cold or wet periods. Place all nestlings from one nest
in one bird bag.
Do your best not to reveal a nest to predators. Look for avian
predators when approaching the nest. Jays and crows may be
attracted by parental alarm calls and rob the nest after you leave.
To reduce the risk of mammalian predation, use a round-about
way of getting to and from the nest, go late in the day so that your
scent is not trapped in dew on the grass, and leave by a route
different from that used to get to the nest so your trail does not
dead-end at the nest; dead-end trails are apt to give the nest away
to mammalian predators. Wearing rubber-soled shoes or boots
helps prevent a human scent trail. In all instances, minimize
your time at the nest; simply band the birds, record any necessary
data, and leave the area immediately.
Nestlings should be banded only after their legs are nearly
adult size. If they are banded too early, the band may not close
properly over the enlarged, fleshy leg (for small passerines,
shorebirds, and many other birds, leg diameter decreases as the
nestling grows). For larger species with heavy legs that increase
in diameter as the nestling grows, the band may slide over the
toes and prevent the foot from developing properly. Also, the
parents may mistake the band for a fecal sac and throw it, along
with the nestling, out of the nest. To minimize further the chance
of this happening, dull the finish of new bands with a couple of
dabs from a magic marker. Avoid using white color bands on
nestlings; these are readily mistaken for fecal sacs!
Young birds occasionally leave a nest prematurely because
of disturbance. Early departure of nestlings can be fatal,
particularly if the nest is over or near water. Banders must be
cautious during a first-time approach to a nest believed to contain
young and be prepared to withdraw at the first sign of possible
premature fledging. In general, do not attempt to band nestlings
that look old enough to explode from the nest. Routine banding
of nestlings should be timed to take place before young are
capable of leaving the nest but, of course, after the legs are
hardened enough to hold the proper adult-sized band. The Bird
Banding Manual: Volume II (Canadian Wildlife Service and U.S.
Fish and Wildlife Service 1977) provides the appropriate ages for
banding nestlings.
When removing nestlings, watch that they do not grasp the
nest or nest lining. Check the toes and tarsi before pulling too
hard. Count as you remove young to ensure that you put back
as many as you took out. Some banders recommend that you stay
at the nest while banding so that the parents do not come back
to an empty nest. If you are working in a colony, however, it is
better to leave one young in the nest and move away to band the
rest so other birds are not disturbed. It is all right to leave the
nest empty for 5-10 minutes; parents almost never desert
nestlings that easily. It may be better to band young away from
the nest to reduce the chance of predation, but work quickly,
being sure that you have all necessary banding equipment ready
for use prior to removing the young.
Use the Bander's Grip when handling nestlings unless they
wriggle a lot, are very tiny, or have short tarsi. In these cases,
the reverse grip can be used. Large nestlings (crow-sized or
larger) can be held in the lap and covered with a cloth, but be
sure they do not wriggle away.
Replace all young and do not leave them hanging out of the
nest, even slightly. Ensure that all bands are tucked away below
the nestlings and out of sight. Cover the nest with your hand or
a cloth until the nestlings settle down. If some do fledge early,
it is normally better to leave them and retreat from the nest site.
11. PROCESSING BIRDS
11.1. Ageing and Sexing
Banders have a unique opportunity to examine live birds
closely, and this opportunity should not be wasted. By closely
observing many individuals of a species, you may begin to
recognize age- or sex-related features that have not been noted
previously. These observations should be recorded and published.
The Banding Offices formally recognize and recommend the
use of Peter Pyle’s (1997a) Identification Guide to North
American Birds, Part 1 as a source of ageing and sexing criteria
for passerines and "near passerines," including doves, owls,
swifts, hummingbirds, and woodpeckers. At the time that guide
went to press, all criteria were accepted by the Banding Offices
unless noted in the text. Errata to this guide are published on the
web (http://www.prbo.org/Errata.html). When Part 2 is publish-
ed (covering diurnal raptors and waterbirds), it also will be
recommended for banders. Until that time, the remaining keys
in the Banding Manual and published peer-reviewed references
should be used for diurnal raptors and waterbirds.
Many criteria can be used to age and sex birds. Most of these
will be detailed in NABC's taxon-specific manuals. In general,
skulling is extremely useful for ageing passerines. Feather
condition can tell you much about a bird's age if you have a basic
understanding of the bird's molt strategy. In contrast to old
feathers, new feathers appear smoother, with more color and
sheen. Abrasion wears away the outer edges of older feath-
ers—most noticeable on the tips of flight feathers and tail
feathers. Birds cope with this constant degeneration of their
plumage by molting. Molt is generally confined to two times of
the year; the prealternate (prenuptial) molt occurs just before the
breeding season when the bird molts into its alternate breeding
North American Banding Council Banders' Study Guide 29
plumage. The prebasic (postnuptial) molt occurs after the
breeding season, though nonbreeders may molt during the
breeding season. The pattern of this molt can help age captured
birds. Although feather shape and wear are useful features when
ageing birds, the differences between after hatch year/after second
year (AHY/ASY) and hatch year/second year (HY/SY) feathers
are often subtle. Hence, as an ageing technique, feather
characteristics are usually used with caution and practice.
Sexing birds often can be based on plumage characters and
physiological changes. During the breeding season, many adult
males develop enlarged, swollen cloacal protuberances, functional
in sperm storage and transfer. During nesting, females (and in
some species, the males) lose the feathers on their belly and
develop a brood patch. This clear patch of skin becomes highly
vascularized and a little swollen at the time of egg laying to
facilitate heat transfer from the body to the eggs.
A bird is aged according to the number of calendar years it
has survived. Birds in their first year are designated as hatching
year (HY) birds until 31 December. Beginning on 1 January of
the next calendar year, the bird is in its second calendar year (SY)
even though it may be only 6 to 7 months old. This system of
ageing allows the bander to place a bird in any of the following
age classes:
(1) U denotes birds of unknown age. The corresponding
numeric code is 0. Do not use U from January 1 to the nest-
ing season. At this time of year, the "unknown" category
is AHY as no young have been produced in the current
calendar year.
(2) HY, SY, and TY, respectively, refer to birds in their first,
second, or third calendar year. These age classes are coded
numerically as 2, 5, and 7, respectively.
(3) AHY, ASY, and ATY, respectively, denote birds that are
at least in their second, third, or fourth calendar year and
are coded 1, 6, and 8, respectively. AHY stands for "after
hatching year;" the bird is at least in its second calendar
year. A bird hatched in May will be AHY in January, but
it is still only about 8 months old. AHY is simply a catch-
all code to designate birds that are at least SY, but for
which the age could not be more precisely determined.
The following alpha and numeric codes are used to indicate
sex: M (or 4) = male, F (or 5) = female, and U (or 0) = unknown
sex.
For many species not yet covered in Pyle's Guide, the Bird
Banding Manual provides dichotomous keys for ageing and
sexing. Merely start at the top of the page and work your way
through the series of couplets, always choosing the more
appropriate option, until you arrive at the right age and sex
"answers." The answer is often an age choice, separated by a
backslash (e.g., HY/SY). The slash merely represents the
calendar year change. Choose the correct code depending on
whether the season is before the new year and post breeding (e.g.,
fall HY) or after the new year and prior to breeding (e.g., spring
SY). Hence, a bird of the year that is banded on 31 December
might be aged correctly as HY. If it is recaptured on 1 January,
however, it automatically becomes SY (i.e., it is in its second
calendar year). Likewise, a bird aged as U in December
automatically becomes AHY in January.
Often it is impossible to correctly age a bird unless you know
its sex. Just as often, you'll need to know its age before you can
sex it. It sounds a little confusing, but it is a matter of applying
what you know in a logical sequence.
Be aware of the difference between "useful" characteristics
(e.g., feather shape) and "reliable" ones (e.g., degree of ossifica-
tion). A general rule of thumb is that reliable characteristics
receive greatest priority; useful characteristics are used primarily
as additional clues.
Many physiological processes cause age-dependent changes
in birds and are primarily used as age indicators, while other
processes, such as the development of cloacal protuberances in
males during the breeding season, can be used as sex indicators.
Measured characteristics are most often used to indicate sex.
With the exception of raptors and most shorebirds and humming-
birds, males are generally larger than females. As a general rule,
graded characters (e.g., "less dark," "more pointed") should not
be used alone as criteria for age or sex without a good deal of
experience.
It is extremely important that banders be aware of potential
pitfalls of many of the ageing and sexing criteria, such as those
described in Pyle (1997a) and the Bird Banding Manual. For
example, when used for sex determination, usually a certain
amount of overlap exists in the wing lengths of males and
females. In bird banding, it is appropriate to ensure that our age
and sex determinations are right 95% of the time. Consequently,
birds of "intermediate" wing length are recorded as "unknown"
sex. Too much processing time can be spent on a fruitless quest
to age or sex a bird, delaying processing of other birds, when the
criteria available can correctly ascertain age or sex for much less
than 95% of the birds. In these cases, such data should be
considered research-oriented and taken only when sufficient time
is present to explore these topics.
Virtually all analyses first divide the birds into age classes,
usually AHY vs. HY. While plumage, molt patterns of wing
feathers, feather wear, and breeding condition all can contribute
to the determination of age in the fall, the degree of skull
pneumatization is the most certain in passerines. Because these
patterns of pneumatization can be difficult to discern, we
recommend using a magnifying device, such as a visor that slips
over your head or a suspended magnifying glass, preferably with
an additional light source. Both visor and suspended magnifying
glass leave both hands free. Most banders find them to be useful
tools when learning to skull. Although it is possible in many
species to determine SY, or even TY birds, and we encourage
this—the minimum data should be adult (AHY) vs. young (HY).
If you are not 100% certain of a bird's age or sex, do not
guess! Guesswork destroys the reliability of your data, making
it less useful. It is much better to record it "unknown" and move
on to the next bird. If you have a good hunch though, record it
in the "remarks" or "notes" section of your banding sheet.
Subsequent recaptures may verify or refute your hunch and, in
either case, you will have learned something.
The introductory sections of Pyle (1997a) provide a thorough
treatment of age- and sex-related physiological processes and

30 North American Banding Council Banders' Study Guide
useful measuring techniques. This material (pp. 1-40) is con-
sidered to be an essential part of this Banders' Study Guide.
11.2. Useful Measurements
11.2.1. Wing length
Wing length is a useful measurement for several reasons: it
can help identify species; it is useful as a standardizing feature
when analyzing bird body weights; and in some species it can
help separate the sexes. Before measuring wing length, make
sure the features that constitute the wing tip are not heavily worn,
broken, missing, or growing. If the longest feathers are growing
or broken, you should note this or consider not recording wing
length.
Wing length is commonly measured in two ways. To
measure the wing chord or unflattened wing length (Fig. 19),
hold the bird in the Bander's Grip and lift the thumb away from
the side of the bird's body. The wing then will be accessible for
measuring. Slip a ruler with a perpendicular metal stop fixed at
zero under the wing. Slide the stop of the ruler until it fits snugly
against the carpal joint, with the primaries parallel to and
extending down the ruler. The wing chord is usually read to the
nearest millimeter. Tilting the ruler to a 45E angle to the plane
of the wing keeps the feathers off the ruler, reduces friction, and
increases accuracy. The wing should be as close to a natural
resting position as possible, ensuring that all primaries lie in their
natural alignments. Imagine an axis running from the apex of
the closed wing at the carpal joint to the very tip of the longest
primary. This axis should lie parallel with the edge of the wing
rule. Do not record wing length if you know or suspect that the
longest primary is missing, broken, or in molt and less than fully
grown.
The flattened and straightened wing length (Fig. 19) is
measured in a similar manner except that the wing is pressed flat
against the ruler with the thumb on the wing coverts. This
method removes the natural curvature of the remiges, so the
measurement is longer (about 0.5-2.0%) than the wing chord.
In North America, this measurement is used more often on
museum specimens than on live birds, but is an important
measurement for shorebirds because the literature tends to use
the flattened (or straightened) wing length.
11.2.2. Wing formula
The "wing formula" is determined by (1) the length and
position of each primary feather in relation to the others; (2) the
occurrence, position, and length of notches on the inner (i.e.,
trailing) edge of each primary; and (3) the occurrence, position,
and length of emarginations (narrowings in the vane) on the
outer (i.e., leading) edge of each primary. The specifics of wing
formulae for various species are extremely useful as tools for the
identification and separation of similar species (e.g., Empidonax
flycatchers). Not much is known about wing formulae of North
American birds in general, so further study would be valuable,
especially relation to ageing and sexing by the length of the 9th
or 10th (outer) primary or by the length of emarginations in the
outer primaries.
To measure, the wing should be in its natural, closed position.
A transparent ruler or calipers are useful to take the measure-
ments. Differences in feather lengths (e.g., p6-p5 [the length of
primary 6 less the length of primary 5]) are measured as the
distance from the tip of the shorter feather(s) to that of the longer
(Fig. 20). Emarginations are measured as the distance from the
tip of the feather inward toward the base, to the start of the
flaring of the outer web (the base of the emargination), that is to
the point where the feather begins to widen. As with the
Figure 19. (A) A good hold to use for measuring wing chord; (B) profiles of wing measurement techniques (from Pyle 1997a).
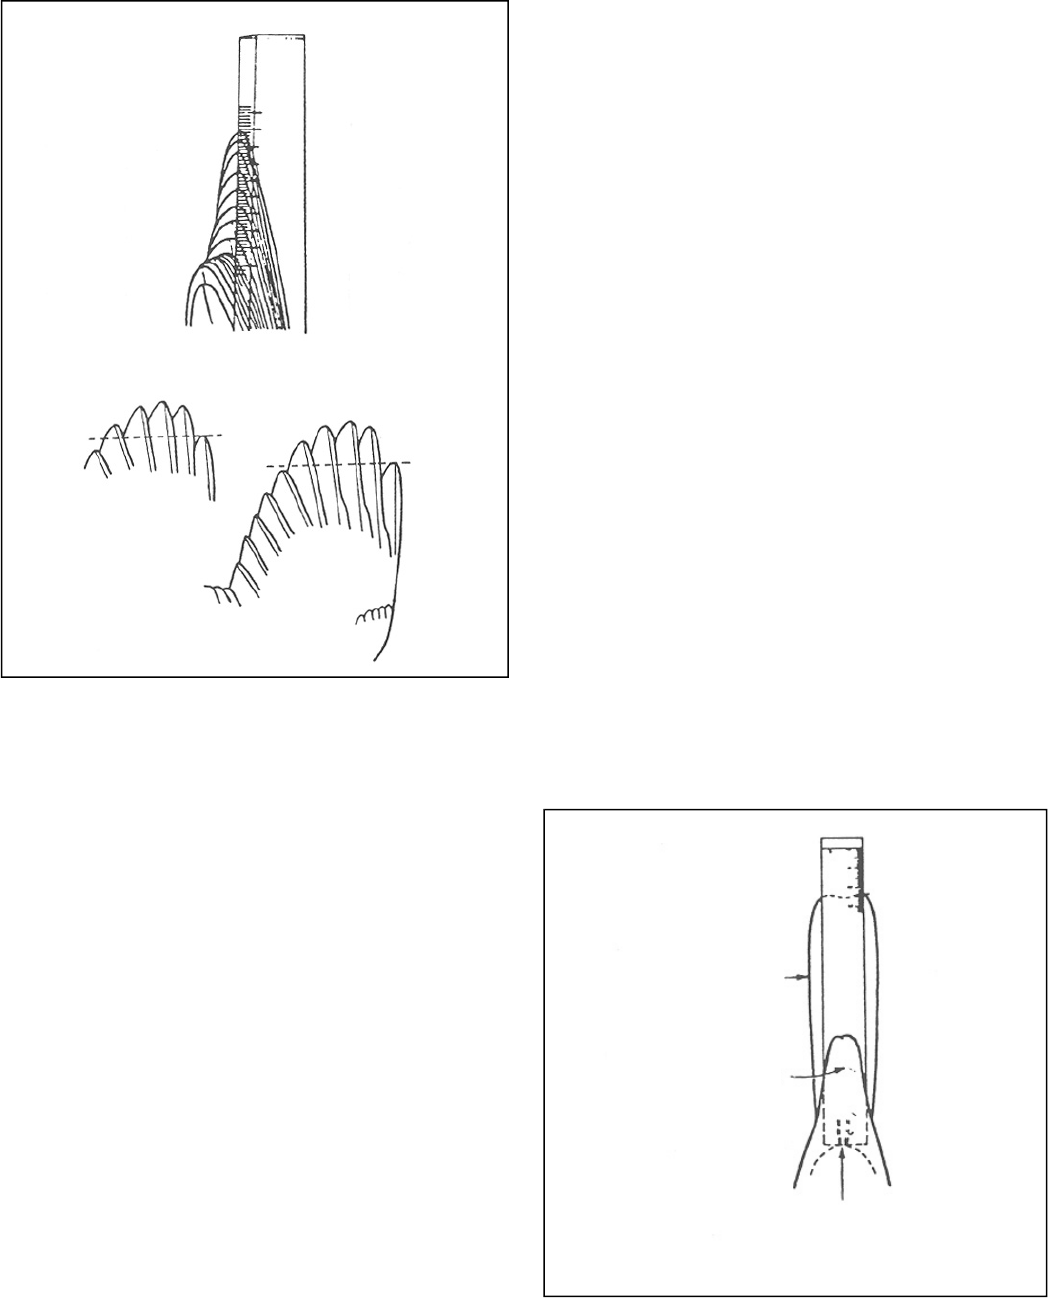
North American Banding Council Banders' Study Guide 31
measurement of wing length, make sure the feathers involved are
not heavily worn, broken, missing, or growing and that the wing
is held in its natural, closed position.
Remiges (wing flight feathers) are numbered beginning at
the carpal joint. Thus, the 1st primary (p1) and the first
secondary (s1) are adjacent. The outermost (distal) primary and
the innermost (proximal) secondary are the highest numbered.
Rectrices (tail feathers) are numbered from the innermost to the
outermost on each side.
11.2.3. Tail length
Tail length is sometimes used for species identification or to
determine age and/or sex. It is defined as the distance between
the tip of the longest rectrix and the point at which the two
central rectrices protrude from the skin. Use a ruler that has the
zero mark set flush at one end. A thin ruler works best. Insert
the ruler between the two central rectrices, holding the ruler in
line with the tail and pushing the end of the ruler firmly against
the feather roots (i.e., the point of insertion of the feathers), or
lay the ruler flat along the underside of the tail and push it gently
against the base of the central tail feathers (Fig. 21). In addition,
the difference in length between the longest and shortest rectrices
(the furca) is useful for ageing and sexing a few species. As with
wing length, do not record tail length if the feathers of concern
are worn, broken, missing, or growing.
11.2.4. Body weight
Birds normally are weighed as the last step of the banding
procedure as it is sometimes difficult to remove a bird from the
weighing "cone" without letting it go. Body weight is most
quickly and accurately measured with the bird confined in some
sort of weighing cup or cone. Pesola scales or triple-beam bal-
ances are adequate, but an electronic balance is best.
Total weight is extremely variable in birds, depending on
time of day; food availability; and whether the bird is migrating,
breeding, molting, or loafing. Although this measurement is not
very useful for ageing, sexing, or identifying species, it is a
quantifiable indicator of the bird's condition. It can be used
separately or in conjunction with how much fat is present on the
bird. To compare weights of different individuals, the weights
ought to be calibrated to body size; since wing chord is a
reasonable indicator of bird size, weights may be compared to
wing measurements. Note that females carrying eggs will weigh
considerably more than normal.
11.2.5. Fat and crop content
Birds store fat as a readily accessible source of energy,
especially during migration. During migration, birds that have
little or no fat probably have just arrived and will need to spend
a few days replenishing their stores. Birds with large amounts
of fat probably are ready to depart on the next phase of their
journey. Fat content is also a good general indicator of the
condition of the bird and is useful for gauging the condition of
sick or injured birds.
Birds store fat in the furcular hollow (or "furculum" where
Figure 20. How to take wing formulae (from Pyle 1997a and Svensson
1992).
p10 < p6
p10 > p5
p 10 . p5
p9-p5 8-13 mm
Alder
Willow
Figure 21. Measuring tail length (from Svensson 1992).
tail feathers
undertail coverts
base of central
pair of tail feathers

32 North American Banding Council Banders' Study Guide
the throat joins the body), lower abdomen, and sides of the body
beneath the ribs, and underneath the wings (Fig. 22). After
banding, blow on the body feathers, parting them along their
natural tracts. You can see easily the fat deposits through the
skin, which appear as yellowish or orangish masses contrasting
with the burgundy-colored muscular areas. With a little practice
and a sense of the depth of an empty furculum, you can gauge the
relative amount of fat on a bird's body (Fig. 22). Fat deposition
is a continuum. Once you understand how that continuum
proceeds, scoring is just a matter of dividing up the continuum
into discrete increments. Considerable variation exists in
assigning fat scores, so if your study depends on consistent scores,
have one person do all this work or ensure that everyone is
trained to the same criteria.
The crop content of raptors and doves is assessed by gently
placing a finger on the furculum. A large lump means that the
bird has just eaten and the crop is full. With experience, you can
easily distinguish among empty, half-full, and full crops. Beware
of the folded trachea; do not mistake this for food in the crop.
Many species of birds lack a crop.
11.2.6. Bill length, width, and depth
Two common methods of measuring bill length require the
use of calipers. One, "bill from nares to tip," refers to the
distance between the anterior (distal) end of the nostril and the
tip of the bill (Fig. 23a). "Exposed culmen" refers to the distance
between the tip of the bill and the edge of the feathering at the
base of the upper bill (Fig. 23b). The former may be the less
meaningful of the two due to variation in the lengths of the
nostrils and bill tip, but it is likely to be the easier and more-
repeatable measurement.
Unless otherwise noted, all references to bill width and depth
in Pyle (1997a) refer to measurements taken at the anterior ends
of the nostrils. To measure bill depth, the caliper jaws should be
perpendicular to the axis of the bill (Fig. 23c). To measure bill
width, open the caliper jaws so they stop at the anterior end of
the nostrils when moved toward the base of the bill (Fig. 23d).
Be sure you can read properly the measurements displayed on the
scale of the calipers. Note also that stiff calipers can crush. To
get a reading, always open, never close, the calipers to the
appropriate point. Use a high-quality tool or a set of dividers to
get the span, and read the measurement from a ruler.
11.2.7. Tarsus and foot length
With calipers, tarsus length is measured as the distance
between the depression in the intertarsal joint anteriorly to the
distal end of the last leg scale before the toes diverge distally (Fig.
24a). Variation in tarsus length among similar species and
between sexes is usually small, so this measurement is not often
taken.
Foot pad length, or maximum toe spread, is useful for sexing
some owls. It is the distance between the edge of the pad of the
hind toe and the edge of the pad of the longest front toe (Fig.
24b). This measurement is most accurate when made with
calipers. Beware of the talons!
11.2.8. Crown patch
Some warblers have crown patches, the length of which is
useful for sexing. Using calipers, measure the distance between
the anterior and posterior edges of the crown patch, along the
medial axis. The feathers must be lying flat in their natural
position, so this measurement should be made before skulling.
Figure 22. Where to look for fat deposits and a representation of increasing fat in the furculum (neck hollow). There
are several systems in use for coding the amount of fat accumulation.
Fat deposition
None Trace Little Moderate Heavy

North American Banding Council Banders' Study Guide 33
The crown patch is often concealed, however, so it may be
necessary to blow on the head to reveal its anterior and posterior
edges.
11.2.9. Rare birds
All banders should be familiar with the species commonly
captured, and they should be aware of any similar, less-common
species and their diagnostic characteristics. When you capture
an unusual or confusing bird, photograph it with a camera with
a close focus function. The bird should be held in front of a
uniform background with a label giving date, location, and the
last three digits of the band number. Be sure to show diagnostic
characters. At the very least, take a side view with the far wing
flared up to show molt and upper coverts. A top and bottom view
would be advantageous. If you do not have a camera, make a
thorough written description covering all the major plumage
Figure 23. (A) Measuring culmen and (B) exposed culmen (from Pyle 1997a); (C) measuring
bill depth and (D) width at the anterior edge of the nostril.
Figure 24. Measuring (A) tarsus length (from Pyle 1997a) and (B) the length of an owl's foot pad.
34 North American Banding Council Banders' Study Guide
areas and color of body parts. Birds that can not be identified
should not be banded, but they should be processed completely
and photographed.
11.3. Parasites
All animals carry parasites. Comparatively little is known
about bird parasites. Depending on available time and personal
interest, parasites can be collected to study how they change with
the bird's age, the seasonal infestation rate, which species
areinvolved, and the geographical distribution of vectors.
Ectoparasites can generally be stored in 70% alcohol, but
interested banders should contact university entomologists for
more specific information on procedures. Most ectoparasites can
be easily removed from live birds, while blood samples are taken
to collect blood parasites. Endoparasites can be obtained from
very recently dead birds.
Encounters with parasites should be anticipated when
working with birds. This is particularly important when reaching
into nests above your head to retrieve nestlings for banding. Blow
fly larvae can be the most obvious of these parasites, but flat flies,
lice, and mites also are common. Most bird parasites are
harmless to humans.
Flat flies (Hippoboscidae) are able to slip in and out among
body feathers. They generally fly only when the bird is handled
and its feathers are ruffled. They give birth to live young. The
larva is deposited on the feathers of the bird, drops to the soil
where it pupates into an adult, and attempts to find a host. When
flying from host to host, flat flies can carry feather lice and mites,
thus serving as dispersal agents.
Feather lice (Mallophaga) are small, soft-bodied, wingless
insects that have specially developed claws for clinging to
feathers and skin. They feed on feather scales, blood, and lymph.
Entomologists suspect that these organisms carry infectious
agents for birds. Healthy birds usually can cope with a few lice
by preening, whereas sick or weak birds often seem to be infested
with them.
Soft-bodied, wingless, blood-sucking lice (Anoplura) also can
be found on birds. Their heads are pointed or tapered, not
rounded as in the Mallophaga, and are known vectors of Typhus
reckettsiae of mammals and birds.
Blow fly (Diptera) larvae will attach themselves to any part
of a nestling, including the inside of the nostrils and ears. The
larvae hang on the birds until they have taken enough blood to
become a sufficient size, then they drop off and pupate. Their
populations are cyclic, so when the flies are at a population peak,
an individual nestling can literally be covered with them and die
from loss of blood.
The most common mites and ticks (Acarina) found on birds
are very tiny feather mites that live (presumably harmlessly)
among the feather bracts and feed on feather scales and detritus.
Ticks are larger than mites. They are eight-legged as adults, and
six-legged as nymphs. As adults, they must take a blood meal
before dropping off their host and laying eggs in the soil. They
are vectors of tick typhus and Lyme Disease. A scaly leg mites
infection might preclude banding.
Flukes (Trematoda) are parasitic flatworms that are internal
parasites, but have been found around the cloaca of passerines.
Many types of blood parasites occur in birds. Sampling blood
is a delicate process that must be carefully demonstrated and
taught to a beginner. Blood sampling also needs to be reviewed
by an Animal Care Committee and requires special authorization
from the Banding Offices. Methods for taking, storing, and
transporting blood samples and smears are detailed in McClure
(1984), but prior arrangements should be made for collaboration
with researchers who can analyze and study the samples. The
red blood cells of birds contain genetic material; a small sample
of blood is invaluable for studies of avian genetics and to confirm
sex when other features do not (e.g., useful for nestlings).
11.4. Deformities
Birds are sometimes encountered that have crossed bills,
deformed legs, feet or eyes, bald patches of skin, pox, and other
afflictions. These may result from disease, the bird's genetics,
or toxic chemicals. Not much is known about deformities, or how
well a bird can cope with various afflictions. Banders should
record deformities on their banding sheets, photograph them (if
possible), and report any significant findings.
12. RECORD KEEPING
The primary reason for banding is to collect useful, reliable
data, and to store these data in a manner that makes them readily
accessible for analysis. Success of the banding and recovery
reporting system depends on international cooperation among
the Banding Offices, all banders, researchers, and the public.
Prompt submission of data to the Banding Offices allows them
to respond immediately to people who submit encounter
information and to banders in need of recovery data. All
necessary forms for reporting and inquiring about banding data
are summarized below and are available from the Banding
Offices.
Every banding operation must keep careful track of all birds
banded and recaptured. In addition, all banders should maintain
a daily journal. Information for a journal would include number
and type of traps or nets used, hours of operation, weather
conditions, names of personnel, a summary of the day's activities,
details of any unusual events, details of any casualties, capture
tally, and possibly a bird list. A sample form is shown in Figure
25.
Each bird's band number, species, age, sex, banding location,
and date trapped must be recorded at the time of banding.
Additional information also may be recorded. Many banders
routinely record wing chord, weight, fat condition, time trapped,
time released, and trapping device. Data on plumage aberrations,
parasites, infections, and descriptions of molt patterns are also
often recorded. Banding records must be kept in a comprehen-
sive, orderly fashion. For example, it is much easier to summa-
rize and report data if records of retraps are kept separate from
the regular banding records.

North American Banding Council Banders' Study Guide 35
Figure 25. Sample of a journal form.
36 North American Banding Council Banders' Study Guide
In the interests of reliable data collection, every bander must
keep field notes (preferably on preprinted sheets) or enter data
directly into the computer program available from the Banding
Offices. Banding sheets ensure that you will be able to verify
your data. In the case of transcription or computer entry errors,
data must be traceable to banders and their original field records.
Every band must be accounted for, either with data or with an
explanation of band loss.
The type and organization of record keeping will depend on
the type of banding being undertaken. For example, when band-
ing only one species, a different band series can be used for each
age/sex combination. Field notes can then be organized by
age/sex category.
12.1. Standard Codes
All codes used in the preparation of banding and recovery
data are detailed in the Banding Manual. Every species is given
its own common name, species number, and alpha code by the
Banding Offices. These are the only acceptable names and codes
for reporting information on a particular species. The four-letter
alpha code generally consists of the first two letters of the first
part of the common name, followed by the first two letters of the
second part of the common name of the species, but exceptions
to this rule are common. If you have any doubt, record the full
species name on the banding sheet and look up the correct code
later. Particularly if you are banding many species, you will find
it extremely useful to keep a list of the alpha codes posted in plain
view at your banding site. The same list should also give the
recommended band sizes for each species.
Banded birds are given a 3-digit status code. The first digit
describes the state of the bird at the time of capture. For example,
a code of three (3) means that a normal, wild bird was banded.
The second two digits are additional information codes. They tell
what was done to the bird in addition to placing a standard band
on one of its legs. For example, was the bird color banded (code
01), or did it receive a state or other address band (code 06), or
was nothing special done (code 00)?
Other codes are used for the remaining data: age and sex (see
Section 11.1), province, regional code, location, station name,
and date.
12.2. Banding Sheets
Since the initiation of computers to analyze banding data in
the 1970s, many data sheets have been devised at different
stations for recording capture data. Widely used versions can be
found in Ralph et al. (1993a) and the MAPS Manual (Burton and
DeSante 1998). Each banding station will evolve its own,
specific techniques and data fields. If you contribute to a
cooperative program, however, you may be required to use
standardized forms. We present here some general forms and
formats with notes on pitfalls to avoid. Consider each of the
following items as a suggestion, unless otherwise indicated.
In addition to the required information (e.g., state or
province, regional code, station name, species name, band
number, age, sex, date, location), all stations should maximize
the usefulness of their data sets by recording other important
information. For example, consider the following. "How aged"
and "how sexed" codes help assure that birds are being aged and
sexed according to the proper features, at the appropriate time
of year. Wing chord is not only useful for determining species
and sex, but also can be used as a standard correction factor for
studies involving bird mass. Body mass itself can be used in
many different studies, as can information on fat and such things
as degree of skull pneumatization. Breeding condition (presence
or absence of a cloacal protuberance or brood patch) can supply
important information about breeding phenology, as well as
information as on age and sex. Trapping time and weighing time
are useful because birds lose weight during the interim; trapping
time itself can be a useful measure of several variables. The
initials of the bander are recorded so any systematic difficulties
in data can be traced back to the proper person and recoveries
ascribed to the original bander. Trap or net type is recorded
because most studies require banding totals to be corrected for
effort, and separate corrections are required for each type. Some
studies may even require recording which individual trap or net
each bird comes from. Most stations include at least an abbrevia-
tion of the species name, as a check against the 4-letter species
code. Molt can be an important variable, telling much about the
age of the bird. A basic system of recording molt in the flight
feathers is to record presence or absence of molt in the primary
feathers or the secondaries (except the innermost three). Molt
of tail feathers is often not recorded, except as a note. You should
always check both wings, because birds often lose feathers
accidentally ("adventitious molt"). More detailed recording of
molt can be done by using a molt card, recording both active molt
using the British Trust for Ornithology's method (Ginn and
Melville 1983) as well as evidence of previous molts (see
Appendix D). The extent of body molt can be recorded by a
subjective determination of none, trace (a few, perhaps adventi-
tious molting feathers), light (involving more than one feather
tract), medium, or heavy. Finally, "Additional Information" can
be used to record brief notes about the bird's age or sex, the
presence of any deformities, molt patterns, and any apparent
discrepancies regarding such things as band size.
Some comments about data sheets: Many stations insist that
only black ball-point pen be used to fill out data sheets, because
pencils can smudge or erase, ink from felt-tipped pens tends to
run, and neither pencil nor blue ink reproduces well when
photocopied. "Liquid paper" must then be used to correct
mistakes. Others feel that liquid paper might eventually flake
off, so one should record over the mistake. All data must be
legible, particularly if someone else will be entering your data
into a computer. Many stations, however, use soft (#2) pencil
without problems in copying and legibility. They contend that
the pencil corrections, through erasure, makes cleaner, more
legible data sheets and reduces the temptation of recorders to
mark over a mistake, rather than erase (or cover it with white-
out).
On the banding sheet, all data are usually right-justified in
the boxes within their own field of columns. Various methods
are used to indicate that data are repeated from one line to the
next. At many stations, a symbol (e.g., a less than (<) or greater
North American Banding Council Banders' Study Guide 37
than (>) sign) is drawn below the repeated data, except where ">"
can be confused for a "7." Ditto marks (") are not generally used
to indicate repeated data, because they are easily misinterpreted
as a number "11." If data in a field are repeated for several
sequential lines, a vertical line can be used to indicate the
repeated data. Do not use a vertical line for only one line of
repeated data, as it can be mistaken for the number "1." Lost or
destroyed bands are recorded as such on the appropriate line for
that band number. Any data recorded on the line following a
band lost or destroyed should be written in full again, even if it
was the same as the previous line containing banding data. It is
a good idea to ensure that either the full name or the appropriate
species code is written out for each entry: it is too easy, when
large numbers of birds are being banded, for a recorder to use the
repeat-line indicator and then accidentally miss a change in
species.
It is imperative that the banding sheets be thoroughly proofed
and corrected. This is usually done by the Master Permit holder,
but students and Subpermit holders can help. Complete proofing
involves confirming that species codes are correct, and looking
for unacceptable age/sex/month combinations, out-of-range
measurements, birds banded with the wrong band size, missing
notes, and so on.
12.3. Recapture Data
Information on recaptures can tell you much about body
weight fluctuations, stop-over periods, site fidelity, annual
survival, quality control for previous captures, and so on. Some
banders suggest that recapture data should be recorded for all
recaptures, even those that have been handled within the previous
24-hour period. Same-day repeats can provide valuable informa-
tion about the effects of handling. Alternatively, other banders
suggest that same-day repeats can be released without processing.
If you do this, make sure that the bird was previously captured
the same day. At most stations, recapture sheets are identical to
the banding sheets.
The most important recapture information is the band
number. All too often, it is the datum to which banders are the
least attentive. Every year, important recoveries are lost because
band numbers are misread, and banders report recoveries of their
own birds because the band numbers were misread. Always read
the band number on the retrap slowly to the recorder. Then verify
the number as the recorder reads it back to you. You will pay
more attention to the number if the recorder repeats it back-
wards. Have another bander look at any number that is in
question on the band. If time allows, and the filing system is
efficient, look for original data while the recaptured bird is still
in the hand, so that any discrepancy can be double checked and
solved.
Some stations use recapture cards with the recapture
information entered, beginning on the second row, and subse-
quent retrap information entered on the next lines. At the end
of each day, they enter the original banding data on the first row
on the card, allowing confirmation of measurements and other
data. This cuts down on the work that must be done at the end
of the season but prevents the use of the data for quality control.
Cards can be filed by band number in a small file box for easy
access and later entered into a personalized version of the
Banding Offices' computer data entry program. The use of
personal computers, however, is more efficient than the use of
recapture cards.
12.4. Banding Schedules
Banding records are reported to the Banding Offices on
"Banding Schedules" (Fig. 26). In the past, data were hand-
written onto these schedules, but the Banding Offices now require
submission of data on computerized Banding Schedules using
their software. This software can produce the schedules on either
MacIntosh (utilizing a program such as virtual PC) or IBM-
compatible PCs; the data-entry program and the Banding Manual
provide detailed, step-by-step instructions for completing the
schedules. Data may be computerized at the time of banding or
entered later from hand-written field sheets. The computerized
schedules facilitate data analyses, provide database management
capabilities, and save the Banding Offices time formerly spent
computerizing the thousands of hand-written schedules submitted
in the past.
You must proof your field data before transcribing them onto
the Banding Schedules. Proof the schedules again to detect data
entry errors before the schedules are submitted to the Banding
Offices. The computer data entry program incorporates several
built-in editing subprograms to help you out, once the manual
checking has been done. For example, while you are entering
data the computer may beep a warning at you when you try to
enter something that is unacceptable. Once the data have been
entered, sorting and sequence checking routines are run to
ensure that all bands are accounted for and that bands and dates
appear in their proper sequence. If any errors are found at this
stage, then you must cross-check them against the original
banding information and make the necessary corrections. Once
this is done, it is a good idea to run the data listing program to
print out the entire data set. This is then proofed against the
original banding sheets as an added check against data entry
errors. After these are corrected, the data file is then run through
an editing program that flags any suspicious data and warns you
of any significant errors that must be corrected prior to schedule
generation. As a final check, the schedule-generating program
runs a final edit to make sure you have corrected the significant
warnings. If no significant errors are detected, the program will
then allow you to print the schedules.
To ease the workload, some large-scale banding operations
enter data directly into field computers, thus bypassing banding
sheets. This can work well, but we recommend that it be used
with caution. We advise that you contact someone who has
worked the "bugs" out of an in-house data entry system before
embarking on it yourself. Manomet Center for Conservation
Sciences (see Appendix A) appears to have a good system in
place.

38 North American Banding Council Banders' Study Guide
Figure 26. An example of a correctly completed banding schedule (from CWS and USFWS 1991).
North American Banding Council Banders' Study Guide 39
Other data entry systems use two people to enter duplicate
data sets. Once all data are entered, a computer program cross-
checks the two computer files and flags all inconsistencies
between the two. This virtually eliminates data entry errors, but
it is time consuming and may be expensive if paid personnel are
used. In the future, easy-to-use "machine readable" banding
sheets may be developed, allowing an electronic scanner to read
and enter data into a computer.
Despite all of your efforts, errors do occur. If schedules al-
ready have been submitted, simply advise the Banding Offices
of errors. Upon receipt of the correct data, the original schedule
will be corrected by the Banding Offices. Do not submit new
schedules.
The Banding Offices may have questions concerning the data
submitted on the Banding Schedules and will contact the Master
Permittee directly to resolve questions. A prompt reply is always
appreciated. After complete processing of your schedules, the
Mater Permittee will receive an evaluation form which informs
you whether your schedules required corrections of non-biological
data and what those corrections were. Corrections for biological
data will be made where required (e.g., age U changed to AHY
in January for most species), but most questions will be sent to
the Master Permittee for resolution.
12.5. Computer verification and edit programs
(MAPSPROG)
Because of the widespread availability and use of personal
computers and the importance of accurate ageing and sexing of
banding and recapture data for use in demographic analyses such
as mark-recapture models, The Institute for Bird Populations, in
conjunction with the Bird Banding Laboratory, has developed a
sophisticated new program, MAPSPROG. Although developed
specifically for MAPS contributors who are banding landbirds,
this user-friendly, windows-based program allows banders to
enter or import raw banding data. It then verifies the validity and
consistency of data in each record by comparing skull pneuma-
tization, breeding condition, molt, plumage, and feather-wear
characteristics to age and sex determinations; it verifies the
consistency of species, age, sex, and location data among multiple
records (spanning multiple years) of the same band number; and
it tracks the rate of errors in the data. To obtain a copy of
MAPSPROG, write MAPS Coordinator, The Institute for Bird
Populations, P.O. Box 1346, Pt. Reyes Station, CA 94956-1346;
or e-mail: [email protected].
12.6. Note For File (Canadian)
In Canada, a "Note For File" is submitted along with the
Banding Schedules. It tabulates and summarizes the numbers
and types of bands used and the species and numbers banded (Fig.
27). If you are using computer-generated schedules, you need not
include a hard copy of the Note for File because it will be
generated by the Banding Office's computer program. Because
of its usefulness, however, you will want to generate the Note for
your own records. The Note for File is used only by Canadian
permittees.
12.7. Recovery Information
All encounters of birds banded by people other than the
Master Permit holder or subpermittees should be reported to the
Banding Offices. Banders also can submit this form on behalf
of members of the public who report band recoveries. The
Banding Offices issue "Certificates of Appreciation" to everyone
who reports bands. This states the original banding information
and gives the name and address of the bander, in case the
observer wishes to obtain additional information.
The following types of encounters are to be reported:
(1) A control recovery is a bird recaptured by someone other
than the master bander and his or her subpermittees.
(2) A foreign recovery is a bird that is encountered outside of
the 10-minute latitude-longitude block in which it was
banded.
(3) Returns are birds recaptured alive in the same 10-minute
block in which they were first banded at least 90 days from
the date of banding. Banders should keep track of these
returns, but reporting them to the Banding Offices is
optional, and only if significant.
(4) If a banded bird was found dead, and it was banded in the
preceding 90 days, within the same 10-minute block, and
before a schedule has been submitted, then the banding data
should be deleted and the band destroyed. "Band De-
stroyed" should be recorded on the Banding Schedule. If
the schedules have been already submitted, inform the
Banding Offices; these records will be deleted from the data
base.
(5) Color-marked birds should be reported to the Banding
Offices. Information to be reported includes the type of
marker and its position, color combination and code, age
and sex if known, date and location of sighting. If a metal
band was on the bird's leg, its presence and position should
be noted even if the band number could not be seen.
If someone has reported a band encounter but no schedule for
that band number has yet been reported, the bander will receive
a notice requesting data for that particular band number and all
unreported bands on that string. This should be returned as soon
as possible to the Banding Offices, but the data still must be
reported on a Banding Schedule.
13. PREVENTING BIRD INJURIES AND
FATALITIES
A "casualty" is defined here as any debilitating injury or
death. Such casualties are rare in any good banding operation,
but birds can be injured or die in even the most careful banding
operation. While the goal is zero casualties, in fact the risk can
never be completely eliminated, if only because predation is
always a risk. Although they are rare, every casualty must be
judged not only as an unfortunate and deeply regrettable accident,
but also as an important learning experience. You never really
get accustomed to casualties, and even the most experienced
banders are shaken by these events.
Banding casualties are usually caused by predators, bander

40 North American Banding Council Banders' Study Guide
inexperience, bad practice, or faulty equipment. A simple
combination of common sense, forethought, and awareness
minimizes the risk of casualties. For example, when approaching
a net or trap, you must quickly assess the risk of injury to the
captured birds. Always remove either the largest or smallest birds
from a trap first (depending on which are fewer in number),
because the larger birds could injure the smaller ones. Priority
also must be placed on removing any bird that seems to be
experiencing difficulty.
The following sections provide of other points that will help
focus your attention on preventing casualties. See also the Mist-
Netter's Bird Safety Handbook (Smith et al. 1999) for extensive
discussion of the material covered in this section. The treatment
or euthanasia of injured birds may be covered by various federal,
state, and provincial regulations. Banders who may encounter
such a situation should consult their appropriate law enforcement
authorities.
13.1. Safety Considerations for the Use of Mist Nets
13.1.1. Mist net selection and use
Mist nets must be of the proper mesh size, of good quality,
in good condition, and monitored correctly. Mesh size is impor-
tant. A small bird in a large-mesh (e.g., > 36 mm) net, particu-
larly if left for any length of time, can get very tangled and
requires considerable expertise in extracting. If your main target,
however, is jay-sized birds or shorebirds, and few smaller birds
are nearby, a slightly larger mesh size would be better. Your
catch will be much higher and you will not have birds flying
along the pocket, not only escaping but also getting caught by
their bands.
The quality of a mist net is likewise important; a main cons-
ideration is material. The choice is usually between nylon and
Figure 27. An example of a Note for File printout.

North American Banding Council Banders' Study Guide 41
polyester (or terylene, as it is known in Europe). Polyester nets
are a little more expensive than nylon (at least in the short term),
but they are finer and stronger, stretch less, are more resistant to
damage by sunlight, and last longer. Because of their durability,
they are more resistant to developing holes and thus safer to use.
Although monofilament nets are durable and effective, they
can injure birds unless the bander is exceptionally skilled and
tends the nets at extremely short intervals (e.g., every 10
minutes). Special training in the use of monofilament nets is
highly recommended.
Other factors that affect the way netting behaves are the
diameter (denier) of the component thread and the ply number
(the number of threads that are braided into each strand). The
bulkier the strand, the less tangled birds get and the easier they
are to extract. As a rule, it is advisable to use a heavier strand
(e.g., 75 denier, 3-ply rather than 70 denier, 2-ply). The catching
rate will be a little lower than for lighter-weight material, but
extraction will be quicker and the likelihood of injuries less.
13.1.2. Setting up a net array
Operating a capture array of mist nets is a complex undertak-
ing, but very rewarding. Much useful information can be gained
from reading Bleitz (1970), Keyes and Grue (1982), McClure
(1984), Ralph et al. (1993), or Burton and DeSante (1998). In
some areas with concentration of migrants, net batteries (several
nets in a row) may be better. When netting for target species
(shorebirds, grassland birds, birds banded at oases or watering
holes), the process of net placement is entirely different. We
outline below some guidelines for operation of nets and their
placement (Fig. 28). While especially applicable for landbirds,
the guidelines apply to other birds as well.
How many nets and banders depends on the site, likely
capture rate, type of bird targeted, and intended data collection.
For basic studies, a field crew of two people can usually set up
and monitor an array of 8-12 mist nets. We suggest 10 or fewer
as an appropriate number. If the biologists are especially skilled,
or the bird density quite low, a few more nets may be operated.
It is critical that nets be close enough to each other so that
a person can visit all nets within 15 minutes of walking, and less
if no birds are caught. This will ensure that birds are never left
in a net for much more than 30 minutes. On level terrain, this
array would be about 800-1000 m (0.5-0.6 mi) in length. If 10
nets are placed in a circle or rectangle, this would allow an
average of 75-100 m between nets and cover approximately 5-10
ha. In steep or rough terrain, nets should be closer and the area
covered less. In all cases, nets should be spread out as uniformly
as possible.
In areas of relatively high human impact, capture arrays must
be located with care. In some areas nets can be left in place (but
closed) between capture days if the chance of encounter by
visitors is extremely low. In most areas, it is advisable to rig the
nets to allow easy removal at the end of a day's effort.
13.1.3. Net maintenance and disposal
Check frequently that guy lines are tight and that the net is
clear of vegetation and other debris. Protect net loops with a
wrap of shrink tubing, silver duct tape, or black electrical tape;
they will last much longer and will be unlikely to fail and
potentially injure a bird. Wrap any loose ends of the loop with
tape to prevent snagging.
If a panel support or shelf string (trammel) breaks, weave an
entirely new line with thick nylon thread in place of the old one,
anchoring it to the proper loops using an overhand stitch. Do not
keep a net open and running with a broken main trammel; side
trammels should be fixed on the spot. A large, blunt embroidery
needle will help immensely. If possible, do not simply tie two
broken ends of a shelf string together or the resulting line will
be shorter and the net will not hang properly. Moreover, the
mesh will have a propensity to get tangled and torn on any knots.
If strands break, repair the hole immediately with thin, nylon
thread. To fix a hole in the mesh, cut the loose ends of the
broken mesh back to about 3-5 mm. Using simple knots, such
as a single or double sheet bend so the knots will not slide, and
Figure 28. An idealized capture station of about 40 acres (16
ha) set in an area of more than 250 acres (100 ha) of habitat "A."
Nine census points are set at uniform spacing of about 150 m
(490 ft) to estimate population levels. Ten net locations are
placed in sites where high capture rates are likely, along a
stream, near a spring, and other areas where vegetation is dense,
to monitor population and demographic parameters.

42 North American Banding Council Banders' Study Guide
a piece of wood or plastic the width of the mesh to keep the right
spacing, you will be able to repair the mesh by tying knots in the
right spots, the right distance apart (Fig. 29).
If nets must be taken down when they are wet, hang them to
dry at your earliest convenience. This will prevent fungus and
mold from weakening the net. Nets do not last forever, but bits
and pieces can be salvaged before a net is discarded. For
example, a four-panel net with holes in only one panel can be
converted easily into a three-panel net. Loops can be salvaged
for the repair of other nets. Old nets should be burned rather
than thrown in the garbage. This ensures that no unauthorized
person will use them and that no animals will get entangled
accidentally.
13.2. Trap and Catching-box Design
Well-designed traps usually are safer to use than mist nets
but, even so, several factors must be considered to minimize
casualties. Most traps are made from welded wire mesh or plastic
netting. Chicken wire has a tendency to injure birds and should
not be used. In general, the material selected should be of the
largest mesh size that will contain the target species and of the
best-quality material. Welded wire mesh measuring 1x½ inches
(2.5x1.2 cm) is generally considered to be optimum for songbirds
and larger species as well. If birds regularly scuff their foreheads,
consider coating the wire with a suitable plastic coating. Edges
of wire traps that birds can contact should be cut and bent back
in such a way as to eliminate sharp points; this not only is safer
for birds but also reduces snagging by hands and clothing.
Alternatively, large, framed traps should be clad with plastic
netting, which is inexpensive and easy to install. It will not
withstand a snow load when used as a roof, nor will plastic walls
take heavy abuse; still, in the interest of bird safety, plastic mesh
clearly is the best material. Some banders have found that plastic
mesh should not be used for ground traps, as mammals chew
through it easily.
Large traps should incorporate a catching box in the design
to help extract birds quickly and safely. Angle the top plate at
45
o
to deflect fast-moving birds. Make the transparent surfaces
of thin plexiglass or (better yet) heavy plastic sheeting instead
of glass. The flexibility of the plexiglass and plastic sheeting
relative to glass, especially if installed loosely, will further reduce
injuries. You also should place a branch or two just in front of
the box to slow birds down. Finally, arrange some grading device
in the holding box to keep large birds from trampling smaller
ones. A simple method is to install a middle shelf inside the
holding box. If this shelf is recessed away from the plexiglass
by a distance of about 40-50 mm, sparrow-sized birds will slip
between the gap down to the lower compartment, leaving larger
birds in the upper compartment.
13.3. Bird Numbers and People on Hand
When deciding how many nets or traps to open, balance the
number of birds you anticipate catching against the number and
skill levels of available helpers. You should be especially
cautious when operating at a new site, particularly if it is one
likely to concentrate migrants. Some or all nets and traps must
be closed in response to large numbers of birds. You are not out
to set records. Whenever a situation develops in which you
cannot safely band the number of birds being caught, you must
release some unbanded and close down some or all catching
devices. Options to consider when faced with large numbers of
birds include closing particular nets temporarily, reallocation of
personnel, making more frequent net rounds, taking minimal
data, and releasing birds unbanded, especially if you have already
processed a good sample of that species that day.
It is imperative that all banders always be aware of the
number of birds left to be processed. We suggest the following
guidelines:
(1) Birds should be removed from nets as quickly as possible;
they can remain healthy in shaded bags for up to 2 hours,
although preferably no more than 1 hour, given that they
are not subjected to excessive heat or cold. Different
considerations must be given in the breeding season—you
do not want to keep a bird off a nest for very long, certainly
less than 0.5 hour. Consideration also should be given to
how large a fraction of the birds' feeding day is impact-
ed—e.g., 1.5 hours of a 12-hour day is a rather high
percentage.
(2) If too many birds are encountered in nets for processing
before the next round, take minimum data until the capture
rate slows down. Be sure to maintain data quality, espe-
cially of species, age, and sex determinations. If a good
sample, perhaps more than 10 birds, of one species is cap-
tured in a day, some researchers suggest that the remainder
be released without banding. Try to age and sex these birds,
Figure 29. Repairing small holes in a mist net. Arrows show
the direction of the movement of the needle (from McClure
1984).
North American Banding Council Banders' Study Guide 43
if possible, and record them on the "Unbanded Birds" sheet.
Some, however, feel that it is better to shut nets than to
release birds, particularly with constant-effort mist netting,
to avoid harassing birds and wasting human effort.
(3) If too many birds are captured to process even with
minimum data, then close two to four nets, including those
with high and low capture rates, and in different habitats,
if possible. Often it is best to close the most distant nets,
thus shortening the net run.
(4) With many birds being caught, try to do net rounds as
quickly as possible (every 15-20 minutes is not too often)
to minimize net time and degree of entanglement.
(5) Use personnel effectively; two people can process much
more than twice the number of birds as a single person, as-
suming one records for the other. If it is time for another
net round, and birds still remain to be processed, many
banders feel it is best for both people to go on the net round,
rather than just one, because birds are safer and less
stressed in the bags than in nets. However, untended birds
in bags should be kept safe from predators and visitors.
(6) If more than about 10 birds still are waiting in bags or
holding cages after 1½ hours, close further nets.
(7) Once the number of backlogged birds is reduced to about
10, nets can be reopened, depending upon the banders'
abilities.
13.4. Injuries and Their Causes
Small cuts may bleed profusely for a short time (as with
humans), despite their nonsevere nature. Because of birds' rela-
tively high metabolism, their blood clots quickly and fights
infection efficiently. Although cuts and scrapes are not life-
threatening, it is your responsibility to ensure that birds are
treated as humanely as possible. Below are some possible sources
of injury to try to avoid.
Forehead abrasion in traps.—When birds enter a trap, they
eventually discover that they are caught and then try to get out
through the mesh. If the mesh is made of metal, this sometimes
results in forehead abrasions. These are not serious injuries but
should be minimized by selecting the most-appropriate-sized
mesh and plastic-coating it, replacing or lining metal mesh with
plastic mesh, and by checking traps frequently.
Cut legs.—Small cuts to legs (usually shanks and toes) can
result from rough handling or inattentiveness during mist-net
extractions. Thicker and/or extra-ply nets reduce abrasions.
Monofilament nets are especially hazardous.
Cut feather bases.—As with legs, this is the result of rough
handling or inattentiveness during net extraction. Less-abrasive
nets reduce these injuries. Recently-fledged juveniles and molt-
ing birds are especially vulnerable because the bases of their
incoming feathers are soft and blood-filled. The netting is apt
to get tangled around these incoming feather shafts, which are
easy to break.
Tongues.—Birds sometimes get tongue-caught with minor
injuries in mist nets. Some species (e.g., thrushes) are more
prone than others. A tongued bird usually looks much worse
than it really is. Usually, it is best to extract the rest of the bird
and leave the tongue until last. Nets can often be teased off with
fingers only. The netting is pulled to the back of the mouth and
over each fork of the tongue. If the netting is wrapped around
the tongue, a toothpick or, failing that, a small twig or grass stem
can be used to free the loops of netting. Heavier netting reduces
tongue injuries and is easier to tease off.
Broken legs.—Very rarely, a bird in a net breaks a leg.
Usually this is caused by some external force applied to the net,
effectively stressing the leg at the wrong angle. The external
force can originate from high wind or from another (usually
larger) bird that is caught in the same panel of the net. Less
often, it is a result of a mist-net strand slipping under a band and
straining the leg. The last risk can be reduced by ensuring that
bands seal when they are put on. Frequently inspect your
banding pliers to make sure that they are not so badly worn as
to prevent full band closure. If they are worn, they must be
repaired or replaced. Always check the bands of recaptures to
make sure they are properly closed. Broken legs also can occur
during mist-net extraction, especially if the tarsi are held too low;
these occurrences are inexcusable.
Dislocated leg.—Leg dislocation, which can occur at any of
the joints, is rare, but some species (e.g., White-throated Spar-
row) seem more prone than others. Most dislocations can be
treated quickly by straightening the leg and popping the joint
back into its socket, although they will sometimes have limited
use thereafter.
Crushed tarsi.—Tarsi can be crushed if the band is too small,
if the bander has failed to notice that the band is starting to
overlap during band closure, or if the band is closed on rather
than around the leg. Banders and trainees must be meticulous
in band selection and application. If a choice of band sizes is
given, use a leg gauge before selecting a band. Do not guess.
Since this injury is usually a result of inattention in applying
bands, it critical to hold the tarsus immobile during band
application.
Wing strain.—Occasionally on release, birds flutter along the
ground, appearing to be incapable of flight. Such symptoms are
commonly referred to as "wing strain." The condition is
popularly believed to result from slight muscular strain or bruise.
It probably is caused while the bird is in the net when one wing
is free but the other is tangled and exerting a lot of pressure
against the net. It also can occur during the extraction process.
Hidden strands of netting where the wing joins the body that are
unnoticed by banders can cause strain. X-rays of some cases have
shown a fracture of the coracoid bone. It is thought by some that
this fracture is caused during release, when wing-strained birds
are released too high over hard ground, causing them to land on
their sternum. Others may be caused by a too-loose grip by the
bander. For these reasons, small birds must be released carefully
and from a minimal height.
It seems that small birds (up to thrush size, such as Catbird
and Ovenbird) are the most susceptible to wing strain. All
banders and trainees must be aware of the anatomy of birds'
wings and how they may and may not be manipulated. Any bird
caught primarily by one wing must be restrained immediately in
the Bander's Grip.
44 North American Banding Council Banders' Study Guide
Unless a joint has been dislocated, most cases of wing strain
are temporary and the bird recovers its capacity to fly within an
hour, although some may take several days or more. Because of
the risk of predation, however, wing-strained birds should be
recaptured and held in a quiet, warm, dark place until they
recover. If you suspect wing strain, you usually can gauge a bird's
flight capability by holding it in the photographer's grip and
gently moving it up and down, making it flutter.
Wing strain injuries can be minimized by using a net with
smaller mesh and checking the nets more frequently.
Stunning.—Provided the appropriate steps are taken to
minimize the chance and severity of impact with catching-box
surfaces (see Section 13.2), stunning should never occur in traps.
Stunning more commonly happens when a bird escapes in a
banding lab and hits a window. For this reason, banding labs
should be small and not have opposing windows. Plastic netting
can be installed over windows to reduce this hazard. It also is
good to leave outside doors open so escapees are able to find their
way outside quickly and unharmed.
Stress and shock.—Very small birds (e.g., kinglets, gnat-
catchers, chickadees, titmice, and sometimes warblers) occasion-
ally appear to go into a state of shock, especially if they have been
overhandled. It is usually only a temporary phenomenon,
provided the bird is suitably treated. Shock can be minimized by
ensuring that birds are not overhandled and being alert for signs
of distress. Try to revive and release such birds as quickly as
possible, unbanded if necessary.
Some telltale signs will alert you to a bird in distress. These
are: fluffing the feathers; opening and closing the bill ("panting");
gaping; closing the eyes; and limpness, especially of the neck.
Birds showing any of these signs should be handled as little as
possible, assessed as to their capacity for flight, and released
immediately if flight is likely. More often than not, the bird will
surprise you and fly away normally. If flight is judged unlikely,
then distressed birds should be put in a warm, dark, quiet place
and checked periodically. As a general rule for passerines, if
recovery is to occur, it usually happens spontaneously within an
hour. Reassess the situation if the bird has not shown signs of
recovery after this time. The Hummingbird Manual, suggests
that every hummer be offered a dose of sugar water (1:4) before
release.
Tail loss.—As part of a bird's strategy to avoid predation, tail
feathers are not firmly anchored. Not surprisingly, tail loss is
probably the most common mishap when handling birds. Usually
it happens when you try to grab an escaping bird, although it also
can occur when placing birds in bags and not ensuring that they
are in the bottom of the bag before tightening and looping the
drawstring. The appearance is certainly worse than the condi-
tion; however, tail loss places additional energetic stress on a bird
and is easily minimized with careful handling.
Damaged feathers.—Feathers can be frayed or broken during
removal from nets or traps and during handling. The most
frequent cause of this is applying too much pressure in trying to
get net strands over a wrist joint that also is caught on several
primary tips (the solution is to carefully push the primaries
through the mesh in the direction of their natural bend, and then
to slip the mesh over the wrist). Experience with careful
handling can minimize these damages. Also be aware that the
natural oils on your hands may gum up feathers. Keep your
hands clean and dry; you can use climber's chalk or talcum
powder. Never handle birds if you have applied insect repellant
to your hands! It may be toxic and corrosive.
Eye injury.—Sharp wire projections can puncture or abrade
a bird's eye. Also, while trapping in sub-zero temperatures, an
eye can freeze to the wire mesh. Eye damage can be prevented
easily by ensuring that no sharp projections exist on traps and/or
by covering traps with plastic coating.
13.5. Causes of Death
Predators.—It is not sufficient merely to treat predation as
an acceptable "natural phenomenon." The effect of predators on
a mist-netting operation is twofold. The most serious result is
that birds are injured or killed. In addition, the predator often
damages the net, posing a threat to subsequent captures unless
repaired immediately. As in other matters, anticipation,
alertness, and swift action by a good bander minimize the risk.
If present, hawks and owls will try to take birds caught in
mist nets. Other species, including herons, rails, jays, magpies,
shrikes, and grackles may be equally dangerous. Therefore,
banders must watch continually for avian predators. Should one
be noticed, nets should be checked more frequently and, if the
threat persists or increases, nets should be closed. No bander can
prevent occasional predation by an itinerant raptor or jay, but if
several predators are known to be in the banding area, and
particularly if one or more individuals learn what mist nets can
provide, no alternative exists to closing some or all of the nets
until the problem has gone away. Sites that regularly concentrate
raptors at certain times of the year may have days when mist-
netting for songbirds is essentially precluded, unless nets are
tended constantly.
Numerous mammals (e.g., fox, weasel, raccoon, bobcat, and
skunk) prey on birds in nets and traps. Other mammals, too,
occasionally harm birds in nets. Squirrels, chipmunks, and even
deer and porcupines have been known to nibble at birds. As with
avian predators, banders always must be alert to the presence of
known or potential predators. If a problem occurs, steps must
be taken immediately to prevent its recurrence, such as making
exceptionally frequent checks of traps and nets or raising the nets
so that captured birds are out of reach. If the problem cannot be
contained, bird trapping should cease until the predator has
departed. You may need to trap and relocate repeat offenders.
Some species of snakes, such as the Eastern Fox Snake, also
prey upon trapped birds, as do larger frogs. Their reach can be
surprisingly high, and they can climb poles. You should be alert
to this possibility and take action (e.g., make frequent net checks,
raise nets well above the ground, capture and relocate offending
species) should snakes be seen near nets. Killing the snake is not
an acceptable option.
In the South, fire ants can be a serious problem at banding
stations, even with half-hour net runs. To ensure the safety of
birds, vegetation must be meticulously cleared all around the nets
and the net hung high enough to avoid contact with the grass or
North American Banding Council Banders' Study Guide 45
ground, even when heavy birds like Bobwhite are caught.
Destroying colonies of this invasive insect from the net lanes and
paths with a machete or spade can help protect banders during
extractions and birds caught in the nets.
Occasionally, wasps and bees kill trapped birds. For the
safety of both birds and banders, avoid placing nets or traps near
active wasp nests or bee hives. Do not to destroy these nests and
hives; these insects have an important role in the ecosystem.
safety of banders may, however, necessitate removal of a nest or
hive. Bees are inactivated when sprayed with sugar solution.
Strangling.—It is rare for a bird caught in a net to strangle.
In general, it happens only if the bird's head and neck are
somehow pulled taut by the netting or when nets are not checked
frequently enough. The likelihood increases when the net has
many holes or if the mesh size is incorrect. It also increases
during large catches at one time, when a heavy bird is captured
under a smaller one, when the bag setting is too generous, or
when it is too windy. Thrushes are apt to get their heads through
the mesh and continue to struggle with their long legs, occasion-
ally strangling themselves. Pay particular attention to birds
captured and missed in the bottom panel; check the entire length
and height of the nets. Strangling also can occur from careless
handling during extraction, which is inexcusable.
Be aware that a particularly dangerous potential for stran-
gling occurs when a high shelf string is stretched down to extract
a bird and then accidentally released. To reach birds in nets
safely, shelf strings should be pulled down at the loop on the net
pole. Close lower shelves too, to avoid the bird's double-bagging
itself. Special attention should be taken to replace the loop or
loops to the correct position after removing a bird. When two
people are extracting birds from the same net at the same time,
each must be aware of the other's actions and be careful not to
pull any netting away from the other's bird.
Hemorrhage.—Birds have higher blood pressure than do
mammals, and birds have been reported to die from ruptured
blood vessels during prolonged territorial disputes. Excitement
from excessive handling may be sufficient to produce hemorrhag-
ing, manifested as traces of blood in the mouth or as a slight
wheezing. If symptoms are detected, cease handling immediately
and put the bird in a sheltered, secure place where it can calm
down and depart at leisure. This may take only a few minutes.
Subsequent retrapping indicates that some birds behaving this
way suffer no lasting impairment. If a bird that has exhibited
wheezing still has not departed after half an hour or an hour, and
if the bander has access to suitable rehabilitation facilities nearby,
it may be taken into temporary care.
Heat exhaustion.—Birds can overheat in mist nets and bird
bags. Cold-adapted species such as Snow Buntings can suffer
heat exhaustion even on cold days. Heat exhaustion can be
avoided with forethought and alertness. Avoid opening nets in
direct sunlight on hot days, or be prepared to check them every
10 minutes. On very hot days, particularly if combined with high
humidity, monitor the captures closely and be prepared to close
nets or traps, release birds waiting to be processed, or reduce the
processing time. Give water to panting birds (see Section 13.6.,
Shock or Torpor) .
Never leave occupied bird bags or holding boxes in full sun
and always allow ample space between bags holding birds to
allow air to circulate among them. Keep bags clean and dry so
that air can circulate through them. If birds have been doubled
up in bags, transfer them to empty bags as soon as possible so
they do not heat up one another.
Cold exhaustion.—Birds are prone to cold exhaustion if they
have little or no fat—their metabolic fuel. Even on cool days,
early-morning captures of small birds with no fat should be
monitored closely. As with heat exhaustion, be prepared to close
nets or traps, release birds waiting to be processed, or reduce the
processing time if exhaustion is apparent.
All birds with wet or even damp feathers are prone to cold
exhaustion at any time. For this reason, mist netting in rain or
even a heavy mist usually is unacceptable. Following overnight
dew, nets should be shaken as dry as possible before starting to
capture. If a bird gets wet, keep it in a warm, dry place out of the
wind until dry. For the same reason, banders may need to forego
using skulling water on small birds on very cold mornings, or use
a minimal amount and pat dry. Encouraging a bird to ingest
sugar water may be helpful to a stressed hummingbird.
Punctured trachea and crop.—Occasionally, seed-eating
birds suffer punctured trachea. This can occur if a well-filled
crop is pressed too hard against the windpipe. Banders using
baited traps should be alert to this possibility. There are also
occasions when corn-fed waterfowl caught in large clover leaf
traps occasionally rupture their crops against the side of the trap.
Reducing the size of the trap and/or using plastic or fiber netting
will eliminate the risk.
"Natural causes."—Occasionally, a bird is found dead in a
net that was checked recently or in a bird bag that was not held
overly long before processing, with no sign of injury or other
indication of what may have been the cause. Birds have short
life spans and, for stations banding thousands of birds annually,
it is likely that one occasionally dies from "natural causes," such
as a bacterial infection like Salmonellosis (see Section 14.2), or
old age. If mysterious deaths are anything more than extremely
rare (e.g., more than 1 in 1,000), however, you must reassess your
entire banding operation. This pertains to any individual source
of mortality.
13.6. Treatment of Injured Birds
Because substantial numbers of birds live near human
populations, injured birds are often found along roadways, power
lines, adjacent to large glass doors and windows, and beneath tall
television and microwave towers, especially those supported by
a system of guy wires. Bird banders also occasionally encounter
injured birds as part of their normal banding operation, although
the numbers of such injuries are dwarfed by the numbers of birds
injured and killed by flying into plate glass windows or doors,
moving vehicles, telephone and power lines, and tall transmission
towers. Nevertheless, all banders and other individuals interested
in birds should know what to do when they encounter an injured
bird.
In some cases, the most humane way to deal with an injured
bird is to release it. This is best done by placing it in a warm,
46 North American Banding Council Banders' Study Guide
sheltered, and secure place away from any further disturbance.
If it has not recovered in half an hour to an hour, consider
attempting rehabilitation. Minor wounds can be treated with
antiseptic cream or an iodine solution.
Birds that need to be kept for a short while (e.g., for recovery
or because weather is unsuited for immediate release) can be kept
inside in a well-ventilated box (e.g., a shoebox). The box should
be placed in a dark, warm (80E F; 25EC) and quiet spot until
release. Most species remain calm under these conditions. This
can be done with a small igloo cooler, with vent hole or lid
slightly raised, and hand warmers under a towel.
Provided the bander has the facilities and the appropriate
permit, an attempt can be made to rehabilitate small birds. All
that may be needed is a suitably sized cage in a quiet, warm place,
equipped with a perch, a plentiful supply of water, and appropri-
ate food. If you know nothing about the care and feeding of wild
birds, however, send the bird to a professional rehabilitator. All
banders should make a point of getting to know rehabilitators in
their area. Note that banding permits do not allow holding a bird
for more than 24 hours.
Shock or torpor.—Birds that appear to be in a state of shock
or have gone into torpor usually can be "jolted" gently back to
reality. This can be done in several ways. The birds can be held
in the photographer's grip and moved up and down a couple of
times, just an inch or so at a time. This coaxes them to flap their
wings, which often seems to rouse them, as movement of the
powerful pectoral muscles causes blood flow to the brain and can
raise the metabolic rate. Hummingbirds should be cradled in the
hands for this procedure. Blowing a couple of puffs of air on the
bird's head may help, too. Torpid birds may even be revived
using mouth-to-mouth resuscitation. If a hummingbird is sus-
pected of heat exhaustion, it can be offered a little 1:4 sugar:water
solution. This can be done by moving the tip of the bill into a
drop on the back of a pencil or eye dropper. Keep the bird
upright and make sure that no liquid enters its nostrils.
Broken leg or foot.—If the break is shallow, a small "bend"
or crack, release the bird without further ado. (If you will have
an opportunity to see its progress, you may wish to band the other
leg quickly first.)
If the break is causing the tarsus to bend at an askew angle,
but it is not "hanging from a thread," you can either take the bird
to a qualified, licensed rehabilitator or attempt to re-fuse the leg.
In making this decision, you must assess the situation. How far
is the nearest rehabilitator from you? Is the bird in breeding
condition, possibly with nesting in progress? Is the bird highly
stressed, in need of professional attention?
If you decide to re-fuse the leg yourself, there are a few things
that can be tried. You can hold the tarsus straight, firmly but
gently, with tweezers or two small sticks, and apply a small dot
of superglue to re-fuse the leg. Some have successfully made
"scotch tape splints" by wrapping a small piece around the break.
You also can try splinting the broken tarsus with a hollow gull
or duck feather shaft.
If the broken tarsus is "hanging by a thread," snip the leg at
the break cleanly with a small, sharp pair of scissors.
Euthanization.—If a badly injured bird is found, either in a
banding operation or elsewhere, and rehabilitation is either not
feasible or not likely to succeed, consider euthanization of the
bird. Important points to assess when considering euthanizing
are: (1) What are the chances that the bird will survive the injury
if left alone? (2) Is the bird suffering and in pain? If the answer
to the first question is "No, essentially no chance exists that the
bird will survive if left alone," the answer to the second question
is "Yes, the bird is suffering greatly and is in real pain" and
rehabilitation of the bird is not possible or not likely to succeed,
then the only recourse is to euthanize the bird quickly and
painlessly. This is always a difficult decision and always a heart-
wrenching task. The currently accepted guidelines for humane
euthanization of birds can be found in Gaunt and Oring (1999),
Guidelines on the Use of Wild Birds in Research, published by
the Ornithological Council. To receive a copy, contact the
Ornithological Council at 1725 K Street, Suite 212, Washington,
D.C. 20006-1401, or at their web site: http://www.nmnh.si.edu/-
BIRDNET.
13.7. Disposition of Dead Birds, Record Keeping, and
Reporting
Any bird found dead in a net or trap should be fully processed
(but not banded), as if it were a live bird. Next, the condition of
the bird should be assessed to determine whether it is suitable for
preparation as a museum specimen. If so, either it should be
skinned or placed in a plastic bag and frozen. Remember, many
birds can provide a useful skeleton, even if the rest of the skin
can not be salvaged. Full collecting details, of which locality and
date are most important, must be recorded on an attached label.
Adding the name of the species sometimes allows labels that have
become dissociated from the specimen to be sorted properly, and
including the name of the collector sometimes allows additional
information to be obtained. Any other information, such as the
degree of skull pneumatization, fat condition, size and condition
of the gonads, and body weight can be useful. Prepare the label
with pencil or waterproof ink. Send dead birds to a museum;
instructions are supplied in the Banding Manual and on the back
of your banding permit. Unless you obtain a special permit, it
is unlawful for you to possess specimens other than during
transport.
In Canada, all casualties must be recorded in a logbook.
Date, species, type of fatality, likely cause, and treatment are
recorded. At the end of the year, all casualties must be tabulated
and reported to the Banding Office on the appropriate form.
14. PREVENTING BANDER INJURIES AND
DISEASES
14.1. Physical Risks
Herons, cormorants, and loons are able to strike with the bill
at incredible speed, often targeting the intruder's eye. Banding
these birds is often best done with two people, one to secure the
bill while the other bands. Failing this, ensure that the bill is
securely tucked under your arm and wear protective eyegear
before commencing banding.
North American Banding Council Banders' Study Guide 47
Swans, particularly male Mute Swans, can be violent during
the breeding season, even if you are not attempting to catch them
or their young. The attack consists of a full frontal assault with
open wings. They are very powerful birds, and banding is a two-
person process.
Most species of gulls, terns, boobies, and jaegers can be
surprisingly aggressive near the nest. A typical attack is to dive
on the intruder and strike with the bill. These birds can inflict
considerable pain. A hard hat can be worn, but this is uncomfort-
able on hot days. An alternative is to carry a stick over one's
head, perhaps with an object on top. The birds will focus on the
higher object.
Some species of hawks and owls (especially Northern
Goshawk and Great Horned Owl) can be extremely aggressive
near their nests. A hard hat and safety glasses are strongly
recommended when attempting to band nestling raptors, and a
leather or very thick jacket could offer some protection against
those species that like to rake intruders with their talons.
Most hawks and owls can inflict varying amounts of damage
to your hand from their bills or talons. In general, accipiters,
buteos, and owls are more dangerous with the talons, while
falcons rely more on their bills. To put the potential danger in
perspective, the Great Horned Owl, admittedly the most powerful
North American raptor, has been demonstrated to possess talon-
grasping power of 170 kg/sq. cm (2400 lbs/sq. inch) which, in
a press, is sufficient to bend 6-mm (0.25-inch) steel plate!
It is impractical (and often ineffective) to use leather gloves
to handle raptors. When extracting a raptor from a mist net, the
bird's attention should be diverted while the legs are grabbed.
This can either be done by a second person or by the bander's
waving a hand so the bird looks away from the hand that is to
grab the legs. From this point on, the bander must concentrate
on not releasing, or even easing, the grip on the legs while the
bird is freed from the net. Once out of the net, rather than putting
the bird in a bag and having to grab the legs a second time, it is
better to hold the bird, effectively immobilizing it so it cannot
strike with its talons, flap its wings, or bend down to bite you.
Some species of raptors, including Barn and Long-eared owls,
are best held by holding the legs as close to the body as possible
and cradling the bird in your other arm, rather than grasping the
wings.
For sharp-taloned birds, the banding process is best done
either by inserting the bird head-first into an appropriate-sized
can with air holes, or by placing it on its back on the bander's
thighs (with the talons away from the body) and covering the
head with a cloth. Some banders recommend giving raptors a
stick to hold in their talons, but this can lull you into a false sense
of security, since the bird can drop the stick and grab you at any
time.
With the exception of shrikes, which can and will draw
blood, most songbirds are quite harmless. Large-billed seed-
eaters (e.g., cardinals and grosbeaks) can inflict painful bites,
although they rarely draw blood. One way to reduce their
mobility is to use the "straitjacket" grip. This is a variation on
the standard Bander's Grip in which the head is held nearer the
tips of the first and second fingers, which are then straightened
somewhat.
Several species, such as jays, starlings, and most icterids and
woodpeckers, have strong toes and sharp claws. Banding
numbers of these can take its toll on banders' hands. Scratches
can be lessened by using another variation on the Bander's Grip
in which legs are immobilized between the third and fourth
fingers for most of the banding operation.
An injury to a bander in the field is unfortunate for the person
concerned, as well as the rest of the birds in the traps or nets. If
the bander is alone (which is generally discouraged), it may be
difficult, if not impossible, to remove any remaining birds from
nets and to close down. At all times, steps should be taken to
minimize the chance of trips or falls. Clear logs and branches
off paths around the netting area, cut any stumps down to ground
level, and mark any guy lines with flagging tape.
14.2. Diseases and Disorders
Birds may suffer from a number of infections. Most of these,
fortunately, are peculiar to birds, but some may be shared with
other animals, including humans. Some of the more likely
candidates are discussed below, but the list is by no means
complete. Banders contracting curious complaints are strongly
advised to inform their doctor of their contact with wild birds.
As a general precaution, regular washing of the hands with
carbolic acid, other germicidal soap, or at least plain soap, is
recommended, especially before eating or smoking. Never place
bird bags in the mouth and avoid inhaling dust from bird bags
or boxes, which should be washed or cleaned out regularly.
While Chlamydiosis (Ornithosis and Psittacosis) is primarily
associated with imported cage birds, evidence exists that it is
widespread in wild birds in some regions. It can be communi-
cated to humans, causing a fever with lung inflammation.
Salmonellosis is a bacterial infection, common in mammals
and birds. In humans, it is most likely to be contracted from the
feces of birds that frequent garbage dumps, feed lots, and bird
feeders. Because it is commonly found in dead birds that are
simply "found dead," personal hygiene is especially important
after handling dead birds. Symptoms are acute enteritis and
diarrhea.
All field workers should be immunized against polio and
tetanus, the more so if they are working with birds near garbage
dumps, sewage plants, or potentially polluted water. In recent
years tuberculosis cases have increased in Canada. Birds can be
carriers of the human form of this disease. All banders should
be immunized against tuberculosis.
Lyme Disease is caused by a bacterial spirochaete that is
transmitted by a bite from the deer tick, which birds sometimes
carry. Banders operating in an area known to harbor the disease
should be aware of the danger and alert to the first signs of an
infected deer tick bite. Any sign of a bull's-eye rash around a tick
bite should be investigated immediately, as the sooner the disease
is confirmed and treated, the greater the chance of a complete
recovery. Learn to recognize what a deer tick looks like; if you
are bitten by one, consult a doctor.
Rabies is potentially communicable, not via birds, but from
bats. Any bander suffering a bite from a bat is advised to seek
48 North American Banding Council Banders' Study Guide
medical treatment. In high risk areas, banders may be advised
to become immunized against rabies.
Banders should be aware of poisonous plants occurring in
their banding area. In much of Canada and the U.S., poison ivy
and poison oak are the most likely species to be encountered,
especially when banders are clearing undergrowth for net lanes.
"Grackle Pox" is a rare affliction, essentially a case of subcutane-
ous poison ivy. It is characterized by intensely itchy, weeping
blisters on the backs of the hands and fingers. It can result in a
bander's hands becoming so swollen as to preclude further
activity. It is caused by the skin being punctured by the claws of
strong-footed species such as grackles and jays that have been
foraging in patches of poison ivy, allowing the toxin to penetrate
under the skin. Treatment is with cortisone cream. Sunlight
exacerbates the condition considerably. Prevention is effected by
care during handling and by frequent hand washing, preferably
using a carbolic soap.
15. VISITORS AND PUBLIC RELATIONS
Banding operations often have visitors, and some operations
are very public. Banding should never be a secretive, "hush-
hush" operation. Instead, banding provides many opportunities
to educate the public about birds, research, and conservation.
Many people go away with a new-found appreciation and
sensitivity towards birds after seeing a banding operation. Still,
it is important to understand that problems can arise if the
operation is not well thought out and if it is in any way sloppy.
15.1. Problems
Unless you exercise control, the negative impacts resulting
from large numbers of visitors at a banding station can outweigh
the positive ones. These range from increased bird stress to
parking problems.
Bird stress can be heightened in several ways by large
numbers of visitors. First, the time it takes to process birds can
be dramatically lengthened due to staff time being spent inter-
acting with visitors. Under such circumstances, birds could be
held for inordinate periods of time. Also, net checks are apt to
be delayed, meaning that birds become more entangled and more
stressed by weather and other factors. The sheer presence of
visitors creates stress on the birds because birds simply view
people as frightening. Some visitors even go so far as to try to
free birds from mist nets! Do not let these things happen!
An increase in the number of casualties may occur if all of
the above stress factors are not wisely considered. Injuries and
mortalities must be kept to an absolute minimum in any banding
operation, but even more so in public surroundings. Needless to
say, any hint of injury creates enormous public relations
difficulties. It is best that every banding station have a written
protocol on hand for banding in case visitors raise any issues.
An average encounter with a visitor can easily last 10
minutes. Hence, if you have lots of visitors, you can spend
considerable time dealing with them, meaning that you will need
more personnel on hand to get the banding job done. You might
choose to hire a special person to deal with visitors. On the other
hand, the presence of such a person, and a beefed-up educational
program, can wind up heightening public demand.
Be aware that visitors provide an easy form of distraction
during the banding operation, increasing the number of errors
in data recording and causing general mix ups (e.g., putting the
wrong sized band on a bird, forgetting to weigh the bird, etc.).
And dealing with large numbers of visitors is tiring and stressful
for your station personnel. Visitors also can interfere with station
logistics.
Training of personnel can be greatly impeded by a lot of
visitors. Students are not able to get the hands-on, one-on-one
supervision they require because of public scrutiny and interrup-
tions.
Finally, you also must pay attention to the needs and privacy
of any neighbors you might have, regarding increased vehicular
traffic, noise, and people wandering onto their properties.
15.2. Some Solutions
One trick is to limit the number of visitors your operation can
accommodate. To do this, post times of the day when your site
is open to the public, and prearrange any group visits well in
advance. Also think carefully before you decide you want to ad-
vertise your station. You may well be swamped by busloads of
tourists.
Many operations do not allow public access to their net lanes.
Others post a large sign at the site to inform the public about
what goes on, the fact that nets and traps are checked every 20
minutes or so, and politely ask visitors to abide by a few rules
regarding pets, the fragility of nets, and birds in nets. It is a good
idea to approach all members of the public who might stumble
upon your nets or banding sites when you not there, to prevent
any problems.
It is sometimes necessary to scale back the banding operation
during peak visitor periods (e.g., on weekends and holidays). In
general, on any day you are open to the public, both the bird and
the visitor situation should be gauged. If you have many birds
and/or visitors, the banding operation must be scaled back
accordingly. It will be a daily judgment call.
Under no circumstances are you to sacrifice a bird's safety to
provide showy banding demonstrations. All banding operations
put the bird's safety first and foremost. If this simple rule is
followed, visitors will sense where your priorities are and few if
any conflicts will occur. If your netting area is open to the public,
you must keep a constant vigil and make exceptionally frequent
net checks (as often as every 15 minutes). Apart from minimiz-
ing any danger or stress to captured birds, this also will reassure
visitors that you are indeed concerned and very much on top of
the situation. At times, you must be strict and tell visitors that
you can not talk with them until you have completed the birds
you have, after which you will be able to explain your techniques.
15.3. Banding Demonstrations for the General Public
Formal banding demonstrations should be done in a special
area of your banding lab, during certain hours only (e.g., from
10:00 a.m. to 12:00 noon), or by special arrangement. Visitors
North American Banding Council Banders' Study Guide 49
should not be permitted inside the portion of the room where the
banders are working, if only to give the banders room to work and
to prevent any jostling. The banders and visitors should be
separated by some kind of divider—a counter top works fine.
Visitors should remain quiet, speaking in low tones at all times,
as noise stresses birds. The banding lab can have two doors—one
for "employees only" and another for visitors. This directs the
visitor traffic into the right part of the room.
Only well-trained, experienced banders should give demon-
strations; students can record and generally help out until they
are sufficiently adept at the entire process. The demonstrator
runs through the process slowly at first, describing everything as
it occurs, as well as interesting facts about the bird itself. The
bird's safety should be stressed at all times. If you think that the
demonstration is using up valuable time that should be devoted
to a net check, get someone to do a net run. Remember that,
especially with visitors, nets should be checked very often.
While some banders feel that one should never let visitors
handle or touch birds, others feel that, when the bird is ready for
release, a few seconds of a bird in an open (not grasping) hand
heightens people's appreciation of birds as living creatures.
Visitors may, however, photograph the birds while you hold
them, if it is done quickly and does not get out of control.
Emphasize that your program is always sensitive to the physical
and emotional health of the birds. You never put birds through
more stress than absolutely necessary. Your visitors will under-
stand and appreciate your concern and your careful handling.
15.4. Group Visits
Group visits (e.g, seniors, children, nature clubs, etc.) can
be educational and even fun. Groups can be booked in as
circumstances permit, generally on dates or times when the site
is closed to members of the general public. Group size should
be limited to a maximum of 30 people; 15 or fewer is a better size
to work with at one time.
Groups may be handled for about 1 hour, during which time
they can be given a brief introduction about the banding station,
its programs, and the role of bird banding. This may be followed
by a guided walk around the net lanes and finished off with a
banding demonstration. Again, only the most experienced
banders should be doing most of the hands-on work in front of
groups.
When groups are scheduled, make sure that not too many
nets are open, keeping in mind that groups take time and that you
do not want to get a back-log of birds. Consider scaling the
typical netting operation back by one-half, or add trained
personnel to help out so it does not affect your banding operation.
At least two people are required to handle a group, and three
are better. When taking a tour of the net lanes, remind the group
frequently to not touch the nets or the birds. Take charge.
Visitors should watch that their buttons do not get caught up in
the nets. Warn the group in advance that, if someone gets
snagged by a net, they should stop immediately and ask for help.
During the net-lane tour, an experienced person acts as the
leader, does most of the talking, and does most (or all) of the bird
extractions. Another person generally helps out, often bringing
up the rear to make sure that no visitor lags behind and to keep
an eye on persons who might get buttons caught on the nets, or
poke at the birds or nets, or try to venture off by themselves.
While the leader is stopped for a while at a particular net, the
other person should take the opportunity for a quick solo dash
around some upcoming nets, to make sure no problems exist.
Any upcoming difficulties can then be relayed (quietly) to the
leader, who might choose to avoid a particular net. If the other
person can extract difficult birds quickly before reporting back
to the leader, so much the better. At times it is best if the
assistant takes over the removal of a particularly difficult or
fragile bird, allowing the group to go on with the leader, thus
reducing stress for all. As an alternative, a few nets can be the
educational or demonstration nets.
The helper also should be alert for nets that are catching too
many birds, and should start to extract the birds and/or close
more nets if necessary. Again, it is important that not too many
nets are open when visitors are present and to remember that
visitors are going to slow you down so that you will not be able
to process nearly as many birds as quickly as you could otherwise.
Plan ahead and you will minimize problems.
50 North American Banding Council Banders' Study Guide
SELECTED BIBLIOGRAPHY
General Ornithological References
American Ornithologists' Union. 1998. Checklist of North
American Birds (seventh edition). American Ornithologists'
Union, Washington, D.C.
Berthold, P. 1975. Migration: control and metabolic physiol-
ogy. Pp 77-128 in Farner, D.S. and J.R. King (eds.). Avian
Biology. Volume 5. Academic Press, New York.
Blem, C.R. 1980. The energetics of migration. Pp 175-224 in
Gauthreaux, S.A. (ed.). Animal Migration, Orientation and
Navigation. Academic Press, New York.
Campbell, B. and E. Lack (eds.). 1985. A Dictionary of Birds.
Buteo Books, Vermilion, SD.
Dorst, J. 1974. The Life of Birds. Volume 1. Weidenfeld and
Nicolson, London.
Farner, D.S., J.R. King and K.C. Parkes. 1971-1975. Avian
Biology. Academic Press, NY.
Gaunt, A.S. and L.W. Oring (eds.). 1999. Guidelines to the
Use of Wild Birds in Research (2nd edition). Ornithological
Council, 1725 K Street, Suite 212, Washington, D.C. 20006-
1401.
Gill, F.B. 1994. Ornithology (second edition). W.H. Freeman
& Co., New York.
Grubb, T.C. Jr. 1986. Beyond Birding: Field Projects for
Inquisitive Birders. Boxwood Press.
Johnston, R.F. (ed.) 1983. Current Ornithology. Vol.1. Plenum
Press, New York.
King, A.S. and J. McLelland. 1979-1979. Form and Function
in Birds (3 vols.). Academic Press, New York.
Lack, D. 1954. The Natural Regulation of Animal Members.
Clarendon Press, Oxford.
Lack, D. 1966. Population Studies of Birds. Clarendon Press,
Oxford.
Lack, D. 1968. Ecological Adaptations for Breeding in Birds.
Methuen and Company, Limited, London.
Peaker, M. (ed.) 1975. Avian Physiology. Academic Press,
New York, NY.
Rickert, J.E. 1978. A Guide to North American Bird Clubs.
Avian Publications, Inc. Elizabethtown, Kentucky. 565 pp.
Stone, W. 1965. Bird Studies at Old Cape May: an Ornithol-
ogy of Coastal New Jersey. Dover Publications, Inc. New
York.
Terres, J.K. 1980. The Audubon Encyclopedia of North
American Birds. Alfred A. Knopf, New York.
Welty, J.C. 1976. The Life of Birds (2nd ed.). W.B. Saunders
Co., Toronto.
General Banding References
Bub, H. and H. Oelke. 1989. The history of bird marking till
the inception of scientific bird ringing. Ring 12(138-
139):141-163.
Buckley, P.A., C.M. Francis, P. Blancher, D.F. DeSante, C.S.
Robbins, G. Smith, and P. Cannell. 1998. The North
American Bird Banding Program: into the 21st Century.
Journal of Field Ornithology 69:511-529.
Coulson, J. 1993. Bird ringing: the greatest advance in the
study of birds in the 20th century. Alauda 61:5-8.
McNicholl, M.K. 1994. Bird-banding and bird observatories
in Ontario: 1905-1988. Chapter 8 in M.K. McNicholl and J.L.
Cranmer-Byng (eds.). Ornithology in Ontario. Ontario Field
Ornithologists, Burlington.
Munro, D.A. 1955. Fifty years of bird banding in Canada. Ring
5:79-80.
Nelson, E.W. 1920. Bird banding work being taken over by the
United States Bureau of Biological Survey. Canadian Field
Naturalist 34:158-159.
Proctor, N.S. and P.J. Lynch. 1993. Manual of Ornithology.
Yale University Press, New Haven, CT.
Seton, E.T. 1921. Early bird banding. Auk 38:611.
Short, L.L. 1993. The Lives of Birds: Birds of the World and
Their Behavior. Henry Holt & Co., New York.
Taverner, P.A. 1920. Migration studies by bird banding.
Canadian Field Naturalist 34:158-159.
Welty, J.C. and L. Baptista. 1988. The Life of Birds (fourth
edition). Saunders College Publishing, New York.
Wood, H.B. 1945. The history of bird banding. Auk 62:256-
265.
Statistics
Fowler, J. and L. Cohen. (undated). Statistics for Ornitholo-
gists. BTO Guide No. 22. British Trust for Ornithology,
England. 175 pp.
Nur, N., S.L. Jones, and G.R. Geupel. 1999. A Statistical
Guide to Data Analysis of Avian Monitoring Programs. U.S.
Department of the Interior, Fish and Wildlife Service, BTP-
R6001-1999, Washington, D.C.
Sokal, R.R. and F.J. Rohlf. 1994. Biometry. Third Edition.
W.H. Freeman and Company, New York. 887 pp.
Zar, J.H. 1984. Biostatistical Analysis. Prentice Hall, New
Jersey.
Population and Demographic Monitoring
Berthold, P., G. Fliege, U. Querner and H. Winkler. 1986.
Change in songbird populations in central Europe: analysis
of trapping data. German, English summary. Journal of
Ornithology 127:397-437.
Blancher, P., A. Cyr, S. Droege, D. Hussell and L. Thomas
[compilers]. 1994. Results of a U.S./Canada Workshop on
monitoring landbirds during migration and recommendations
towards a North American Migration Monitoring Program
North American Banding Council Banders' Study Guide 51
(MMP). 27 pp. [Available from P. Blancher, Canadian
Wildlife Service, National Wildlife Research Centre, Hull,
P.Q. K1A 0H3; or S. Droege, National Biological Survey
1849 C St. NW, Washington, D.C. 20240].
Buckley, P.A., C.M. Francis, P. Blancher, D.F. DeSante, C.S.
Robbins, G. Smith, and P. Cannell. 1998. The North
American Bird Banding Program: into the 21st century.
Journal of Field Ornithology 69: 511-692.
DeSante, D.F. 1983. Annual variability in the abundance of
migrant landbirds on southeast Farallon Island, California.
Auk 100:826-852.
DeSante, D. F. 1990. The role of recruitment in the dynamics
of a Sierran subalpine bird community. American Naturalist
136:429-455.
DeSante, D. F. 1992. Monitoring Avian Productivity and
Survivorship (MAPS): a sharp, rather than blunt, tool for
monitoring and assessing landbird populations. Pp. 511-521
in McCullough, D. C., and R. H. Barrett (eds.). Wildlife
2001: Populations. Elsevier Applied Science, London, U.K.
DeSante, D. F. 1995. Suggestions for future directions for
studies of marked migratory landbirds from the perspective
of a practitioner in population management and conservation.
Journal Applied Statistics 22:949-965.
DeSante, D.F. 2000. Patterns of productivity and survivorship
from the MAPS Program. Pp.166-177 in Bonney, R., D.N.
Pashley, R.J. Cooper, and L. Niles (eds.) Strategies for Bird
Conservation: the Partners in Flight Planning Process.
Proceedings of the Third Partners in Flight Workshop; 1995
October 1-5; Cape May, NJ. Proceedings RMRS-P-16. USDA,
Forest Service, Rocky Mtn. Research Station, Ogden, UT.
DeSante, D. F., and K. M. Burton. 1994. The Monitoring
Avian Productivity and Survivorship (MAPS) Program third
annual report (1992). Bird Populations 2:62-89.
DeSante, D. F., K. M. Burton, and D. R. O'Grady. 1996. The
Monitoring Avian Productivity and Survivorship (MAPS)
Program fourth and fifth annual report (1993 and 1994). Bird
Populations 3:67-120.
DeSante, D. F., K. M. Burton, J. F. Saracco, and B. L.
Walker. 1995. Productivity indices and survival rate est-
imates from MAPS, a continent-wide programme of con-
stant-effort mist netting in North America. Journal Applied
Statistics 22:935-947.
DeSante, D. F., K. M. Burton, and O. E. Williams. 1993b.
The Monitoring Avian Productivity and Survivorship (MAPS)
Program second annual report (1990-1991). Bird Populations
1:68-97.
DeSante, D. F., and G. R. Geupel. 1987. Landbird productivity
in central coastal California: the relationship to annual
rainfall and a reproductive failure in 1986. Condor 89:636-
653.
DeSante, D. F., D. R. O’Grady, K. M. Burton, P. Velez, D.
Froehlich, E. E. Feuss, H. Smith, and E. D. Ruhlen. 1998.
The Monitoring Avian Productivity and Survivorship (MAPS)
Program sixth and seventh annual report (1995 and 1996).
Bird Populations 4:69-122.
DeSante, D. F., D. R. O’Grady, and P. Pyle. 1999. Measures
of productivity and survival derived from standardized mist-
netting are consistent with observed population changes. Bird
Study 46:178-188.
DeSante, D. F., and D. K. Rosenberg. 1998. What do we need
to monitor in order to manage landbirds? Pp. 93-106 in
Marzluff, J. M. and R. Sallabanks (eds.). Avian Conservation:
Research and Management. Island Press, Washington, DC.
DeSante, D. F., O. E. Williams, and K. M. Burton. 1993a.
The Monitoring Avian Productivity and Survivorship
(MAPS) Program: overview and progress. Pp. 208-222 in
Finch, D. M., and P. W. Stangel (eds.). Status and Manage-
ment of Migratory Birds. Gen. Tech. Rep. GTR-RM-229.
USDA Forest Service, Rocky Mt. Forest and Range Experi-
mental Station, Ft. Collins, CO.
Dunn, E.H. 1992. Using migration counts to monitor Canadian
landbird populations: background and current status. Un-
publ. rept. for Can. Wildl. Serv., Long Point Bird Obser-
vatory. 34 pp.
Dunn, E.H. 1995. Recommended methods for regional check-
list programs. [Unpublished report available from U.S. Forest
Service, Redwood Sciences Laboratory, 1700 Bayview Dr.,
Arcata, CA 95521] 11 pp.
Eckert, K.R. 1990. Lakewood Pumping Station census of fall
migration. Loon 62:99-105.
Francis, C.M. and D.J.T. Hussell. 1998. Changes in numbers
of landbirds counted in migration at Long Point Bird
Observatory, 1961-1997. Bird Populations 4:37-66.
Fuller, M.R. and K. Titus. 1990. Sources of migrant hawk
counts for monitoring raptor populations. Pp. 41-46 in Sauer,
J.R. and D.W. Droege (eds.). 1990. Survey Designs and
Statistical Methods for the Estimation of Avian Population
Trends. USFWS Biol. Rept. 90(1).
Hagan, J.M. III, T.L. Lloyd-Evans, J.L. Atwood and D.S.
Wood. 1992. Long-term changes in migratory landbirds in
the northeastern United States: evidence from migration cap-
ture data. Pp. 115-130 in Hagan, J.M. III and D.W. Johnston
(eds.) 1992. Ecology and Conservation of Neotropical
Migrant Landbirds. Smithsonian Institution Press, Washing-
ton, D.C.
Hussell, D.J.T. 1981. The use of migration counts for detecting
population levels. Studies in Avian Biology 6:92-102.
Hussell, D.J.T., M. Mather and P. Sinclair. 1992. Trends in
numbers of tropical- and temperate-wintering migrant
landbirds in migration at Long Point, Ontario, 1961-1988.
Pp. 101-114 in Hagan, J.M., III, and D.W. Johnston (eds.).
1992. Ecology and Conservation of Neotropical Migrant
Landbirds. Smithsonian Institution Press, Washington, D.C.
Hussell, D.J.T. and C.J. Ralph. 1998. Recommended methods
for monitoring bird populations by counting and capture of
migrants. Unpubl. rept. available from U.S. Forest Service,
Redwood Sciences Laboratory, 1700 Bayview Dr., Arcata, CA
95521 14 pp.
Karr, J.R. 1981. Surveying birds with mist nets. Pp 62-67 in
Ralph, C.J. and J.M. Scott (eds.). Estimating numbers of
terrestrial birds. Studies in Avian Biology 6.
Long Point Bird Observatory. 1991. Long Point Bird
52 North American Banding Council Banders' Study Guide
Observatory Operations Manual for Volunteers and Assis-
tants. Long Point Bird Observatory, Port Rowan, Ontario.
(unpaginated).
McCracken, J.D., D.J.T. Hussell and E.H. Dunn. 1993. A
Manual for Monitoring Bird Migration. Long Point Bird
Observatory, Port Rowan, Ontario. 65 pp.
Mulvilhill, R.S., R.C. Leberman, and D.S. Wood. 1992. A
possible relationship between reverse sexual size dimorphism
and reduced mail survivorship in the Ruby-throated Hum-
mingbird. Condor 94:480-489.
Ralph, C.J. 1976. Standardization of mist net captures for
quantification of avian migration. Bird-banding 47:44-47.
Ralph, C.J. 1981a. Age ratios and their possible use in
determining autumn routes of passerine migrants. Wilson
Bulletin 93:164-188.
Ralph, C.J. 1981b. Appendix I. Terminology used in estimat-
ing numbers of birds. Pp. 577-578 in Ralph, C.J. and J.M.
Scott (eds.). Estimating numbers of terrestrial birds. Studies
in Avian Biology 6.
Ralph, C.J., G.R. Geupel, P. Pyle, T.E. Martin and D.F.
DeSante. 1993a. Handbook of Field Methods for Monitor-
ing Landbirds. Gen. Tech. Rep. PSW-GTR-144. USDA
Forest Service, Pacific Southwest Research Station, Albany,
CA. 41 pp.
Trapping, Netting, and Banding Techniques
Addy, C.E. 1956. Guide to Waterfowl Banding. U.S. Fish and
Wildlife Service.
Bart, J. 1977. Impact of human visitations on avian nesting
success. Living Bird 16:187-192.
Berger, D.D. and F. Hamerstrom. 1962. Protecting a trapping
station from raptor predation. Journal of Wildlife Manage-
ment 26:203-206.
Berthold, P. and R. Schlenker. 1975. The "Mettnau-Reit-
Illnitz-Programm" — a long-term bird trapping program of
the Vogelwarte Radolfzell with multiple goals. German, with
English summary. Vogelwarte 28:97-123.
Bird Banding Manual. see Canadian Wildlife Service and U.S.
Fish and Wildlife Service 1991, 1997 below.
Blackshaw, S.R. 1993. An improved method of net handling
and storage. North American Bird Bander 18:49-50.
Bleitz, D. 1957. On the use of mist nets. News from the Bird-
banders (WBBA) 32:22-25.
Bleitz, D. 1957. On banding hummingbirds. News from the
Bird-banders (WBBA) 32:32.
Bleitz, D. 1970. Mist nets and their use. Inland Bird Banding
News 42(2).
Bub, H. 1991. Bird Trapping and Bird Banding. Cornell
University Press, Ithaca, New York. 330 pp.
Burton, K.M. and D.F. DeSante. 1998. MAPS Manual. The
Institute for Bird Populations. Pt. Reyes Station, California.
56 pp.
Burton, K.M., P. Velez, and D.F. DeSante. 1999. MAPS
Intern Manual. The Institute for Bird Populations. Pt. Reyes
Station, California. 38 pp.
Canadian Wildlife Service and U.S. Fish and Wildlife Service.
1991. North American Bird Banding. Volume I. Canadian
Wildlife Service, Ottawa and U.S. Fish and Wildlife Service,
Washington, D.C..
Canadian Wildlife Service and U.S. Fish and Wildlife Service.
1977. North American Bird Banding Techniques. Volume II.
Canadian Wildlife Service, Ottawa (parts revised, 1981).
Davis, P.G. 1981. Trapping Methods for Bird Ringers. British
Trust for Ornithology. Tring, UK.
DeSante, D.F., Burton, K.M., Velez, P., and Froehlich, D.
2000. MAPS Manual: 2000 Protocol. The Institute for Bird
Populations, Point Reyes Station, CA. 67 p.
Elliot, R.D. 1992. The future of non-game banding in North
America. Part 2. Where should we put our banding efforts?
OBBA Newsletter 37(1):3-7.
Giles, R.H., Jr. 1971. Wildlife Management Techniques. The
Wildlife Society, Washington. 633 pp.
Heimerdinger, M.A, and R.C. Leverman. 1966. The
comparative efficiency of 30 and 36 mm mesh mist nets.
Bird-banding 37:280-285.
Humphrey, P.S., D. Bridge and T.E. Lovejoy. 1968. A
technique for mist netting in the forest canopy. Bird-banding
39:43-50.
Hussell, D.J.T. and J. Woodford. 1961. The use of a Helgo-
land trap and mist-nets at Long Point, Ontario. Bird-banding
32:115-141.
Hussell, D.J.T., D. Shepherd, Wallace, G.E. and J.D.
McCracken. 1990. Supplementary address bands increase
recovery rates. North American Bird Bander 18:133-141.
Keyes, B.E. and C.E. Grue. 1982. Capturing birds with mist
nets: a review. North American Bird Bander 7:2-14.
Lockley, R.M. and R. Russell. 1953. Bird-ringing. The Art
of Bird Study by Individual Marking. Crosby Lockwood, and
Son Ltd., London. 119 pp.
Low, S.H. 1957. Banding with mist nets. Bird-banding
28:115-128.
Lowe, K.W. 1989. The Australian Bird Bander's Manual, First
Edition. Australian National Parks and Wildlife Service.
Major, R.E. 1989. The effect of human observers on the
intensity of nest predation. Ibis 132:608-612.
McClure, H.E. 1984. Bird Banding. The Boxwood Press,
Pacific Grove, California. 341 pp.
McCracken J., L. Enright, D. Shepherd, J. Cappleman, and
E. Dunn. 1999. The Canadian Bird Bander's Training
Manual. Canadian Wildlife Service Technical Report no.
275.
McNicholl, M.K. 1991. OBBA Forum on the future of non-
game bird banding: Introduction. OBBA Newsletter 36(3):4-
6.
McNicholl, M.K. 1992. OBBA Forum on the future of non-
game bird banding: Part 3. Increasing recovery rates. OBBA
Newsletter 37(2):4-5.
McNicholl, M.K. 1993. Bander Training in Canada: a Review
and Recommendations. Unpubl. rept. for Can. Wildl. Serv.,
Long Point Bird Observatory. 69 pp.
North American Banding Council Banders' Study Guide 53
Mead, C. 1974. Bird Ringing. British Trust for Ornithology.
Tring, England.
Mercereau, G.S. 1975. Modifying small raptor Bal-chatri traps.
EBBA News 38:88-89.
Pardieck, K. and R.W. Waide. 1992. Mesh size as a factor in
avian community studies using mist nets. Journal of Field
Ornithology 63:250-255.
Pribil, S. 1997. An effective trap for the House Wren. North
American Bird Bander 22:6-9.
Ralph, C.J. 1967. Taking data at a banding station. Western
Bird-banding Association Workshop Manual. Point Reyes
Bird Observatory. Bolinas, California.
Ralph, C.J., G. Geupel, S. Jones, K. Milne and M. Rigney.
1993b. A syllabus of training methods and resources for
monitoring landbirds. [Unpublished report available from C.
John Ralph, US Forest Service Redwood Sciences Laboratory,
1700 Bayview Dr., Arcata, CA 95521). 10 pp.
Ralph, C.J., G.R. Geupel, P. Pyle, T.E. Martin and D.F.
DeSante. 1993a. Handbook of Field Methods for Monitor-
ing Landbirds. Gen. Tech. Rep. PSW-GTR-144. Albany,
California: Pacific Southwest Research Station, Forest
Service, U.S. Department of Agriculture. 41 pp.
Shepherd, D., J. McCracken, J. Cappleman, L. Enright, and
E. Dunn. 1999. The Canadian Bird Bander's Training
Manual: The Instructor's Guide. Canadian Wildlife Service
Report no. 276.
Shreve, A. 1965. Preventing net casualties. Eastern Bird
Banding Association, Workshop Manual 4:1-22.
Smith, H., J. McCracken, D. Shepherd, and P. Velez. 1999.
The Mist-Netter's Bird Safety Handbook. The Institute for
Bird Populations, Pt. Reyes Station, California. 105 pp.
Spencer, R. (ed.). 1992. The Ringer's Manual. British Trust
for Ornithology. Thetford, England. 138 pp.
Thomas, B.T. 1979. How to mend a mist net. North American
Bird Bander 4:161-163.
Wells, S. 1972. Holding hummingbirds for banding. Western
Bird-bander 3:42-43.
Whitman, J.D. 1962. Sparrow Hawk banding with the Bal-
chatri trap. EBBA News 25:5-11.
York, D.L.; J.E. Davis, Jr.; J.L. Cummings and E.A. Wilson.
1998. Pileated woodpecker capture using a mist net and taped
call. North American Bird Bander 23:81-82.
Identification, Ageing and Sexing
Bailey, R. 1952. The incubation patch of passerine birds.
Condor 54:121-136.
Baird, J. 1963. On ageing birds by skull ossification. Ring
37:253-255.
Bent, A.C. 1919-1968. Life Histories of North American Birds.
Smithsonian Institute.
Blake, C. 1963. The brood patch. EBBA Workshop Manual
2:8-9; EBBA News 27:16-18.
Canadian Wildlife Service and U.S. Fish and Wildlife Service.
1977. North American Bird Banding Techniques. Volume II.
Canadian Wildlife Service, Ottawa and U.S. Fish and
Wildlife Service, Washington, D.C. (parts revised, 1981).
Clark, G., Jr. 1969. Oral flanges (gape) of juvenile birds.
Wilson Bulletin 81:270-279.
Dwight, J. Jr., 1900. The sequence of plumages and moults of
passerine birds of New York. Ann. N.Y. Acad. Sci. 13:73-
360.
Flicken, M. 1965. Mouth color of nestling passerines and its
use in taxonomy. Wilson Bulletin 77:71-75.
Froehlich, D., D.F. DeSante, and P. Velez. 1999. MAPSPROG
Version 2.0 User's Guide and Manual. The Institute for Bird
Populations. Pt. Reyes Station, California. 57 pp.
Godfrey, W.E. 1986. The Birds of Canada (Revised Edition).
National Museum of Canada, Ottawa.
Ginn, H.B. and D.S. Melville. 1983. Moult in Birds. BTO Guide
No. 19. Hertfordshire, England: British Trust for Ornithol-
ogy; 112 p.
Hamerstrom, F. 1967. On the use of fault bars in ageing birds
of prey. IBB News 39:35-41.
Jenni, L. and R. Winkler. 1994. Moult and Ageing of
European Passerines. Academic Press, London. 224 pp.
Leberman, R.C. 1970. Pattern and timing of skull pneumatiza-
tion in the Ruby-crowned Kinglet. Bird-banding 41:121-124.
Middleton, A.L.A. 1974. Age determination in the American
Goldfinch. Bird-banding 45:293-296.
Mulvihill, R.S. 1993. Using wing molt to age passerines. North
American Bird Bander 18:1-10.
Prater, A.J., J.H. Marchant and J. Vuorinen. 1977. Guide
to the identification and ageing of Holarctic Waders. BTO
Guide No. 17. British Trust for Ornithology. Tring,
England. 168 pp.
Pyle, P. 1997a. Identification Guide to North American Birds,
Part 1. Slate Creek Press. Bolinas, California. 732 pp.
Pyle, P. 1997b. Molt limits in North American passerines.
North American Bird Bander 22:49-89.
Pyle, P., S.N.G. Howell, R.P. Yunick and D.F. DeSante. 1987.
Identification Guide to North American Passerines. Slate
Creek Press. Bolinas, California. 278 pp.
Roberts, T.S. 1980. A Manual for the Identification of the
Birds of Minnesota and Neighboring States. University of
Minnesota Press, Minneapolis.
Svensson, L. 1992. Identification Guide to European Passer-
ines. Naturhistoriska Riksmuseet, Stockholm. 184 pp.
Wood, M.S. 1969. A Bird-bander's Guide to the Determination
of Age and Sex of Selected Species. College of Agriculture,
the Pennsylvania State Univ., University Park, Pennsylvania.
181 pp.
Yunick, R.P. 1979. Variation in skull pneumatization patterns
of certain passerines. North American Bird Bander 4:145-
147.
Yunick, R.P. 1983. Age determination of female American
Goldfinches. North American Bird Bander 8:152.
Yunick, R.P. 1984. Toward more effective age determination
of banded birds. North American Bird Bander 9:2-4.
54 North American Banding Council Banders' Study Guide
Parasites and Diseases
Bennett, G.F. and A.M. Fallis. 1960. Blood parasites of birds
in Algonquin Park, Canada, and a discussion of transmission.
Canadian Journal of Zoology 38:261-273.
Davis, J.W., R.C. Anderson, L. Karstad and D.O. Trainer.
1971. Infectious and Parasitic Diseases of Wild Birds. Iowa
State University, Ames, Iowa.
Fisher, J. 1952. An outbreak of Ornithosis in Fulmars. The
Fulmar pp. 382-385.
Houston, C.S. 1995. Hantavirus: Warning to bird banders.
North American Bird Bander 20:63-64.
Macdonald, J.W. 1968. Blackbirds and Salmonellosis. British
Birds 61:85.
Macdonald, J.W. and L.W. Cornelius. 1969. Salmonellosis
in wild birds. British Birds 62:28.
Rothschild, M. and T. Clay. 1952. Fleas, Flukes, and
Cuckoos. Collins, London.
Smith, R.P., Jr., P.W. Eand, E.H. LaConmbe, S.R. Morris,
D.W. Holmes, and D.A. Caporale. 1996. Role of bird
migration in the long distance dispersal of Ixodes dammini,
the vector of lyme disease. J. Infectious Diseases 174:221-
224.
Some Studies Utilizing Morphometrics
Biebach, H. 1985. Sahara stopover in migratory flycatchers:
fat and food affect the time program. Experientia 41:695-
697.
Biebach, H., W. Friedrech and G. Heine. 1986. Interaction
of body mass, fat foraging and stopover period in trans-Sahara
migrating passerine birds. Oecologia 69:370-379.
Blake, C. 1956a. Wing-length in the Black-capped Chickadee.
Bird-banding 27:32.
Blake, C. 1956b. The topography of a bird. Bird-banding
27:22-31.
Chandler, C.R. and R.S. Mulvihill. 1990. Wing-shape
variation and differential timing of migration in Dark-eyed
Juncos. Condor 92:54-61.
Chandler, C.R. and R.S. Mulvihill. 1992. Effects of age, sex,
and fat level on wing loading in Dark-eyed Juncos. Auk
109:235-241.
Cherry, J.D. 1982. Fat deposition and the length of stopover
of migrant White-crowned Sparrows. Auk 99:725-732.
Clench, M.H. and R.C. Leberman. 1978. Weights of 151
species of Pennsylvania birds analyzed by month, age, and
sex. Bull. Carnegie Mus. Nat. Hist. No. 5. Pittsburgh,
Pennsylvania.
Collins, C.T., and E.L. Bull. 1996. Seasonal variation in body
mass of Chimney and Vaux's Swifts. North American Bird
Bander 21:143-152.
Davis, J. 1971. Breeding and moult schedules of the Rufous-
collared Sparrow in coastal Peru. Condor 73:127-146.
Evans, P.R. 1969. Ecological aspects of migration and pre-
migratory fat deposition in the Lesser Redpoll Carduelis
flammea cabaret. Condor 71:316-330.
Francis, C.M. and D.S. Wood. 1989. Effects of age and wear
on wing length of wood-warblers. J. Field Ornithol. 60:495-
503.
Metcalfe, N.B. and R.W. Furness. 1984. Changing priorities:
the effect of pre-migratory fattening on the trade-off between
foraging and vigilance. Behavioural Ecology and Sociobiol-
ogy 15:203-206.
Moore, F.R. and P. Kerlinger. 1987. Stopover and fat
deposition by North American wood-warblers (Parulidae)
following spring migration over the Gulf of Mexico.
Oecologia 74:47-54.
Morris, S.R. 1996. Mass loss and probability of stopover by
migrant warblers during spring and fall migration. J. Field
Ornithol. 67:456-462.
Morris, S.R., D.W. Holmes, and M.E. Richmond. 1996. A
ten-year study of the stopover patterns of migratory passerines
during fall migration on Appledore Island, Maine. Condor
98:395-409.
Mulvihill, R.S. and C.R. Chandler. 1990. The relationship
between wing shape and differential migration in the Dark-
eyed Junco. Auk 107:490-499.
Winker, K., D.W. Warner, and A.R. Weisbrod. 1992a. Daily
mass gains among woodland migrants at an inland stopover
site. Auk 109:853-862.
Winker, K., D.W. Warner, and A.R. Weisbrod. 1992a. The
Northern Waterthrush and Swainson's Thrush as transients
at a temperate inland stopover site. Pp 384-402 in J.M.
Hagan, III, and D.W. Johnston, eds. Ecology and Conser-
vation of Neotropical Migrant Landbirds. Smithsonian Insti-
tute Press, Washington, D.C.
Wiseman, A.J. 1975. Changes in body weight of American
Goldfinches. Wilson Bulletin 87:390-411.
Other Studies That Incorporated Bird Banding
Brooks, E.W. 1997. Capture times of passerines on the south
shore of Lake Ontario during spring migration. North
American Bird Bander 22:1-5.
Hill, G.E. 1990. Female House Finches prefer colorful males:
sexual selection for a condition-dependant trait. Animal
Behaviour 40:563-572.
Hill, G.E. 1991. Plumage coloration is a sexually selected
indicator of male quality. Nature 350:337-339.
Hill, G.E. 1992. The proximate basis of variation in carotenoid
pigmentation in male House Finches. Auk 109:1-12.
Ketterson, E.D. and V. Nolan. 1982. The role of migration and
winter mortality in the life history of a temperate-zone
migrant, the Dark-eyed Junco, as determined from demo-
graphic analysis of winter populations. Auk 99:243-259.
Middleton, A.L.A. 1977a. The moult of the American
Goldfinch. Condor 79:440-444
Middleton, A.L.A. 1977b. Effect of cowbird parasitism on
nesting by the American Goldfinch. Auk 94:304-307.
Middleton, A.L.A. 1977c. Increase in overwintering by the
North American Banding Council Banders' Study Guide 55
American Goldfinch, Carduelis tristis, in Ontario. Canadian
Field Naturalist 91:165-172.
Middleton, A.L.A. 1978. The annual cycle of the American
Goldfinch. Condor 80:401-406.
Middleton, A.L.A. 1979. Influence of age and habitat on
reproduction by the American Goldfinch. Ecology 60:418-
432.
Middleton, A.L.A. 1984. Longevity of the American Goldfinch.
Journal of Field Ornithology 55:383-385.
Middleton, A.L.A. 1986. Seasonal changes in plumage
structure and body composition of the American Goldfinch,
Carduelis tristis. Canadian Field Naturalist 100:545-549.
Middleton, A.L.A. 1988. Polyandry in the mating system of the
American Goldfinch Carduelis tristis. Canadian Journal of
Zoology 66:296-299.
Middleton, A.L.A. 1990. Age and sex differences in winter
distribution of American Goldfinches in eastern North
America. Ornis Scandinavica 21:99-104.
Middleton, A.L.A. and D.R.C. Prescott. 1989. Polygyny,
extra-pair copulations and nest helpers in the Chipping
Sparrow, Spizella passerina. Canadian Field Naturalist
103:61-64.
Mulvihill, R.S. and C. Rimmer. 1997. Timing and extent of
molts of adult Red-eyed Vireos (Vireo olivaceus) on their
breeding and wintering grounds. Condor 99:73-82.
Mulvihill, R.S. and R.L. Winstead. 1997. Variation in the
extent of the first prebasic molt of Dark-eyed Juncos. J. Field
Ornithol. 68:183-199.
Phillips, R.S. 1968. Goldfinch attains age in excess of 11 years.
Auk 85:499.
Royall, W.C. Jr., J.L. Guarino, J.W. DeGrazio and A.
Gammel. 1971. Migration of banded Yellow-headed
Blackbirds. Condor 100-106.
Woodrey, M.S. and C.R. Chandler. 1992. Age-related timing
of migration: geographic and interspecific patterns. Wilson
Bull. 109:52-67.
56 North American Banding Council Banders' Study Guide
APPENDIX A. ASSOCIATIONS AND BIRD
OBSERVATORIES
1. Ontario Bird Banding Association (OBBA)
The OBBA covers the province of Ontario, but because it is
the only Banding Association operating from Canada, it is of
special interest to all Canadian banders. Address: OBBA secre-
tariat, Mississauga Valley Boulevard, Suite 804, Mississauga, ON
L5A 3S9. Publications: Ontario Bird Banding Association
Newsletter (quarterly), Ontario Bird Banding (annually). Web
site: http://sites.netscape.net/tntcomm/obba/OBBA.htm.
2. Eastern Bird Banding Association (EBBA)
The EBBA includes the eastern U.S., Ontario, Quebec, and
the Maritime Provinces. Membership information can be
solicited from the Treasurer of the Association. Publication:
North American Bird Bander (quarterly). Web site: http://www.-
pronetisp.net/~bpbird.
3. Inland Bird Banding Association (IBBA)
The IBBA covers the central U.S., Manitoba, and Saskatche-
wan. Membership information can be solicited from the Treasur-
er of the Association. Publication: North American Bird Bander
(quarterly). Web site: http://aves.net/inlandbba.
4. Western Bird Banding Association (WBBA)
The WBBA covers the western U.S. and Canada east to the
Northwest Territories, Alberta, Montana, Wyoming, Colorado,
and New Mexico. Membership information can be solicited at
http://thecity.sfsu.edu/snfc/western.htm or by writing to WBBA,
P.O. Box 716, Inverness, CA 94937. Publication: North Ameri-
can Bird Bander.
5. North American Bird Observatories That Have Bander
Training
For more information about training opportunities in Canada,
contact the Ontario Bird Banding Association or the Banding
Offices.
A. Alaska Bird Observatory P.O. Box 80505, Fairbanks AK
99708. Phone 907-451-7059, FAX 907-451-9723. E-mail:
B. Beaverhill Bird Observatory 18624 70th Avenue,
Edmonton AB, T5T 2V8. E-mail: [email protected]
ualberta.ca.
C. Braddock Bay Bird Observatory P.O. Box 12876,
Rochester, NY 14612. Phone 716-324-3525. E-mail:
D. Colorado Bird Observatory 13401 Piccadilly Road,
Brighton CO 80601. E-mail: [email protected].
E. Golden Gate Raptor Observatory Bldg. 201, Ft. Mason,
San Francisco, CA 94123. Phone 415-331-0730, FAX
415-331-0851. E-mail: [email protected].
F. Humboldt Bay Bird Observatory 7000 Lanphere Road,
Arcata, CA 95521. Phone 707-822-2015. E-mail:
G. The Institute for Bird Populations P.O. Box 1346, Point
Reyes Station, CA 94956. Phone 415-663-1436, FAX
415-663-9482. E-mail: [email protected]..
H. Lesser Slave Lake Bird Observatory P.O. Box 726,
Slave Lake, AB T0G 2A0. Phone 403-951-8689, FAX
403-849-4147. E-mail: [email protected].
I. Long Point Bird Observatory P.O. Box 160, Port Rowan
ON, N0E 1M0, Canada. Phone: 519-586-3531 FAX:
519-586-3532. E-mail: [email protected].
J. Manomet Center for Conservation Sciences Box1770,
Manomet, Massachusetts, 02345, U.S.A. Phone: 508-
224-3559. E-mail: [email protected].
K. Point Reyes Bird Observatory 4990 Shoreline Highway,
Stinson Beach, California, 94970, U.S.A. Phone: 415-
868-1221. E-mail: [email protected].
L. Powdermill Bird Observatory HC 64, Box 453, Rector,
Pennsylvania, 15677-9605, U.S.A. Phone: 724-593-7521.
Fax: 724-593-6570. E-mail: [email protected].
M. San Francisco Bay Bird Observatory Box 247, Alviso,
California, 95002, U.S.A. Phone: 408-946-6548. E-mail:
N. Thunder Cape Bird Observatory c/o Sleeping Giant
Provincial Park, RR #1, Pass Lake, Ontario P0T 2M0.
E-mail: [email protected].
O. Whitefish Point Bird Observatory HC 48, Box 115,
Paradise, Michigan, 49007. Phone: 906-492-3954. E-
mail: [email protected].
6. Other Stations
More bird observatories and banding stations in North and
South America are listed in "Migration Monitoring Network:
Banding Stations and Observatories," available on the internet
at "http://www.rsl.psw.fs.fed.us/pif/mnstalst.html" or by writing
C. John Ralph at the USDA Forest Service, Redwood Sciences
Laboratory, 1700 Bayview Drive, Arcata, CA 95521; phone 707-
825-2992. An additional listing of stations can be found in
conjunction with the Bird Banding Manual at http://www.pwrc.-
usgs.gov/bbl/manual/birdobs.htm.

North American Banding Council Banders' Study Guide 57
APPENDIX B. SOURCES OF BANDING
EQUIPMENT
1
A comprehensive, updated list is available at http://www.pwrc.-
usgs.gov/bbl/resources/supply.htm.
Mist Nets: These are available from any of the following
suppliers:
1. Association of Field Ornithologists Mist Nets, Manomet, Inc.,
P.O. Box 1770, Manomet, MA 02345, USA. Telephone:
508-224-6521, FAX: 508-224-9220. Web site: http://www.-
afonet.org/mistnets.html.
2. Eastern Bird Banding Association Net Committee, c/o Gale
Smith, R.D. #2, Box 131, Kempton, PA, 19529, U.S.A.
Phone: 215-756-4311. E-mail: [email protected]. Web site:
http://www.pronetisp.net/~bpbird.
3. Avinet, Box 1103, Dryden NY, 13053, U.S.A. FAX and
phone: 607-844-3277. E-mail: [email protected]. Web
site: http://www.avinet.com.
4. British Trust for Ornithology, The Nunnery, Nunnery Place,
Thetford, Norfolk, IP24 2PU, England. Phone: 44-1842-
750050; Fax 44-1842-750030.
5. Spidertech Bird Nets, The Owl Engineering Group, 1-
Roobertinkatu 33 D 34 SF-00120 Helsinki, Finland. Phone:
358-(9)0-444692.
6. Ecotone, ul Slowackiego, 12, 81-871 Sopot, Poland. Phone:
48-58-514606. E-mail: [email protected]. Web site:
http://www.ecotone.polbox.com.
Mist Net Poles: Available from Avinet (see above) or from any
electrical supply store.
Wing Rules: Available in three sizes (15 cm, 30 cm, and 60 cm)
from Chris N. Rose, 98 Lopez Road, Cedar Grove NJ, 07009,
U.S.A. (201) 256-4410, and from the British Trust for Ornithol-
ogy (see above).
Banding Pliers: Holes in jaws to fit standard band sizes, with
a split pin on top for even band opening. Available in three sizes
(band sizes 0 through 1A, band sizes 2 and 3, and band sizes 3B
through 4) from Avinet (see above). Pliers for larger bands are
available from Lambournes (B'ham) Ltd., Unit 1, Shallowford
Court, Off High Street, Henley-in-Arden, Solihull, West
Midlands, B95 5BY, England, and the BTO (see above). Circlip
pliers (for band removal) can be purchased from the BTO (see
above).
Scales for Weighing: Electronic and triple beam scales are
widely available from any scientific supply retailer, one of which
is LabEquip, 330 Esna Park Drive, Unit 32, Markham ON, L3R
1H3. Phone: (416) 475-5880 FAX: (416) 475-1231. Pesola
scales are available through Avinet (see above). Both Forestry
Suppliers, Inc., P.O. Box 8397, Jackson, MS, 39284-8397,
Phone: 800-647-5368; and Ben Meadows Company, 35 89 Broad
St., Atlanta, GA, 30341, Phone: 800-241-6401 sell spring
balances and other weighing devices (including plastic bird
weighing cones), magnifiers, and lots of other equipment of
possible use to banders.
Calipers: Available from Avinet (see above).
Leg Gauges: Available from Avinet (see above).
Bird Bags: Washable bags can be made, or cotton mailing bags
can be purchased from BTO or Avinet (see above). Tyvek soil
sampling bags are available from Forestry Suppliers, P. O. Box
8397, Jackson, MS 39284-8397; Phone: 800-647-5368; web site:
http://www.Forestry-Suppliers.com.
Colored Leg Bands: Split plastic colored leg bands are available
from Avinet (see above), which imports them from A.C. Hughes
Ltd., 1 High Street, Hampton Hill, Middlesex, TW12 1NA,
England. Leg bands also are available from Gey Band and Tag
Company, 2940 Felton Road, Norristown, PA 19404-0363;
Phone: (601) 277-3280, FAX: (601) 277-3282.
Optical Device for Skulling: A good instrument is an Optivisor,
a binocular magnifier (#6353-A12, A.H. Thomas Co., Philadel-
phia PA, 19105, USA).
Books of Interest to the Bander: Publication lists are available
from the American Birding Association (PO Box 6599, Colorado
Springs, Colorado 80934; phone 1-800-634-7736), Avinet (see
above), and the British Trust for Ornithology (see above)
1
The use of the name of a company does not imply that the
NABC, Canadian, or U.S. government endorses this company's
products. Note also that supplies may change; recent issues of
banders' journals (Appendix A) should be consulted for up-to-
date information and for suppliers of other kinds of markers not
mentioned above.
58 North American Banding Council Banders' Study Guide
APPENDIX C. A WELL-DESIGNED RESEARCH
PROJECT
Dr. A.L.A. Middleton of the Zoology Department at the
University of Guelph, Ontario, began banding a local population
of American Goldfinches in 1968. Because the duration and
scope of his project, Middleton has been able to make significant
contributions to the knowledge of the biology of the American
Goldfinch. Many of his findings are a direct result of the analysis
of his own banding and recovery data, while other results
incorporate banding data requested from the Banding Offices.
Some of the features that make this a well-designed study are as
follows:
(1) Simple questions were asked; hypotheses were testable.
(2) The study involved a large sample size.
(3) Results were used to generate more questions.
(4) Literature was used to suggest explanations.
(5) Data were analyzed along the way to see if the question had
been answered and to help define the question for the next
step in the study.
(6) Middleton did not rely on other researchers to make sense
or use his data.
(7) Cooperators were involved to gather more data for specific
purposes.
(8) Results were published.
1. Molt and Plumage of the American Goldfinch and their
Relation to Timing of Reproduction and Migration
Middleton (1977a) first studied the timing and sequence of
molt in the American Goldfinch because little was known about
it and its molt strategy appeared to be unique among other
cardueline finches. The American Goldfinch is the only species
to acquire its dimorphic, alternate plumage through molt of the
body feathers. In addition, the prebasic and prealternate molts
in the goldfinch are prolonged relative to other species of
temperate zone passerines. Between 1970 and 1975, Middleton
banded 3,433 American Goldfinches at Guelph, and recorded the
extent of molt of these individuals. He supplemented his field
studies by closely observing a captive population of 12 birds held
in an aviary.
In addition to providing a detailed account of the sequence
and timing of molt in the American Goldfinch, Middleton found
that males molted about one week before females, that the
postjuvenal molt was prolonged when compared to the prebasic
molt of adults, and that the postjuvenal molt enabled sex
determination of young birds after about mid-November of their
hatch year. Middleton suggested that molt is initiated in males
before it begins in females because the testes of males degenerate
before the ovaries of the female.
In an attempt to understand the relationship that may exist
between the goldfinch's late nesting and prolonged molt, Mid-
dleton suggested that, while other species of cardueline finches
acquire their alternate plumage through abrasion, the American
Goldfinch is the only species with the time in its annual cycle to
go through a complete body molt prior to nesting. Because the
energy demands of molt are so high, molt delays the development
of the gonads, which then delays nesting and reproduction. The
fact that molt occurs over a prolonged period suggests that the
goldfinch has adapted to acquire the protein requirements neces-
sary for molt from an exclusively granivorous diet, therefore
avoiding possible nutrient stress at times of unpredictable weather
and food availability.
Middleton continued his study of the annual cycle of the
American Goldfinch, using molt data from the 3,433 birds
banded, an additional 371 birds trapped at nests, as well as molt
data from 200 birds collected for gonadal study (Middleton 1978).
He found that male gonadal development slightly precedes that
of the female. Therefore, males do enter into breeding condition
before females. Middleton detailed the timing of molt, gonadal
development, and migration and presented further results
suggesting that molt itself may be controlled by photoperiod.
However, it is the timing and duration of molt that affect other
prominent events of the goldfinch's annual cycle. This is because
energy requirements for molt are high and preclude additional
energy from being expended for reproduction or migration before
the flight feathers are molted.
Middleton (1977a) hypothesized that the prealternate molt
enables the goldfinch to develop a less dense summer plumage,
which is beneficial to a species that inhabits open areas in the hot
dry months of the summer. Middleton (1986) studied the
plumages of collected goldfinches and found that the basic
(winter) plumage of the American Goldfinch was significantly
heavier than its alternate (summer) plumage. This difference was
attributed to a difference in summer versus winter feather
structure. Feathers of the basic plumage were more dense and
downy, giving them greater insulating qualities.
2. Age and Longevity of the American Goldfinch
As a result of the high mortality experienced by wild
passerines living in temperate climates, ornithologists generally
accept that few passerine species survive much in excess of 7
years. Their expected survival can increase when kept in
captivity, however, to between 11 and 15 years, or even longer.
Middleton's own records of the survivorship of color-banded
American Goldfinches reflected these expected ages of survival.
Although his data suggested that individuals living under natural
conditions survived to between 4 and 6 years of age, Middleton
(1984) analyzed data from the Recovery Retrieval File of the Bird
Banding Laboratory to obtain a more accurate indication of
survivorship in the North American population of the American
Goldfinch. He used data from recoveries and recaptures of
goldfinches recovered 5 years or more after they had been banded
to formulate a survival curve. This curve showed that the
majority of birds survived to between 5 and 7 years and that the
oldest birds did not live beyond 11 years. Those banded or
recovered in Canada did not live beyond 6 years, whereas those
recovered in more southerly locations tended to live longer.
Middleton noted that these results support Welty's (1982) earlier
North American Banding Council Banders' Study Guide 59
suggestion that birds living in harsher climates have shorter life
expectancies.
3. Age and Sex of the American Goldfinch in Relation to
Winter Distribution, Breeding Habitat, and Reproduction
Using the aforementioned banding data, Middleton (1977c)
used capture and recapture techniques to derive an estimate of
the overwintering population of goldfinches in Guelph. These
data showed that 853 to 1,816 American Goldfinches overwinter-
ed in the study area. By comparing his results to Christmas Bird
Count data, Middleton was able to show that populations of
overwintering goldfinches in Ontario had been steadily increasing
over the years. He suggested that the increasing availability of
winter food (due to an increase in the number of bird feeders)
enabled goldfinches to survive long, harsh winters.
Middleton (1990) used banding data requested from the
Banding Offices to examine the distributions of wintering
American Goldfinches by age and sex classes. These data were
requested from the Banding Retrieval File for original bandings
of American Goldfinches from 1975 to 1985. Banding data were
available previous to that period, but ageing techniques for male
goldfinches were not known before Middleton's paper. Moreover,
because ageing techniques for females were not developed until
after his study was completed (Pyle et al. 1987), Middleton pooled
data from all females, which precluded analysis of their distribu-
tion by age class. The sex distributions of wintering birds could
therefore be analyzed. However, only the age class distribution
of wintering males could be examined. Data were selected for
birds banded only during January and February, when the
populations are least likely to be migratory, and for birds banded
east of 100
o
longitude, where the majority (over 90%) of all
bandings occurred.
Middleton's own banding data suggested that Guelph's
breeding population migrated south and that the city's wintering
population consisted of migrants from farther north. In fact,
results showed that male American Goldfinches wintered farther
north than females and that young males wintered farther north
than adult males. Recapture data suggested that age and sex
distributions of wintering birds result from different distances
flown from the breeding grounds. Currently accepted hypotheses
proposed to explain differential migration (Myers 1981, Ketterson
and Nolan 1983) could not explain why younger males winter
farther north than adult birds. Middleton (1990) suggested that
young birds are not physiologically or behaviorally able to
migrate long distances from their breeding grounds.
In an attempt to discern the influence of age and sex on
reproductive success and choice of nesting habitat, Middleton
(1979) trapped American Goldfinches breeding in three distinct
habitat types at Guelph, and placed colored leg bands on each
bird. Between 1968 and 1975, breeding populations were studied
in a residential area of the city, in an old-field natural habitat and
in a tree nursery where cultivated saplings were evenly spaced.
Observations of color-marked individuals showed that males
often changed nesting sites between breeding seasons, whereas
females often showed a high degree of fidelity to their original
nesting site. Monogamous pair bonds lasted the duration of the
breeding season but broke down during migration and wintering.
Often goldfinches changed mates from year to year.
Nesting began in early July and continued until August, with
a mean clutch size of 5.3 eggs. Older birds, regardless of sex,
were more successful than younger birds. Older females
produced larger clutches, fledged a more young per nest, and had
more successful nests than known second-year or birds of
unknown age. Older females were responsible for a majority of
early nests. In pairs where both the male and the female were
old birds, more fertile eggs were produced per clutch and more
young fledged successfully than was the case for younger pairs.
The city habitat showed the highest nesting and fledging
success. As well, city nests suffered a lower predation rate and
fewer instances of parasitism by Brown-headed Cowbirds than
nests located in the other habitats. Reproductive success was
lowest in the nursery.

60 North American Banding Council Banders' Study Guide
APPENDIX D. MOLT CARDS
Little is known about the timing, sequence, and extent of
molt in many North American species. Because this information
can be extremely useful for ageing birds, banders are wise to
collect and analyze these data. Moreover, because most banders
do not get large enough samples of molting individuals of single
species, this is a fruitful topic for cooperative studies.
Molt can be recorded in several different ways. The
following system was developed by the British Trust for Ornithol-
ogy (BTO). Molt cards (Fig. 30) are completed for each bird to
show active molt, even if it is only partial. Many juveniles show
only partial body and/or flight feather molt, and banders cannot
afford to lose information on the timing and extent of molt for
any age class of any species. One card is filled out for each bird.
Recaptures are treated as new birds and given a new card each
time molt is recorded, unless they are captured more than once
on the same day. Naturally, cards from the same individual
should be filed together. Cards can be filed by band number or
by band number within each species.
Certain species throughout their life, and most passerines in
their first fall, do not undergo a complete molt; instead, their molt
is limited to certain portions of various feather tracts. Thus, they
retain some of their older feathers, typically on the wing, until
a subsequent molt. Contrasts between the various generations
of feathers (called "molt limits"), as well as the feather retention
patterns, are often detectable and of great assistance in ageing
birds. Many of the ageing criteria presented in Pyle's (1997a)
Identification Guide are based on the detectability of these
retention patterns. Because much variation exists within and
among populations in the extent of these incomplete molts, and
because these patterns are poorly described for many individual
populations, banders proficient in detecting multiple generations
of feathers can make a substantial contribution by not only
recording molt patterns in actively molting birds but also noting
the absence of active molt. Recording molt limits for just a few
common species at a banding station, and publishing the results,
will greatly improve the information on molt patterns of
populations across North America. The traditional BTO molt
scoring system shown below can easily be expanded for use with
molt limits. When two feather generations are present, old and
new generations can be distinguished with the same codes used
for old and new feathers on wings with active molt ("0" and "N").
When three or more feather generations are present, these may
be distinguished from "0," old feathers, by using letters, "A" and
"B" for example. The BTO molt scores are often used additively,
with new feathers scoring "5." A completely molted wing thus
scores highest, and a wing without active molt scores 0. To
maintain the usefulness of this system, As and Bs should count
as 0, just as Ns count as 5.
Conventionally, the primaries are numbered in ascending
order, beginning with the innermost feather, in accordance with
the sequence in which the feathers are normally replaced.
Likewise, secondaries are numbered in ascending order,
beginning with the outermost secondary and proceeding towards
the body. Tertials are numbered as part of the secondary row
because these feathers are morphologically of the same origin.
Tertial molt is most difficult to master; it takes practice to detect
which feathers are missing and to find tertial pin feathers.
Figure 31 shows a typical passerine wing in active molt, with
Figure 30. An example of a correctly filled in molt card.

North American Banding Council Banders' Study Guide 61
all feathers numbered conventionally. Sections 1, 2, and 3 of the
molt card are to be filled out in numerical order. If time is short,
some data are more useful than no data. In these cases, it may
be more useful to complete section 1 for many birds than to
complete entire cards for only a few.
Instructions for Completing Molt Cards
Wing and Tail ("Flight Feathers")
Use the following notation:
0 old feather
A, B when three or more feather generations are present
1 feather missing or new feather in pin
2 new feather up to one-third grown
3 new feather up to two-thirds grown
4 new feather nearly fully grown
N new feather that is fully developed
Molt in the wings and tail should proceed symmetrically.
If molt is not "in-phase" in the two wings, divide the squares with
an oblique stroke (/). Use the space above the stroke to represent
the left wing, and the space below the stroke to represent the right
wing.
Greater and Primary Coverts and Alula (or "Bastard Wing")
Notation to describe molting coverts is identical to that used
to describe flight-feather molt. Each covert overlies its corre-
sponding flight feather.
Lesser and Median Coverts and Body Molt
Appropriate boxes are marked with a check mark. Active
molt in the head, upper parts and underparts may be further
qualified as follows: X slight molt; XX moderate molt; and XXX
heavy molt.
Figure 31. A passerine wing in active molt (from Pyle 1997a).
62 North American Banding Council Banders' Study Guide
APPENDIX E. THE BANDER'S REPORT CARD
Not all categories need to be checked for a certification. Some
categories are usually considered fundamental, however, and will
probably need to be assessed for all prospective banders. These
are identified by an asterisk (*). Items with double asterisks are
likely to be essential elements.
BACKGROUND MATERIAL
* Understand the ethics of banding birds
* Understand how banding fits into scientific studies
CHECKLIST OF PRACTICAL SKILLS
PROCESSING
Identification and handling
* Recognize all target species and release a bird unbanded if
identification cannot be made with virtual certainty
* Appreciate the importance of minimizing handling time while not
compromising safety
* Use the Bander's Grip on a variety of species
* Use the Photographer's Grip safely
* Safely transfer a bird from hand to hand
Open a bird's bill reliably
* Handle a variety of "awkward" species
* Correctly release a variety of species
Effectively deal with escaped birds in an enclosed space
Banding
* Select correct band size
* Read band numbers correctly
* Apply a band correctly
Correctly apply a lock-on band (if appropriate)
Correctly apply a color band (if appropriate)
* Recognize when and how to correct an improperly applied band
* Know when and how to remove a band safely
Storing and carrying birds
* Use the appropriate method of storage for particular species
* Place birds in bags and carry and hang them correctly
* Recommend when bags or boxes need cleaning
Field data collection
* Record data clearly, legibly, and accurately on field sheets
* Be able to recognize and take descriptions of or photograph rarities
or unusual birds
* Maintain complete and accurate daily logs
Biometrics
* Use and accurately read measuring devices (wing rule, balances,
calipers, dividers)
* Correctly and accurately measure various anatomical features
Assess simple wing formulae
Accurately assess and record molt on a molt card
Accurately score fat deposits
Ageing and sexing
* Correctly use guides for ageing and sexing
Accurately score skull pneumatization (if appropriate)
Correctly use other characteristics for age determination
Understand and assign correct age codes
Correctly use color, size, brood patch, and cloacal protuberance for
sex determination
*SPECIAL AUTHORIZATION FOR MIST NETTING
Erecting, opening, and closing nets
Choose an appropriate netting site and appropriate net
Correctly set up nets unaided
Properly furl and unfurl nets
Properly take in and store nets and associated equipment
Operation and extraction
Judge how many nets to use safely and check them frequently and
carefully
Demonstrate an astute, accommodating approach to extraction
Extract a variety of species quickly and safely
Deal proficiently with tricky situations
Recognize and repair nets that are in poor condition
TRAPS
Have knowledge of range of traps and their target species
Operate traps properly and safely, if appropriate
NESTLINGS (IF APPROPRIATE)
Follow species and date and age guidelines in Banding Manual
Approach nests responsibly and remove, handle, band, and replace
nestlings safely
ETHICS AND INJURIES
* Know and practice the Bander's Code of Ethics
* Show excellent awareness of injury prevention
* Show familiarity with the most common injuries and their causes
* Demonstrate ability to treat minor injuries
* Recognize and demonstrate the necessity for euthanasia
* Assess whether a specimen is worth preserving
* Record details of all injuries and casualties
HEALTH AND SAFETY OF BANDERS
* Demonstrate a responsible attitude towards potential injuries from
birds
* Demonstrate a responsible attitude towards physical hazards in the
banding area
DATA MANAGEMENT
* Proof and correct banding sheets
Know how to complete banding schedules properly
Handle other paperwork correctly and promptly
PUBLIC RELATIONS
* Communicate effectively with the public about banding
Communicate effectively using banding data (reports, articles, etc.)
OTHER SPECIAL AUTHORIZATIONS
Demonstrate proficiency in special authorizations (such as color
marking):
North American Banding Council Banders' Study Guide 63
APPENDIX F. SOME EXAMPLES OF
COOPERATIVE BANDING PROJECTS
The Monitoring Avian Productivity and Survivorship
(MAPS) Program is a cooperative effort among public agencies,
private organizations, and the bird banders of North America to
provide long-term data on the productivity, survivorship, and
population trends of dozens of target landbird species through a
network of about 500 (in 1999) constant-effort mist netting and
banding stations operated throughout the continental United
States and Canada. A typical MAPS station consists of about 10
12-m mist nets placed at permanent locations within the central
8 ha (20 acres) of a 20-ha (50-acre) study area. Banding is done
for about 6 hours, beginning at sunrise, 1 day of every 10 from
May or early June (depending on latitude) through early August
in most areas.
The goals of MAPS are to: (1) identify temporal and spatial
patterns in productivity indices and survival-rate estimates for
target landbird species at spatial scales ranging from the local
landscape to the entire continent; and (2) describe relations
between these patterns and (a) population trends and ecological
characteristics of the target species, (b) landscape-level and
station-specific, GIS-based habitat characteristics, and (c) local
and broad-scale weather variables. These patterns and relation-
ships, in turn, will be used to: (1) determine proximate demo-
graphic causes of population change; (2) construct strong, testable
hypotheses regarding the ultimate environmental causes of
population change; (3) suggest management actions and
conservation strategies to reverse population declines that have
a high probability of succeeding; and (4) evaluate the effective-
ness of management actions and conservation strategies actually
implemented.
A review of the MAPS Program by Biological Resources
Division of the USGS concluded that MAPS is technically sound
and is based on the best available biological and statistical
methods. MAPS thus provides banders a unique opportunity to
contribute valuable local data on landbird productivity and
survivorship to large-scale, state-of-the-art, habitat-based analyses
that will greatly aid management and conservation efforts for
landbirds. For information on becoming part of the MAPS
program, or for registration materials and a copy of the MAPS
Manual, write to MAPS Coordinator, The Institute for Bird
Populations, P.O. Box 1346, Pt. Reyes Station, CA 94956-1346;
or e-mail: [email protected].
The Migration Monitoring Program is overseen by the
Migration Monitoring Council, a joint effort of the Canadian
Wildlife Service and the Biological Resources Division of the
U.S. Geological Survey. The Council was appointed after a
workshop organized by the above organizations was held in 1993
to evaluate the potential of migration monitoring as a means of
assessing population changes in migrant landbirds. The Council
appointed two technical committees charged with establishing
standards and guidelines for the operation of monitoring
programs. The Extensive Monitoring Technical Committee dealt
with extensive monitoring (such as checklist programs) and
published "Recommended methods for regional checklist
program" (Dunn 1995). The Intensive Monitoring Technical
Committee was responsible for the requirements of intensively
operated sites, such as bird observatories and bird-banding
capture stations. It published "Recommended methods for
monitoring bird populations by counting and capture of migrants"
(Hussell and Ralph 1998). Both documents are available on the
internet at http://www.rsl.psw.fs.fed.us/pif/pubs.html or from C.
John Ralph at the U.S.F.S. Redwood Sciences Laboratory, 1700
Bayview Drive, Arcata, CA 95521; phone 707-825-2992.
The Council also solicited information on stations in North
and Latin America that are actively monitoring the migration of
birds by the use of capture and release, census, and other methods
at intensive field sites. The responses were compiled into the
"Migration Monitoring Network Banding Stations and Observa-
tories." This document is available on the internet at http://www-
.rsl.psw.fs.fed.us/pif/mnstalst.html or from C. John Ralph at the
above address.
The Birdhouse Network (TBN) Program is a continent-wide
nest box monitoring program. Participants monitor nest boxes
and provide data on clutch size, calcium ingestion, nest site, and
the use of feathers to line nest boxes. Advanced participants band
the nestlings and capture adults for population demographic
studies. TBN is administered by researchers at Cornell Univer-
sity. Cornell Nest Box Network researchers can be contacted at
the Cornell Lab of Ornithology, P.O. Box 11, Ithaca, New York
14851, (607) 254-2414, or visit the website at http://birds.-
cornell.edu/birdhouse/.
Through annual meetings and publications, regional Banding
Associations and Bird Observatories provide a forum for the
discussion and development of banding philosophy and theory;
project design, methods and data analysis; capture and handling
techniques; and so on. Most importantly, these organizations
allow banders to exchange ideas and experiences and to define
research needs. They are also a route to contacting potential
trainers.
A list of relevant addresses is given in Appendix A. At the
very least, all banders are strongly encouraged to subscribe to
North American Bird Bander to keep abreast of research
involving many banding-related topics. This journal also
contains advertisements for specialized banding equipment. The
Journal of Field Ornithology also is useful to banders seeking
information on banding techniques and how banding is used as
a research tool.
The Klamath Demographic Network was organized in
September 1993, when biologists from several agencies and
private organizations from southwest Oregon and northern
California met to discuss the need for cooperative effort to
promote the standardization of methods of monitoring landbirds
and to create a regional database for the monitoring of landbird
populations. Over the past 6 years, the group has evolved to
make up the most concentrated network of monitoring sites in
North America. Communication within the network is facilitated
by the personnel of the Regional Data Center at the Redwood
64 North American Banding Council Banders' Study Guide
Sciences Laboratory of the U.S. Forest Service. The Center acts
as a repository for data collected in the region. Through the
Center, cooperators in the network have access to data collected
by all participants. This provides a regional database covering
a broad biogeographical area from which generalized conclusions
of landbird population trends and composition can be made.
Such a regional network does not supplant national programs
such as MAPS, BBIRD, and the banding laboratory but, rather,
constitutes a local center that cooperators can turn to for help,
encouragement, materials, feedback, supplementary personnel,
training, data, and other region-specific information, not as
readily available from the national programs.
The Canadian Migration Monitoring Network (CMMN)
is a program where volunteers and experienced banders can
contribute. The CMMN is supported by Bird Studies Canada and
involves the cooperation of many bird observatories and stations
across Canada. There are currently 22 stations active in the
network. For more information, contact Bird Studies Canada,
P.O. Box 160, Port Rowan, ON, N0E 1M0. Their web site is:
http://www.bsc-eoc.org/cmmn.html.
APPENDIX G. BANDING OFFICES
INFORMATION
Bird Banding Laboratory, USA contact information
USGS Patuxent Wildlife Research Center
Bird Banding Laboratory
12100 Beech Forest Road
Laurel, MD 20708-4037
General Information 301-497-5790
Permit Information 301-497-5799
Auxiliary Markers 301-497-5804
Fax: 301-497-5717
Internet Address: [email protected]
Web pages: http://www.pwrc.usgs.gov/bbl
Canadian Banding Office, Canada contact information
Bird Banding Office
National Wildlife Research Centre
Canadian Wildlife Service
Hull, Quebec, Canada K1A 0H3
General Information 819-994-6176
Fax: 819-953-6612
Internet Address: [email protected]
Web page: http://www.cws-scf.ec.gc.ca/nwrc/birdband.htm
North American Banding Council Banders' Study Guide 65
APPENDIX H. POLICY FOR RELEASE AND
USE OF BANDING AND ENCOUNTER DATA
September 24, 1998
shared responsibility of
U.S. Geological Survey,
Patuxent Wildlife Research Center,
Bird Banding Laboratory
Canadian Wildlife Service,
National Wildlife Research Centre,
Bird Banding Office
I. General: This Policy replaces all previous documents
related to release and use of banding and encounter data obtained
through the Bird Banding Laboratory (BBL) and/or the Bird
Banding Office (BBO). Approval of this policy has been obtained
from the U.S. Geological Survey, Biological Resources Division
and Environment Canada, Canadian Wildlife Service. The Policy
is written in accordance with regulations in both countries. It
may be subject to revisions as existing international agreements
and/or federal regulations are needed.
II. Applicability: This Policy covers release and use of all
banding and encounter data as well any other ancillary data that
may be a part of the North American Banding files.
III. Open-Data Policy: We encourage full use of banding
data in the hopes that maximum benefits will accrue to the avian
resources. To promote this policy, data are available free of
charge via hard copy, electronically, and on the Internet as soon
as possible after the data are electronically coded. This is in
keeping with the spirit of making information from federal
agencies as available to the public as possible. Banding records
are usually provided in summary format; raw banding records can
be provided, if needed, in electronic form. To make the data easy
to access, retrieve, and summarize, appropriate tools and utilities
will be made available to potential users as they become available.
Having an open policy regarding distribution of banding and
encounter data is not without risks. The risks are justified,
however, given checks and balances and potential rewards. We
recognize that many users might not know how to use banding
and encounter data or associated ancillary data properly or the
limitations of such data even if utilities and database tools are
offered. The BBL and BBO will rely upon the scientific integrity
of users and the scientific community, with its associated peer
review process, to prevent data misuse and improper interpreta-
tions.
IV. Data Use: Record formats as well as a codes section of
the Bird Banding Manual, Vol. I, necessary for data interpreta-
tion, are provided with the data to nonbanders. This information
is in the Bird Banding Manual, Vol. I, supplied to all banders
when their permits are issued and via the BBL Home Page. Users
should be sure to check these codes before contacting the BBL
or BBO with questions concerning data (e.g., inexact date codes).
The staff of both the BBL and BBO will assist users as needed
with code interpretation or other queries regarding the data. A
user who feels that a record or part of a record is in error should
provide the entire record to the BBL. BBL staff will verify the
record and correct it, if necessary, as time and staff permit.
V. Permission to Publish: Bird banding records are main-
tained for use worldwide. The data have been contributed by
many cooperators and government biologists at considerable
public and private expense since 1908. Users of the data are
expected to exhibit professional courtesy and use the data within
bounds of the highest scientific integrity. We cannot, however,
enforce such courtesy and instead call upon users to operate
ethically. Scientific ethics dictate proper citation and crediting
when significant data not collected by the author are used in
publication. Users of data should be sensitive to ongoing projects
by others who may be using the data, especially those who have
collected the data, and should not allow the data to be used
inappropriately, for example, for disturbance of endangered or
sensitive species.
We encourage users of banding data to allow the bander first
right of use of their data for publication purposes. As a general
rule, users should request permission from those banders who
wish to be contacted (as indicated in the Bander Database) for
permission to publish their data if:
A. A bander's past 5 years of banding or encounter data
contribute 5% or more of the total records being used for
publication, and/or
B. individual banding or encounter records will be published
or cited in the paper.
If the data are required by Federal, State, Provincial, or
Territorial agencies in their mandate of migratory bird population
management, permission to use the data is not required.
After obtaining permission from banders, the BBL and BBO
will supply names and mailing addresses (including e-mail
addresses when available) for permittees in a publicly available
database on the Internet. This will allow data users to contact
banders for permission to use and publish their data, as recom-
mended above. In the U.S., if a bander declines to have their
name and address put on the Internet site, the BBL will provide
this information privately. Requests for using data of Canadian
banders who do not consent to have their name and address put
on the Internet site will be handled on a case-by-case basis by the
BBO (in Canada, written consent must be obtained from the
Canadian banders prior to releasing or supplying their name and
address).
The scientific community must be the enforcer of ethical
standards as it is not the purview of the BBL or BBO to legislate
or enforce ethics. The user bears the responsibility of communi-
cation with the banders should questions of ethical data use arise.
VI. Contacts for Data, Data Queries, or Data Verification:
All data are available from both the BBL and BBO. Please
contact the BBL if you are a United States citizen or the BBO if
you are a Canadian citizen.
66 North American Banding Council Banders' Study Guide
U.S. Geological Survey
Patuxent Wildlife Research Center
Bird Banding Laboratory
12100 Beech Forest Road
Laurel, MD 20708-4037
301-497-5790 Fax 301-497-5717
E-mail: [email protected]
Canadian Wildlife Service
National Wildlife Research Centre
Bird Banding Office
100 Gamelin
Hull PQ Canada K1A 0H3
819-997-1121 Fax 819-953-6612
E-mail: [email protected]
VII. Liability, Indemnification, and Disclaimer Statement:
No warranty is expressed or implied regarding the accuracy or
utility of the data on any system or for general or scientific
purposes, nor shall the act of distribution constitute any such
warranty. This disclaimer applies both to individual use of the
data and aggregate use with other data. It is strongly recom-
mended that these data are directly acquired from the Biological
Resources Division (BRD) and not indirectly through other
sources, which may have changed the data in some way. The
BRD shall not be held liable for improper or incorrect use of the
data described and/or contained.
